cat page


Covid-19 has affected almost every country around the globe and has left everyone looking for the latest information. Below are just some of those who are searching for data:

  • Government agencies trying to manage information for the public
  • Healthcare organizations trying to keep abreast of the latest research
  • Businesses looking for the latest updates on government subsidies and how to properly plan and prepare to reopen
  • Parents following information on school closures and how to keep their families safe
  • Individuals staying home and trying to navigate through the constant updates and search for products that have become harder to source during the outbreak

For these scenarios and so many more, all of those searching need to be able to access the most current and relevant information.

Norconex has assisted with a couple of projects related to the coronavirus outbreak, so we wanted to share the details for one of those projects.

Covid-19 Content Monitor

Right before Covid-19 emerged, Norconex had built a search testbed for the Canadian federal government departments. The testbed application was used to demonstrate the many features of a modern search engine and how they can be applied to search initiatives across the Government of Canada. As part of this initiative, for Health Canada we had implemented the search using data related to health and safety recalls. 

When Covid-19 hit, it became more important than ever for Health Canada to ensure that the government disseminates accurate and up-to-date information to the Canadian population. Each department has the ongoing responsibility to properly inform its audience, efficiently share new directives and detail how the virus impacts department services. This raised some questions. How do you validate the quality of information shared with the public across various departments? How do you ensure a consistent message?

Norconex was happy to answer when asked for a quick solution to facilitate a remedy for these issues.

By building upon the pre-existing testbed, Norconex developed a search solution that crawls the relevant data from specific data sources. Health Canada employees can search through all data using various faceting options to help find the desired data.  The data is then provided back in a fast, simple-to-use interface. The solution monitors content in both of Canada’s official languages across all departments. Among its time-saving features, the search tool offers the following:

  • Automated classification of content
  • Continuous detection of new and updated content
  • Easy filtering of content
  • Detection of “alerts” found in pages so alerts can be verified more frequently to ensure continued relevance

This search and monitoring tool is currently being hosted for free on the Norconex cloud and being accessed by the team at Health Canada daily, saving precious time as they gather the information needed to help keep Canadians safe.


Introduction

Docker is popular because it makes it easy to package and deliver programs. This article will show you how to run the Java-based, open-source crawler, Norconex HTTP Collector and Elasticsearch Committer in Docker to crawl a website and index its content into Elasticsearch. At the end of this article, you can find links to download the complete, fully functional files.

Overview

Here is the whole structure, which contains a “Dockerfile” to make a Docker image, “entrypoint.sh” and “start.sh” in “bin/” directory to configure and execute the Docker container, and “es-config.xml” in “examples/elasticsearch” as Norconex-Collector’s configuration file to crawl a website and index contents into Elasticsearch.

Installation

We are using Docker Community Edition in this tutorial. See Install Docker for more information.

Download the latest Norconex Collector and extract the downloaded .zip file. See Getting Started for more details.

Download the latest Norconex Elasticsearch Committer and install it. See Installation for more details.

Collector Configuration

Create “es-config.xml” in the “examples/elasticsearch” directory. In this tutorial, we will crawl /product/collector-http-test/complex1.php and /product/collector-http-test/complex2.php  and index them to Elasticsearch, which is running on 127.0.0.1:9200, with an index named “norconex.” See Norconex Collector Configuration as a reference.

<?xml version="1.0" encoding="UTF-8"?>
<!--
   Copyright 2010-2017 Norconex Inc.

   Licensed under the Apache License, Version 2.0 (the "License");
   you may not use this file except in compliance with the License.
   You may obtain a copy of the License at

       http://www.apache.org/licenses/LICENSE-2.0

   Unless required by applicable law or agreed to in writing, software
   distributed under the License is distributed on an "AS IS" BASIS,
   WITHOUT WARRANTIES OR CONDITIONS OF ANY KIND, either express or implied.
   See the License for the specific language governing permissions and
   limitations under the License.
-->
<httpcollector id="Norconex Complex Collector">

  #set($http = "com.norconex.collector.http")
  #set($core = "com.norconex.collector.core")
  #set($urlNormalizer   = "${http}.url.impl.GenericURLNormalizer")
  #set($filterExtension = "${core}.filter.impl.ExtensionReferenceFilter")
  #set($filterRegexRef  = "${core}.filter.impl.RegexReferenceFilter")
  #set($committerClass = "com.norconex.committer.elasticsearch.ElasticsearchCommitter")
  #set($searchUrl = "http://127.0.0.1:9200")

  <progressDir>../crawlers/norconex/progress</progressDir>
  <logsDir>../crawlers/norconex/logs</logsDir>

  <crawlerDefaults>
    <referenceFilters>
      <filter class="$filterExtension" onMatch="exclude">jpg,gif,png,ico,css,js</filter>
    </referenceFilters>
    <urlNormalizer class="$urlNormalizer">
      <normalizations>
        removeFragment, lowerCaseSchemeHost, upperCaseEscapeSequence,
        decodeUnreservedCharacters, removeDefaultPort, encodeNonURICharacters,
        removeDotSegments
      </normalizations>
    </urlNormalizer>
    <maxDepth>0</maxDepth>
    <workDir>../crawlers/norconex/workDir</workDir>
    <!-- We know we don't want to crawl the entire site, so ignore sitemap. -->
    <sitemapResolverFactory ignore="true" />
  </crawlerDefaults>
  <crawlers>
    <crawler id="Norconex Complex Test Page 1">
      <startURLs>
        <url>/product/collector-http-test/complex1.php</url>
      </startURLs>
      <committer class="$committerClass">
    	  		<nodes>$searchUrl</nodes>
    	  		<indexName>norconex</indexName>
            <typeName>web</typeName>
    	  		<queueDir>../crawlers/norconex/committer-queue</queueDir>
    	  		<targetContentField>body</targetContentField>
    	  		<queueSize>100</queueSize>
  			<commitBatchSize>500</commitBatchSize>
   		</committer>
    </crawler>
    <crawler id="Norconex Complex Test Page 2">
      <startURLs>
        <url>/product/collector-http-test/complex2.php</url>
      </startURLs>
      <committer class="$committerClass">
    	  		<nodes>$searchUrl</nodes>
    	  		<indexName>norconex</indexName>
            <typeName>web</typeName>
    	  		<queueDir>../crawlers/norconex/committer-queue</queueDir>
    	  		<targetContentField>body</targetContentField>
    	  		<queueSize>100</queueSize>
  			<commitBatchSize>500</commitBatchSize>
   		</committer>
    </crawler>
  </crawlers>
</httpcollector>

Entrypoint and Start Scripts

Create a directory, “docker”, to store the configuration and execute scripts.

Entrypoint.sh:

#!/bin/sh
set -x
set -e

set -- /docker/crawler/docker/start.sh "$@"

exec "$@"

start.sh:

#!/bin/sh
set -x
set -e
${CRAWLER_HOME}/collector-http.sh -a start -c examples/elasticsearch/es-config.xml

Dockerfile

A Dockerfile is a simple text -file that contains a list of commands that the Docker client calls on while creating an image. Create a new file, “Dockerfile”, in the “norconex-collector-http-2.8.0” directory.
Let’s start with the base image “java:8-jdk” using FROM keyword.

FROM java:8-jdk

Set environment variables and create a user and group in the image. We’ll set DOCKER_HOME and CRAWLER_HOME environment variables and create the user and group, “crawler”.

ENV DOCKER_HOME /docker
ENV CRAWLER_HOME /docker/crawler
RUN groupadd crawler && useradd -g crawler crawler

The following commands will create DOCKER_HOME and CRAWLER_HOME directories in the container and copy the content from the “norconex-collector-http-2.8.0” directory into CRAWLER_HOME.

RUN mkdir -p ${DOCKER_HOME}
RUN mkdir -p ${CRAWLER_HOME}
COPY ./ ${CRAWLER_HOME}

The following commands change ownership and permissions for DOCKER_HOME, set entrypoint, and execute the crawler.

RUN chown -R crawler:crawler ${DOCKER_HOME} && chmod -R 755 ${DOCKER_HOME}
ENTRYPOINT [ "/docker/crawler/docker/entrypoint.sh" ]
CMD [ "/docker/crawler/docker/start.sh" ]

Almost There

Build a Docker image of Norconex Collector with the following command:

$ docker build -t norconex-collector:2.8.0 .

You will see this success message:

Successfully built 43298c7de13f
Successfully tagged norconex-collector:2.8.0

Start Elasticsearch for development with the following command (see Install Elasticsearch with Docker for more details):

$ docker run -p 9200:9200 -p 9300:9300 -e "discovery.type=single-node" docker.elastic.co/elasticsearch/elasticsearch:6.1.2

Start Norconex Collector.

$ docker run --net=host norconex-collector:2.8.0

Let’s verify the crawling result. Visit http://127.0.0.1:9200/norconex/_search?pretty=true&q=* and you will see two indexed documents.

Conclusion

This tutorial is for development or testing use. If you would like to use it in a production environment, then we recommend that you consider the data persistence of Elasticsearch Docker container, security, and so forth, based on your particular case.

Useful Links

Download Norconex Collector
Download Norconex Elasticsearch Committer

Norconex just made it easier to understand the inner-workings of its crawlers by creating clickable flow diagrams. Those diagrams are now available as part of both the Norconex HTTP Collector and Norconex Filesystem Collector websites.

Clicking on a shape will bring up relevant information and offer links to the corresponding documentation in the Collector configuration page.

While not all features are represented in those diagrams, there should be enough to improve your overall understanding and help you better configure your crawling solution.

Have a look now:

Amazon Web Services (AWS) have been all the rage lately, used by many organizations, companies and even individuals. This rise in popularity can be attributed to the sheer number of services provided by AWS, such as Elastic Compute (EC2), Elastic Beanstalk, Amazon S3, DynamoDB and so on. One particular service that has been getting more exposure very recently is the Amazon CloudSearch service. It is a platform that is built on top of the Apache Solr search engine and enables the indexing and searching of documents with a multitude of features.
The main focus of this blog post is crawling and indexing sites. Before delving into that, however, I will briefly go over the steps to configure a simple AWS CloudSearch domain. If you’re already familiar with creating a domain, you may skip to the next section of the post.


Starting a Domain

A CloudSearch domain is the search instance where all your documents will be indexed and stored. The level of usage of these domains is what dictates the pricing. Visit this link for more details.
Luckily, the web interface is visually appealing, intuitive and user friendly. First of all, you need an AWS account. If you don’t have one already, you can create one now by visiting the Amazon website. Once you have an account, simply follow these steps:

1) Click the CloudSearch icon (under the Analytics section) in the AWS console.

2) Click the “Create new search domain” button. Give the domain a name that conforms to the rules given in the first line of the popup menu, and select the instance type and replication factor you want. I’ll go for the default options to keep it simple.

3) Choose how you want your index fields to be added. I recommend starting off with the manual configuration option because it gives you the choice of adding the index fields at any time. You can find the description of each index field type here:

4) Set the access policies of your domain. You can start with the first option because it is the most straightforward and sensible way to start.

5) Review your selected options and edit what needs to be edited. Once you’re satisfied with the configurations, click “Confirm” to finalize the process.


It’ll take a few minutes for the domain to be ready for use, as indicated by the yellow “LOADING” label that shows up next to the domain name. A green “ACTIVE” label shows up once the loading is done.

Now that the domain is fully loaded and ready to be used, you can choose to upload documents to it, add index fields, add suggesters, add analysis schemes and so on. Note, however, that the domain will need to be re-indexed for every change that you apply. This can be done by clicking the “Run indexing” button that pops up with every change. The time it takes for the re-indexing to finish depends on the number of documents contained in the domain.

As mentioned previously, the main focus of this post is crawling sites and indexing the data to a CloudSearch domain. At the time of this writing, there are very few crawlers that are able to commit to a CloudSearch domain, and the ones that do are unintuitive and needlessly complicated. The Norconex HTTP Collector is the only crawler that has CloudSearch support that is very intuitive and straightforward. The remainder of this blog post aims to guide you through the steps necessary to set up a crawler and index the data to a CloudSearch domain in as simple and informative steps as possible.


Setting up the Norconex HTTP Collector

The Norconex HTTP Collector will be installed and configured in a Linux environment using Unix syntax. You can still, however, install on Windows, and the instructions are just as simple.

Unzip the downloaded file and navigate to the extracted folder. If needed, make sure to set the directory as readable and writable using the chmod command. Once that’s done, follow these steps:

1) Create a directory and name it testCrawl. In the folder myCrawler, create a file config.xml and populate it with the minimal configuration file, which you can find in the examples/minimum directory.

2) Give the crawler a name in the <httpcollector id="..."> I’ll name my crawler TestCrawl.

3) Set progress and log directories in their respective tags:

<progressDir>./testCrawl/progressdir</progressDir>
<logsDir>./testCrawl/logsDir</logsDir>


4) Within <crawlerDefaults>, set the work directory where the files will be stored during the crawling process:

<workDir>./testCrawl/workDir</workDir>

5) Type the site you want crawled in the [tag name] tag:

<url>http://beta2.norconex.com/</url>

Another method is to create a file with a list of URLs you want crawled, and point to the file:

<urlsFile>./urls/urlFile</urlsFile>

6) If needed, set a limit on how deep (from the start URL) the crawler can go and a limit on the number of documents to process:

<maxDepth>2</maxDepth>
<maxDocuments>10</maxDocuments>

7) If needed, you can set the crawler to ignore documents with specific file extensions. This is done by using the ExtensionReferenceFilter class as follows:

<referenceFilters>
  	<filter
     	class="com.norconex.collector.core.filter.impl.ExtensionReferenceFilter"                                                                             
            onMatch="exclude" caseSensitive="false">
         	png,gif,jpg,jpeg,js,css
  	</filter>
</referenceFilters>

8) You will most likely want to use an importer to parse the crawled data before it’s sent to your CloudSearch domain. The Norconex importer is a very intuitive and easy-to-use tool with a plethora of different configuration options, offering a multitude of pre- and post-parse taggers, transforms, filters and splitters, all of which can be found here. As a starting point, you may want to use the KeepOnlyTagger as a post-parse handler, where you get to decide on what metadata fields to keep:

<importer>
      <postParseHandlers>
         <tagger class="com.norconex.importer.handler.tagger.impl.KeepOnlyTagger">
            <fields>title,description</fields>
         </tagger>
       </postParseHandlers>
</importer>

Be sure that your CloudSearch domain has been configured to support the metadata fields described above. Also, make sure to have a ‘content’ field in your CloudSearch domain as the committer assumes that there’s one.

The config.xml file should look something like this:

<?xml version="1.0" encoding="UTF-8"?>
<!-- 
   Copyright 2010-2015 Norconex Inc.

   Licensed under the Apache License, Version 2.0 (the "License");
   you may not use this file except in compliance with the License.
   You may obtain a copy of the License at

       http://www.apache.org/licenses/LICENSE-2.0

   Unless required by applicable law or agreed to in writing, software
   distributed under the License is distributed on an "AS IS" BASIS,
   WITHOUT WARRANTIES OR CONDITIONS OF ANY KIND, either express or implied.
   See the License for the specific language governing permissions and
   limitations under the License.
-->
<!-- This configuration shows the minimum required and basic recommendations
     to run a crawler.  
     -->
<httpcollector id="TestCrawl">

  <!-- Decide where to store generated files. -->
  <progressDir>../myCrawler/testCrawl/progress</progressDir>
  <logsDir>../myCrawler/testCrawl/logs</logsDir>

  <crawlers>
    <crawler id="CloudSearch">

      <!-- Requires at least one start URL (or urlsFile). 
           Optionally limit crawling to same protocol/domain/port as 
           start URLs. -->
      <startURLs stayOnDomain="true" stayOnPort="true" stayOnProtocol="true">
        <url>http://beta2.norconex.com/</url>
      </startURLs>

      <!-- === Recommendations: ============================================ -->

      <!-- Specify a crawler default directory where to generate files. -->
      <workDir>../myCrawler/testCrawl</workDir>

      <!-- Put a maximum depth to avoid infinite crawling (e.g. calendars). -->
      <maxDepth>2</maxDepth>
      <maxDocuments>10</maxDocuments>

      <!-- We know we don't want to crawl the entire site, so ignore sitemap. -->
      <!-- Before 2.3.0: -->
      <sitemap ignore="true" />
      <!-- Since 2.3.0: -->
      <sitemapResolverFactory ignore="true" />

      <!-- Be as nice as you can to sites you crawl. -->
      <delay default="5000" />

	  
      <referenceFilters>
      	<filter class="$filterExtension" 
			onMatch="exclude"
			caseSensitive="false" >
			png,gif,jpg,jpeg,js,css
		</filter>
      </referenceFilters>

      
      <!-- Document importing -->
 
      <importer>
        <postParseHandlers>
          <tagger class="com.norconex.importer.handler.tagger.impl.KeepOnlyTagger">
            <fields>title,description/fields>
          </tagger>
        </postParseHandlers>
      </importer> 

 	</crawler>
  </crawlers> 
</httpcollector>


The Norconex CloudSearch Committer

The Norconex http collector is compatible with several committers such as Solr, Lucidworks, Elasticsearch, etc. Visit this website to find out what other committers are available. The latest addition to this set of committers is the AWS CloudSearch committer. This is an especially useful committer since the very few publicly available CloudSearch committers are needlessly complicated and unintuitive. Luckily for you, Norconex solves this issue by offering a very simple and straightforward CloudSearch committer. All you have to do is:

1) Download the JAR file from here, and move it to the lib folder of the http collector folder.

2) Add the following towards the end of the <craweler></crawler> block (right after the specifying the importer) in your config.xml file:

<committer class="com.norconex.committer.cloudsearch.CloudSearchCommitter">
    <documentEndpoint></documentEndpoint>
    <accessKey></accessKey>
    <secretAccessKey></secretAccessKey>
</committer>

You can obtain the URL for your document endpoint from your CloudSearch domain’s main page. As for the AWS credentials, specifying them in the config file could result in an error due to a bug in the committer. Therefore, we strongly recommend that you DO NOT include the <accessKey> and <secretAccessKey> variables. Instead, we recommend that you set two environment variables, AWS_ACCESS_KEY and AWS_SECRET_ACCESS_KEY with their respective values. To obtain and use these values, refer to the AWS documentation.


Run the Crawler!

All that is left to do is to run the http collector using the Linux shell script (from the main collector directory):

./collector-http.sh -a start -c ./myCrawler/config.xml

Give the crawler some time to crawl the specified URLs, until it reaches the <maxDepth> or <maxDocuments> constraints, or if it finds no more URLs to crawl. Once the crawling is complete, the successfully processed documents will be committed to the domain specified in the <documentEndpoint> option.

To confirm that the documents have indeed been uploaded, you can go to the domain’s main page and see how many documents are stored and run a test search.

Looking for InformationThere are many business applications where web crawling can be of benefit. You or your team likely have ongoing research projects or smaller projects that come up from time to time. You may do a lot of manual web searching (think Google) looking for random information, but what if you need to do targeted reviews to pull specific data from numerous websites? A manual web search can be time consuming and prone to human error, and some important information could be overlooked. An application powered by a custom crawler can be an invaluable tool to save the manpower required to extract relevant content. This can allow you more time to actually review and analyze the data, putting it to work for your business.

A web crawler can be set up to locate and gather complete or partial content from public websites, and the information can be provided to you in an easily manageable format. The data can be stored in a search engine or database, integrated with an in-house system or tailored to any other target. There are multiple ways to access the data you gathered. It can be as simple as receiving a scheduled e-mail message with a .csv file or setting up search pages or a web app. You can also add functionality to sort the content, such as pulling data from a specific timeframe, by certain keywords or whatever you need.
If you have developers in house and want to build your own solution, you don’t even have to start from scratch. There are many tools available to get you started, such as our free crawler:  Norconex HTTP Collector

If you hire a company to build your web crawler, you will want to use a reputable company that will respect all website terms of use. The solution can be set up and then “handed over” to your organization for you to run on an ongoing basis. For a hosted solution, the crawler and any associated applications will be set up and managed for you. This means any changes to your needs like adding/removing what sites to monitor or changing the parameters of what information you want to extract can be managed and supported as needed with minimal effort by your team.

Here are some examples of how businesses might use web crawling:

MONITORING THE NEWS AND SOCIAL MEDIA

What is being said about your organization in the media? Do you review industry forums? Are there comments posted on external sites by your customers that you might not even be aware of to which your team should be responding? A web crawler can monitor news sites, social media sites (Facebook, LinkedIn, Twitter, etc.), industry forums and others to get information on what is being said about you and your competitors. This kind of information could be invaluable to your marketing team to keep a pulse on your company image through sentiment analysis. This can help you know more about your customers’ perceptions and how you are comparing against your competition.

COMPETITIVE INFORMATION

Are people on your sales, marketing or product management teams tasked with going online to find out what new products or services are being provided by your competitors? Are you searching the competition to review pricing to make sure you are priced competitively in your space? What about comparing how your competitors are promoting their products to customers? A web crawler can be set up to grab that information, and then it can be provided to you so you can concentrate on analyzing that data rather than finding it. If you’re not currently monitoring your competition in this way, maybe you should be.

LEAD GENERATION

Does your business rely on information from other websites to help you generate a portion of your revenues? If you had better, faster access to that information, what additional revenues might that influence? An example is companies that specialize in staffing and job placement. When they know which companies are hiring, it provides them with an opportunity to reach out to those companies and help them fill those positions. They may wish to crawl the websites of key or target accounts, public job sites, job groups on LinkedIn and Facebook or forums on sites like Quora or Freelance to find all new job postings or details about companies looking for help with various business requirements. Capturing all those leads and returning them in a useable format can help generate more business.

TARGET LISTS

A crawler can be set up to do entity extraction from websites. Say, for example, an automobile association needs to reach out to all car dealerships and manufacturers to promote services or industry events. A crawler can be set up to crawl target websites that provide relevant company listings to pull things like addresses, contact names and phone numbers (if available), and that content can be provided in a single, usable repository.

POSTING ALERTS

Do you have partners whose websites you need to monitor for information in order to grow your business? Think of the real estate or rental agent who is constantly scouring the MLS (Multiple Listing Service) and other realtor listing sites to find that perfect home or commercial property for a client they are serving. A web crawler can be set up to extract and send all new listings matching their requirements from multiple sites directly to their inbox as soon as they are posted to give them a leg up on their competition.

SUPPLIER PRICING AND AVAILABILITY

If you are purchasing product from various suppliers, you are likely going back and forth between their sites to compare offerings, pricing and availability. Being able to compare this information without going from website to website could save your business a lot of time and ensure you don’t miss out on the best deals!

These are just some of the many examples of how web crawling can be of benefit. The number of business cases where web crawlers can be applied are endless. What are yours?


Useful links


Google Search Appliance is Being Phased Out… Now What?Google Search Appliance (GSA) was introduced in 2002, and since then, thousands of organizations have acquired Google “search in a box” to meet their search needs. Earlier this year, Google announced they are discontinuing sales of this appliance past 2016 and will not provide support beyond 2018. If you are currently using GSA for your search needs, what does this mean for your organization?

Google suggests migration from GSA to their Google Cloud Platform. Specifically, their BigQuery service offers a fully-scalable, fully-managed data warehouse with search capabilities and analytics to provide meaningful insights. This may be a great option, but what if your organization or government agency needs to have significant portions of your infrastructure in-house, behind firewalls? This new Google offering may be ill-suited as a possible replacement for GSA.

There are some other important elements you will want to consider before making your decision such as protecting sensitive data, investment stability, customizability, feature set, ongoing costs, and more.

Let’s look at some of the options together.

1. COMMERCIAL APPLIANCES

Examples: SearchBlox, Thunderstone, Mindbreeze

Pros

Commercial appliances can be fast to deploy if you have little requirement for customization. As such, they may need little or no professional services involvement.

To Watch

Because appliance products aim to be stand-alone, black box solutions, they may be less customizable to meet specific needs, and may not be able to easily integrate with many other technologies. Because the hardware is set for you, if your requirements change over time, you may end up with a product that no longer meets your needs. You may also be tied to the vendor for ongoing support, and as with GSA, there is no guarantee the vendor won’t discontinue the product and have you starting over again to find your next solution.

2. CLOUD-BASED SOLUTIONS

Examples: Google Cloud (BigQuery), Amazon CloudSearch, etc.

Pros

A cloud-based solution can be both cost-effective and fast to deploy, and will require little to no internal IT support depending on your needs. Because the solution is based in the cloud, most of the infrastructure and associated costs will be covered by the provider as part of the solution pricing.

To Watch

Cloud solutions may not work for organizations with sensitive data. While cloud-based solutions try to provide easy-to-use and flexible APIs, there might be customizations that can’t be performed or that must be done by the provider. Your organization may not own any ongoing development. Also, if you ever wish to leave, it may be difficult or costly to leave a cloud provider if you heavily rely on them for warehousing large portions of your data.

3. COMMERCIAL SOFTWARE SOLUTIONS

Examples: Coveo, OpenText Search, HP IDOL, Lexmark Perceptive Platform, IBM Watson Explorer, Senequa ES, Attivio

Pros

Commercial solutions work great behind firewalls. You can maintain control of your data within your own environment. Several commercial products often make several configuration assumptions that can potentially save time to deploy when minimal customization is required. Commercial vendors try to differentiate themselves by offering “specializations”, along with rich feature sets and administrative tools out of the box. If most of your requirements fit within their main offerings, you may have fewer needs for customization, potentially leading to professional services savings.

To Watch

Because there are so many commercial products out there, your organization may need to complete lengthy studies, potentially with the assistance of a consultant, to compare product offerings to see which will work with your platform(s) and compare all feature sets to find the best fit. Customization may be difficult or costly, and some products may not scale equally well to match your organization’s changing and growing needs. Finally, there is always risk that commercial products get discontinued, purchased, or otherwise vanish from the market, forcing you to migrate your environment to another solution once more. We have seen this with Verity K2, Fast, Fulcrum search, and several others.

4. CUSTOM OPEN SOURCE SOLUTIONS

Examples: Apache Solr, Elasticsearch

Pros

Going open source is often the most flexible solution you can implement. Having full access to a product source code makes customization potential almost unlimited. There are no acquisition or ongoing licensing costs, so the overall cost to deploy can be much less than for commercial products, and you can focus your spending towards creating a tailored solution rather than a pre-built commercial product. You will have the flexibility to change and add on to your search solution as your needs change. It is also good to point out that the risk of the product being discontinued is almost zero due to the advanced adoption of open source for Search. Being open source, add-on component options are plentiful and these options grow every day thanks to an advanced online community – and many of these options are also free!

To Watch

Depending on the number and complexity of your search requirements, the expertise required may be greater and an open source solution may take longer to deploy. You often need good developers to implement an open source solution; you will need key in-house resources, or be prepared to hire external experts to assist with implementation. If using an expert shop, you will want to pre-define your requirements to ensure the project stays within budget. It is good to note that unlike some of the commercial products, open source products usually keep a stronger focus on the search engine itself. This means they often lack many accompanying components and features, often shipping with commercial products (like crawlers for many data sources, built-in analytics reporting, industry-specific ontologies, etc). Luckily, open source solutions often integrate easily with several commercial or open source components that can be used to fill these gaps.

I hope this brief overview helps you begin your assessment on how to replace your Google Search Appliance, or implement other Search solutions.


DockerDocker is all the rage at the moment! It was recently selected as Gartner Cool Vendor in DevOps. As you may already know, Docker is a platform to build and deploy applications as self-contained units. Those units, called containers, can be executed consistently on a developer laptop or production server. Since containers include all their dependencies, they are truly portable. And, compared to normal virtual machine images, Docker containers are much more lightweight because they don’t need as much infrastructure as a normal VM. Docker containers are built from an image, a simple text file describing the steps needed to assemble and execute the container. But the goal of this blog post is not to be a Docker tutorial. If you need it, there are plenty of good resources to get you started, like the Docker User Guide, this series of video tutorials recently published on their blog or the nice 10-minute tutorial where you can try Docker online. In this post, we will be using Docker 1.6.

We recently encountered a situation where we needed to use Solr 5 on a server already installed with Java 6. But Solr 5 requires at least Java 7. And, for different reasons, upgrading to Java 7 on this server was not an option. The solution? Run Solr 5 in a Docker container using the appropriate Java version! Containers are completely isolated, so this has no impact on the other applications running on the server.

It’s easy to build a Docker image for Solr 5. But, it’s even easier to use an already-existing image! Unfortunately, Docker does not offer an official Solr image (like it does for Elasticsearch). But the community has built multiple good-quality Solr images. We decided to use makuk66/docker-solr, which is actively maintained and has the options we needed. For example, this image has options to use SolrCloud. For this post, we will limit ourselves to using Solr cores.

First, you need to pull the image:

$ docker pull makuk66/docker-solr

Then, you can simply start a container with:

$ docker run -d -p 8983:8983 --name solr5 makuk66/docker-solr

You should be able to connect to Solr on port 8983.

But, as it is, you can’t add a core to this Solr installation. Solr requires the core files (solrconfig.xml, schema.xml, etc.) to be already on the server (in this case the container), which the makuk66/docker-solr does not provide. So we have to provide the core configuration files to the Docker container. The easy way to do so is to use Docker volumes, which link a directory on the host server to a directory of the Docker container. For example, let’s assume we create the necessary configuration files for the Solr core at ~/solr5/myindex on our server. This directory should contain a sub-directory conf with all the usual files, like solrconfig.xml and schema.xml. The myindex directory should also have a core.properties file with the content name=myindex.

$ cd ~/solr5/myindex
$ tree .
.
├── conf
│   ├── admin-extra.html
│   ├── admin-extra.menu-bottom.html
│   ├── admin-extra.menu-top.html
│   ├── _rest_managed.json
│   ├── schema.xml
│   └── solrconfig.xml
└── core.properties

1 directory, 7 files

Docker will need write access to the myindex directory (to create the data directory containing the Lucene index, for example). There are multiple ways to accomplish this, but here we simply change the group owner of the myindex directory to be docker and allow group members write access to the folder:

$ chgrp docker ~/solr5/myindex
$ chmod g+w ~/solr5/myindex

Now that the myindex directory is ready, we will need to link it so that it is available under the solr.home directory of the Docker container. What is the solr.home directory of the container? It’s easy to get this from Solr. When connecting to the Solr instance on port 8983, you should be redirected to the Solr dashboard. On this page, you should see the list of JVM parameters, and one of them is -Dsolr.solr.home

Docker Solr5 Dashboard

We can now remove the previous container:

$ docker rm -f solr5

and start a new one with a volume:

$ docker run -d -p 8983:8983 -v ~/solr5/myindex:/opt/solr/server/solr/myindex --name solr5 makuk66/docker-solr

Notice the -v parameter. It links the ~/solr5/myindex directory of the server to the /opt/solr/server/solr/myindex of the container. Every time Solr reads or writes data to the /opt/solr/server/solr/myindex directory, it will actually be accessing our ~/solr5/myindex directory. This is where Solr will create the data directory. Great, because Docker recommends that all files created by the container be held outside of the container. If you access the Solr instance on port 8983, you should now have the myindex core available.

The Docker container was started with basic JVM settings. What if we need to allocate more memory to Solr or other options? Docker allows us to override the default startup command defined in the image. For example, here is how we could start the container with more memory (don’t forget to remove the previous container):

$ docker run -d -p 8983:8983 -v ~/solr5/myindex:/opt/solr/server/solr/myindex --name solr5 makuk66/docker-solr "/bin/bash" "-c" "/opt/solr/bin/solr -m 1g -f"

To confirm that everything is fine with our Solr container, you can consult the logs generated by Solr with:

$ docker logs solr5

Conclusion

There is a lot more to be said about Docker and Solr 5, like how to use a specific Solr version or how to use SolrCloud. Hopefully this blog post was enough to get you started!

Introduction

You already know that Solr is a great search application, but did you know that Solr 5 could be used as a platform to slice and dice your data?  With Pivot Facet working hand in hand with Stats Module, you can now drill down into your dataset and get relevant aggregated statistics like average, min, max, and standard deviation for multi-level Facets.

In this tutorial, I will explain the main concepts behind this new Pivot Facet/Stats Module feature. I will walk you through each concept, such as Pivot Facet, Stats Module, and Local Parameter in query. Once you fully understand those concepts, you will be able to build queries that quickly slice and dice datasets and extract meaningful information.

Applications to Download

Facet

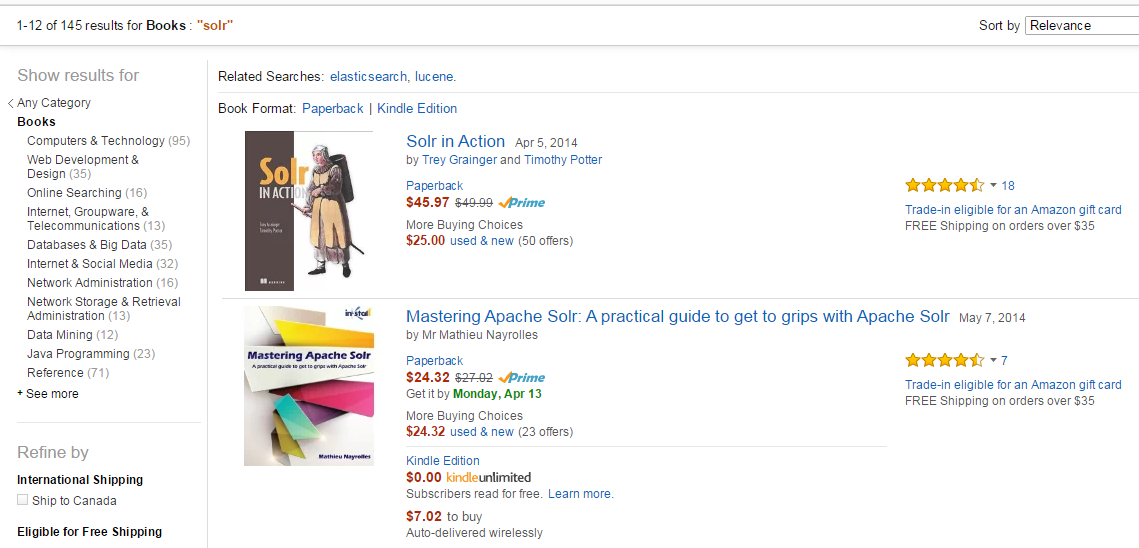
If you’re reading this blog post, you’re probably already familiar with the Facet concept in Solr. A facet is a way to count or aggregate how many elements are available for a given category. Facets also allow users to drill down and refine their searches. One common use of facets is for online stores.

Here’s a facet example for books with the word “Solr” in them, taken from Amazon.

2015-04-09_1428

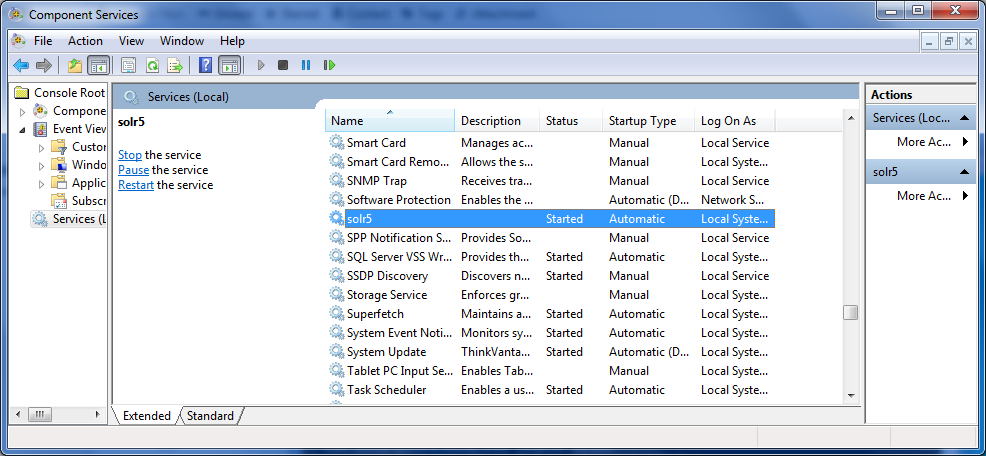
To understand how Solr does it, go on the command line and fire up the techproduct example from Solr 5 by executing the following command:

pathToSolr/bin/solr -e techproducts

If you’re curious to know where the source data are located for the techproducts database, go to the folder pathToSolr/example/exampledocs/*.xml

Here’s an example of a document that’s added to the techproduct database.

Notice the cat and manu field names. We will be using them in the creation of facet.

<add><doc>
<field name="id">MA147LL/A</field>
 <field name="name">Apple 60 GB iPod with Video Playback Black</field>
 <field name="manu">Apple Computer Inc.</field>
 <!-- Join -->
 <field name="manu_id_s">apple</field>
 <field name="cat">electronics</field>
 <field name="cat">music</field>
 <field name="features">iTunes, Podcasts, Audiobooks</field>
 <field name="features">Stores up to 15,000 songs, 25,000 photos, or 150 hours of video</field>
 <field name="features">2.5-inch, 320x240 color TFT LCD display with LED backlight</field>
 <field name="features">Up to 20 hours of battery life</field>
 <field name="features">Plays AAC, MP3, WAV, AIFF, Audible, Apple Lossless, H.264 video</field>
 <field name="features">Notes, Calendar, Phone book, Hold button, Date display, Photo wallet, Built-in games, JPEG photo playback, Upgradeable firmware, USB 2.0 compatibility, Playback speed control, Rechargeable capability, Battery level indication</field>
 <field name="includes">earbud headphones, USB cable</field>
 <field name="weight">5.5</field>
 <field name="price">399.00</field>
 <field name="popularity">10</field>
 <field name="inStock">true</field>
 <!-- Dodge City store -->
 <field name="store">37.7752,-100.0232</field>
 <field name="manufacturedate_dt">2005-10-12T08:00:00Z</field>
</doc></add>

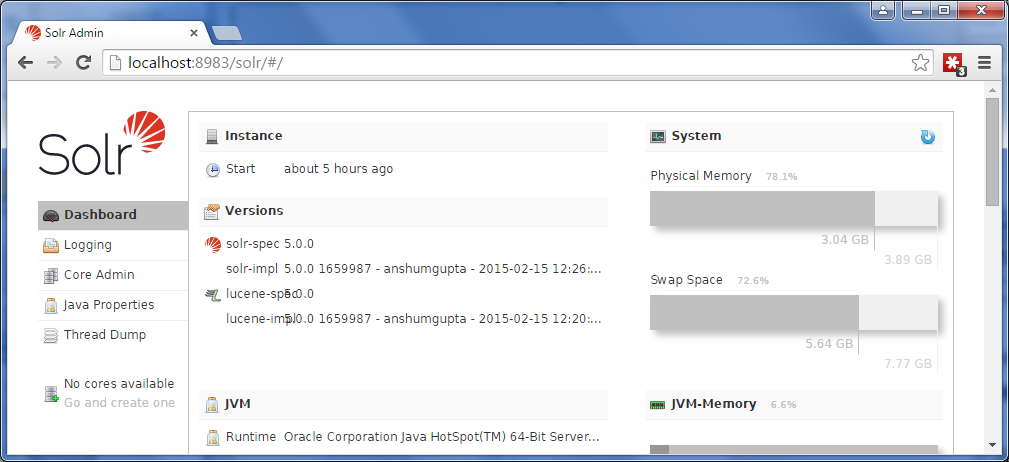
Open the following link in your favorite browser:

http://localhost:8983/solr/techproducts/select?q=*%3A*&rows=0&wt=json&indent=true&facet=true&facet.field=manu

Notice the 2 parameters:

  • facet=true
  • facet.field=manu

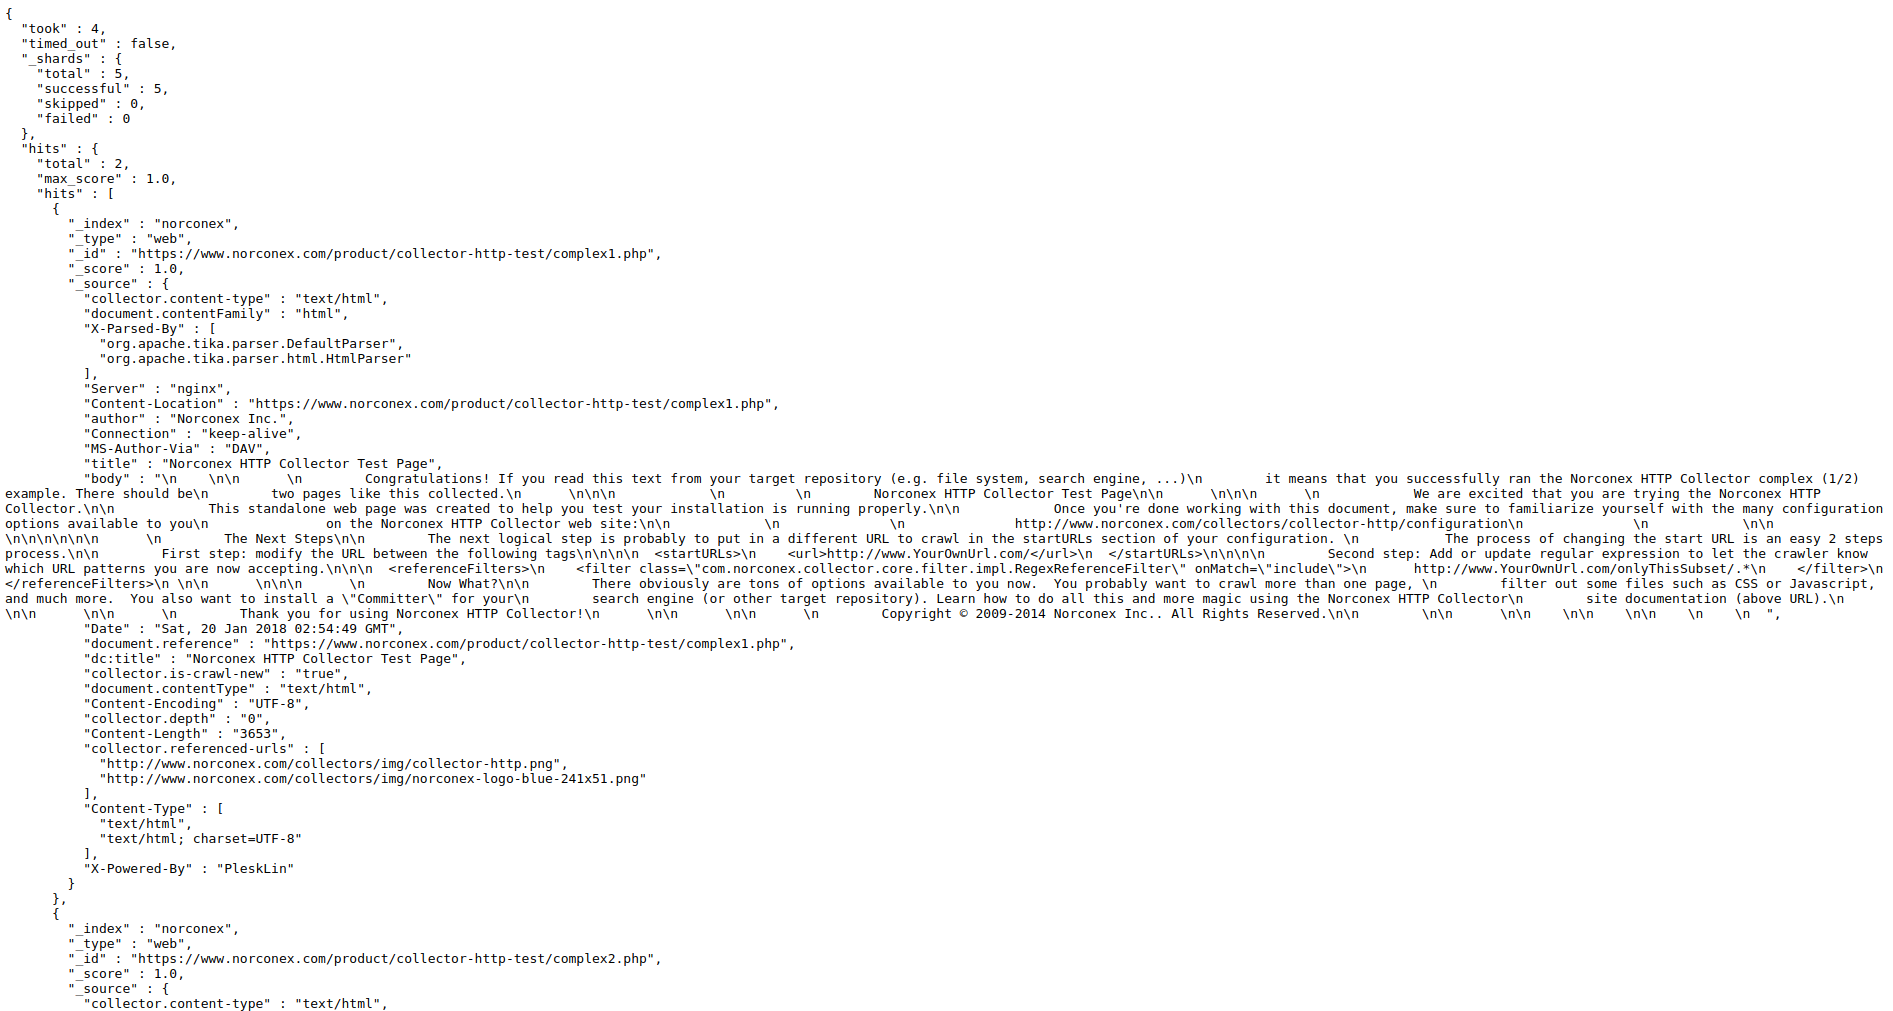
If everything worked as planned, you should get an answer that looks like the one below. You should see the results show how many elements are included for each manufacturer.

…
"response":{"numFound":32,"start":0,"docs":[]
 },
 "facet_counts":{
   "facet_queries":{},
   "facet_fields":{
     "manu":[
       "inc",8,
       "apache",2,
       "bank",2,
       "belkin",2,
…

Facet Pivot

Pivots are sometimes also called decision trees. Pivot allows you to quickly summarize and analyze large amounts of data in lists, independent of the original data layout stored in Solr.

One real-world example is the requirement of showing the university in the provinces and the number of classes offered in both provinces and university. Until facet pivot, it was not possible to accomplish this task without changing the structure of the Solr data.

With Solr, you drive the pivot by using the facet.pivot parameter with a comma separated field list.

The example below shows the count for each category (cat) under each manufacturer (manu).

http://localhost:8983/solr/techproducts/select?q=*%3A*&rows=0&wt=json&indent=true&facet=true&facet.pivot=manu,cat

Notice the fields:

  • facet=true
  • facet.pivot=manu,cat
"facet_pivot":{
     "manu,cat":[{
         "field":"manu",
         "value":"inc",
         "count":8,
         "pivot":[{
             "field":"cat",
             "value":"electronics",
             "count":7},
           {
             "field":"cat",
             "value":"memory",
             "count":3},
           {
             "field":"cat",
             "value":"camera",
             "count":1},
           {
             "field":"cat",
             "value":"copier",
             "count":1},
           {
             "field":"cat",
             "value":"electronics and computer1",
             "count":1},
           {
             "field":"cat",
             "value":"graphics card",
             "count":1},
           {
             "field":"cat",
             "value":"multifunction printer",
             "count":1},
           {
             "field":"cat",
             "value":"music",
             "count":1},
           {
             "field":"cat",
             "value":"printer",
             "count":1},
           {
             "field":"cat",
             "value":"scanner",
             "count":1}]},

Stats Component

The Stats Component has been around for some time (since Solr 1.4). It’s a great tool to return simple math functions, such as sum, average, standard deviation, and so on for an indexed numeric field.

Here is an example of how to use the Stats Component on the field price with the techproducts sample database. Notice the parameters:

http://localhost:8983/solr/techproducts/select?q=*:*&wt=json&stats=true&stats.field=price&rows=0&indent=true

  • stats=true
  • stats.field=price
...

"response":{"numFound":32,"start":0,"docs":[]
 },
 "stats":{
   "stats_fields":{
     "price":{
       "min":0.0,
       "max":2199.0,
       "count":16,
       "missing":16,
       "sum":5251.270030975342,
       "sumOfSquares":6038619.175900028,
       "mean":328.20437693595886,
       "stddev":536.3536996709846,
       "facets":{}}}}}

...

Mixing Stats Component and Facets

Now that you’re aware of what the stats module can do, wouldn’t it be nice if you could mix and match the Stats Component with Facets? To continue from our previous example, if you wanted to know the average price for an item sold by a given manufacturer, this is what the query would look like:

http://localhost:8983/solr/techproducts/select?q=*:*&wt=json&stats=true&stats.field=price&stats.facet=manu&rows=0&indent=true

Notice the parameters:

  • stats=true
  • stats.field=price
  • stats.facet=manu
…
"stats_fields":{
     "price":{
       "min":0.0,
       "max":2199.0,
       "count":16,
       "missing":16,
       "sum":5251.270030975342,
       "sumOfSquares":6038619.175900028,
       "mean":328.20437693595886,
       "stddev":536.3536996709846,
       "facets":{
         "manu":{
           "canon":{
             "min":179.99000549316406,
             "max":329.95001220703125,
             ...
             "stddev":106.03773765415568,
             "facets":{}},

"belkin":{
             "min":11.5,
             "max":19.950000762939453,
             ...
             "stddev":5.975052840505987,
             "facets":{}}

…

The problem with putting the facet inside the Stats Component is that the Stats Component will always return every term from the stats.facet field without being able to support simple functions, such as facet.limit and facet.sort. There’s also a lot of problems with multivalued facet fields or non-string facet fields.

Solr 5 Brings Stats to Facet

One of Solr 5’s new features is to bring the stats.fields under a Facet Pivot. This is a great thing because you can now leverage the power of the code already done for facets, such as ordering and filtering. Then you can just delegate the computing for the math function tasks, such as min, max, and standard deviation, to the Stats Component.

http://localhost:8983/solr/techproducts/select?q=*:*&wt=json&indent=true&rows=0&facet=true&stats=true&stats.field={!tag=t1}price&facet.pivot={!stats=t1}manu

Notice the parameters:

  • facet=true
  • stats=true
  • stats.field={!tag=t1}price
  • facet.pivot={!stats=t1}manu
...

"facet_counts":{
   "facet_queries":{},
   "facet_fields":{},
   "facet_dates":{},
   "facet_ranges":{},
   "facet_intervals":{},
   "facet_pivot":{
     "manu":[{
         "field":"manu",
         "value":"inc",
         "count":8,
         "stats":{
           "stats_fields":{
             "price":{
               "min":74.98999786376953,
               "max":2199.0,
...
               "sumOfSquares":5406265.926629987,
               "mean":549.697146824428,
               "stddev":740.6188014133371,
               "facets":{}}}}},
       {

...

The expression {!tag=t1} and the {!stats=t1} are named “Local Parameters in Queries”. To specify a local parameter, you need to follow these steps:

  1. Begin with {!
  2. Insert any number of key=value pairs separated by whitespace.
  3. End with } and immediately follow with the query argument.

In the example above, I refer to the stats field instance by referring to arbitrarily named tag that I created, i.e., t1.

You can also have multiple facet levels by using facet.pivot and passing comma separated fields, and the stats will be computed for the child Facet.

For example : facet.pivot={!stats=t1}manu,cat

http://localhost:8983/solr/techproducts/select?q=*:*&wt=json&indent=true&rows=0&facet=true&stats=true&stats.field={!tag=t1}price&facet.pivot={!stats=t1}manu,cat

...

"facet_pivot":{
     "manu,cat":[{
         "field":"manu",
         "value":"inc",
         "count":8,
         "pivot":[{
             "field":"cat",
             "value":"electronics",
             "count":7,
             "stats":{
               "stats_fields":{
                 "price":{
                   "min":74.98999786376953,
                   "max":479.95001220703125,
...
                   "stddev":153.31712383138424,
                   "facets":{}}}}},
           {

...

You can also mix and match overlapping sets, and you will get the computed facet.pivot hierarchies.

http://localhost:8983/solr/techproducts/select?q=*:*&wt=json&indent=true&rows=0&facet=true&stats=true&stats.field={!tag=t1,t2}price&facet.pivot={!stats=t1}cat,inStock&facet.pivot={!stats=t2}manu,inStock

Notice the parameters:

  • stats.field={!tag=t1,t2}price
  • facet.pivot={!stats=t1}cat,inStock
  • facet.pivot={!stats=t2}manu,inStock

This section represents a sample of the following sequence: facet.pivot={!stats=t1}cat,inStock

 "facet_pivot":{
     "cat,inStock":[{
         "field":"cat",
         "value":"electronics",
         "count":12,
         "pivot":[{
             "field":"inStock",
             "value":true,
             "count":8,
             "stats":{
               "stats_fields":{
                 "price":{
                   "min":74.98999786376953,
                   "max":399.0,
             ...
                   "facets":{}}}}},
           {
             "field":"inStock",
             "value":false,
             "count":4,
             "stats":{
               "stats_fields":{
                 "price":{
                   "min":11.5,
                   "max":649.989990234375,
...
                   "facets":{}}}}}],
         "stats":{
           "stats_fields":{
             "price":{
               "min":11.5,
               "max":649.989990234375,
...
               "facets":{}}}}},

This section represents a sample of the following sequence:

facet.pivot={!stats=t2}manu,inStock

It’s the sequence that was produced by the query shown in the URL above.

 "facet_pivot":{
     "cat,inStock":[{
         "field":"cat",
         "value":"electronics",
         "count":12,
         "pivot":[{
             "field":"inStock",
             "value":true,
             "count":8,
             "stats":{
               "stats_fields":{
                 "price":{
                   "min":74.98999786376953,
                   "max":399.0,
             ...
                   "facets":{}}}}},
           {
             "field":"inStock",
             "value":false,
             "count":4,
             "stats":{
               "stats_fields":{
                 "price":{
                   "min":11.5,
                   "max":649.989990234375,
...
                   "facets":{}}}}}],
         "stats":{
           "stats_fields":{
             "price":{
               "min":11.5,
               "max":649.989990234375,
...
               "facets":{}}}}},

How about Solr Cloud?

With Solr 5, it’s now possible to compute fields stats for each pivot facet constraint in a distributed environment, such as Solr Cloud. A lot of hard work went into solving this very complex problem. Getting the results from each shard and quickly and effectively merging them required a lot refactoring and optimization. Each level of facet pivots needs to be analyzed and will influence that level’s children facets. There is a refinement process that iteratively selects and rejects items at each facet level when results are coming in from all the different shards.

Does Pivot Faceting Scale Well?

Like I mentioned above, Pivot Faceting can be expensive in a distributed environment. I would be careful and properly set appropriate facet.list parameters at each facet pivot level. If you’re not careful, the number of dimensions requested can grow exponentially. Having too many dimensions can and will eat up all the system resources.  The online documentation is referring to multimillions of documents spread across multiple shards getting sub-millisecond response times for complex queries.

Conclusion

This tutorial should have given you a solid foundation to get you started on slicing and dicing your data. I have defined the concepts Pivot Facet, Stats Module, and Local Parameter. I also have shown you query examples using those concepts and their results. You should now be able to go out on your own and build your own solution. You can also give us a call if you need help. We provide training and consulting services that will get you up and running in no time.

Do you have any experience building analytical systems with Solr? Please share your experience below.

In this tutorial, I will show you how to run Solr as a Microsoft Windows service. Up to version 5.0.0, it was possible to run Solr inside the Java web application container of your choice. However, since the release of version 5.0.0, the Solr team at Apache no longer releases the solr.war file. This file was necessary to run Solr from a different web application container such as Tomcat. Starting with version 5.0.0, Solr will be distributed only as a self-contained web application, using an embedded version of Jetty as a container.

Unfortunately, Jetty does not have a nice utility like Tomcat’s to register itself as a service on Microsoft Windows. I had to research and experiment to come up with a clean and easily-reproduced solution. I tried to follow the Jetty website instructions and adapt them to make Jetty work with Solr, but I was not able to stop the service cleanly. When I would request a “stop” from the Windows Service Manager, the service was flip-flopping between “starting” and “stopping” statuses. Then I discovered a simple tool, NSSM, that did exactly what I wanted. I will be using the NSSM tool in this tutorial.

Applications to Download

File System Setup

Taking Solr 5.0.0 as an example, first, extract Solr and NSSM to the following path on your file system (adapt paths as necessary).

C:\Program Files\solr-5.0.0
C:\Program Files\nssm

Setting up Solr as a service

On the command line, type the following:

"c:\Program Files\nssm\win64\nssm" install solr5

Fill out the path to the solr.cmd script, and the startup directory should be filled in automatically. Don’t forget to input the -f (foreground) parameter so that NSSM can kill it when it needs to be stopped or restarted.

Application tab on NSSM Service Editor screen capture to show path to Solr start script

The following step is optional, but I prefer having a clean and descriptive name in my Windows Service Manager. Under the details tab, fill out the Display name and Description.

Details tab for NSSM service installer for setting up Solr 5 as a service on Microsoft Windows

Click on Install service.

NSSM confirmation box saying "Solr5" installed successfully

Check that the service is running.

Microsoft Windows Component Services Running Solr 5

Go to your favorite web browser and make sure Solr is up and running.

Solr 5 running as a service on Microsoft Windows

Conclusion

I spent a few hours finding this simple solution, and I hope this tutorial will help you set up Solr as a Microsoft Windows service in no time. I invite you to view the solr.cmd file content to find the parameters that will help you customize your Solr setup. For instance, while looking inside this file, I realized there I needed to add the -f parameter to run Solr in the foreground. That was key to get it running the way I needed it.

If you successfully used a different approach to register Solr 5 as a service, please share it in the comments section below.

Solr_Logo_on_white_webI am very excited about the new Solr 5. I had the opportunity to download and install the latest release, and I have to say that I am impressed with the work that has been done to make Solr easy and fun to use right out of the box.

When I first looked at the bin folder, I noticed that the ./bin/solr script from Solr 4.10.x was still there, but when I checked the help for that command, I noticed that there are new parameters. In Solr 4.10, we only had the following parameters: start, stop, restart, and healthcheck. Now in Solr 5.0, we have additional options that make life a little easier: status, create, create_core, create_collection, and delete.

The create_core and the create_collection are self explanatory. What is interesting is that the create parameter is smart enough to detect the mode in which mode Solr is running; i.e., “Solr Cloud” or  “Solr Core” mode. It can then create the proper core or collection.

The status parameter returns a JSON formatted answer that looks like the following. It could be used by a tool like Nagios or JEF Monitor to do some remote monitoring.

Found 1 Solr nodes:
Solr process 6922 running on port 8983
{
"solr_home":"/Applications/solr-5.0.0/server/solr/",
"version":"5.0.0 1659987 - anshumgupta - 2015-02-15 12:26:10",
"startTime":"2015-02-27T17:19:22.455Z",
"uptime":"0 days, 0 hours, 2 minutes, 18 seconds",
"memory":"53.1 MB (%10.8) of 490.7 MB"}

 Solr Core demo

Since version 4.10, the /bin/solr start command has a parameter that lets you test Solr with few interesting examples: -e <example>.. To run Solr Core with sample data in 4.10, you would run the following command: ./bin/solr start -e default. That would give you an example of what could be done with a Solr search engine. In version 5.0, the default option has been replaced by the option ./bin/solr start -e techproducts. That new option illustrates many of the Solr Core capabilities.

Solr Cloud demo

Configuring a Solr Cloud used to be a very complicated process. Several moving pieces needed to be put together perfectly to configure a working Solr Cloud server. Solr 5.0 still has the ./bin/solr start -e cloud present in 4.10. This option lets you create a Solr Cloud instance by answering a few questions driven by a wizard. You can see an example of the type of questions asked below.

Welcome to the SolrCloud example!
This interactive session will help you launch a SolrCloud cluster on your local workstation.
To begin, how many Solr nodes would you like to run in your local cluster? (specify 1-4 nodes) [2]
Ok, let's start up 2 Solr nodes using for your example SolrCloud cluster.
...
Now let's create a new collection for indexing documents in your 2-node cluster.
Please provide a name for your new collection: [gettingstarted]
gettingstarted
How many shards would you like to split gettingstarted into? [2]
2
How many replicas per shard would you like to create? [2]
2
...

SolrCloud example running, please visit http://localhost:8983/solr

solr-cloud

Finally, a script to install Solr as service

Solr now has a script named install_solr_service.sh that installs Solr as a service on Linux and Unix machines. When I tested Solr 5, I ran the code from a Mac os box, so the script did not work for me. I received an error message telling me my Linux distribution was not supported and I needed to setup Solr as a service manually using the documentation provided in the Solr Reference Guide. Even if the install script did not work for me on a Mac, this tool is a great addition for system administrators who like to configure their machines using automated tools like Puppets.

We use Tomcat at work, so where did my WAR go?

As of Solr 5.0, the only supported container is the Jetty one that ships by default with the download file. It is possible to repackage the exploded files into a war, but you will end up with an unsupported installation of Solr. I cannot recommend that route.

Adding document has never been easier

In Solr 5.0, adding documents has never been easier. We now have access to a new tool named ./bin/post. This tool can take almost any input document imaginable and post it to Solr. It has support for JSON, XML, CSV, and rich text documents like Microsoft Office documents. The post tool can also act as a crawler to extract information out of a website. During my test, I was not able to get the content off of a web page. The information extracted was meta-data like the title, authors, and keywords. Maybe there is a way to obtain this content, but I was not able to find a parameter or a config file that would let me do so. I think that the post utility is a very good tool to get started, but for my day to day work, I will stick with our good old open source crawler and Solr Commiter that we use here at Norconex.

Here is a quick list of the parameters one can use from the post command:

* JSON file: ./post -c wizbang events.json
* XML files: ./post -c records article*.xml
* CSV file: ./post -c signals LATEST-signals.csv
* Directory of files: ./post -c myfiles ~/Documents
* Web crawl: ./post -c gettingstarted http://lucidworks.com -recursive 1 -delay 1
* Standard input (stdin): echo ‘{commit: {}}’ | ./post -c my_collection -type application/json -out yes -d
* Data as string: ./post -c signals -type text/csv -out yes -d $’id,value\n1,0.47′

Solr 5.0 supports even more document types thanks to Tika 1.7

Solr 5 now comes with Tika 1.7. This means that Solr now has support for OCR via the Terrasact application. You will need to install Terrasact separately. With Tika 1.7, Solr also has better support for PST and matlab files. The date and spatial unit handling also have been improved in this new release.

More Exciting new features

Solr 5.0 now lets you slice and dice your data the way you want it. What this means is stats and facets are now working together. For example, you can automatically get the min, max, and average price for a book. You can find more about this new feature here.

The folks at Apache also improved the schema API to let us add fields programmatically. A core reload will be done automatically if you use the API. Check out the details on how to use that feature.

We can also manage the request handler via the API.

What are the main “gotchas” to look for when upgrading to Solr 5.0?

Solr 5 does not support reading Solr/Lucene 3.x and earlier indexes. You have to make sure that you run the tool Lucene IndexUpdate that is included with the Solr 4.10 release. Another way to go about it would be to fully optimise your index with a Solr 4.10 installation.

Solr 5 does not support the pre Solr 4.3 solr.xml format and move entirely to core discovery. If you need some more information about moving to the latest and greatest solr.xml file format, I suggest this article:  moving to the new solr.xml.

Solr 5 only supports creating and removing SolrCloud collections through the Collection API. You might still be able to manage the collection the former way, but there is no guarantee that it will work in future releases, and the documentation strongly advises against it.

Conclusion

It looks like most of the work done in this release was geared toward ease of use. The inclusion of tools to easily add data to the index with a very versatile script was encouraging. I also liked the idea of moving to a Jetty-only model and approaching Solr as a self-contained piece of software. One significant advantage of going this route is that it will make providing support easier for the Solr team, who will also be able to optimise the code for a specific container.