cat page

Solr_Logo_on_white_webI am very excited about the new Solr 5. I had the opportunity to download and install the latest release, and I have to say that I am impressed with the work that has been done to make Solr easy and fun to use right out of the box.

When I first looked at the bin folder, I noticed that the ./bin/solr script from Solr 4.10.x was still there, but when I checked the help for that command, I noticed that there are new parameters. In Solr 4.10, we only had the following parameters: start, stop, restart, and healthcheck. Now in Solr 5.0, we have additional options that make life a little easier: status, create, create_core, create_collection, and delete.

The create_core and the create_collection are self explanatory. What is interesting is that the create parameter is smart enough to detect the mode in which mode Solr is running; i.e., “Solr Cloud” or  “Solr Core” mode. It can then create the proper core or collection.

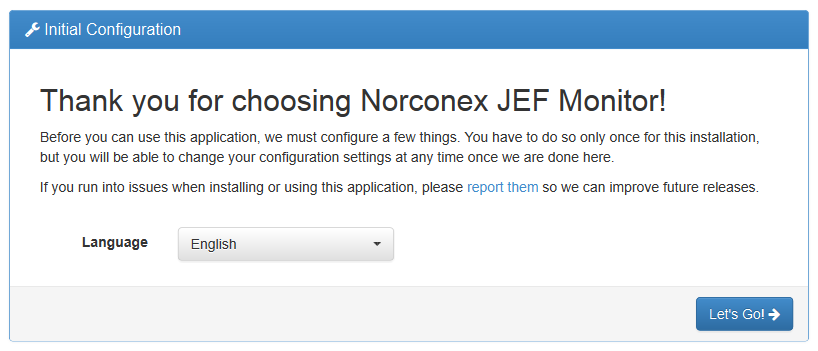
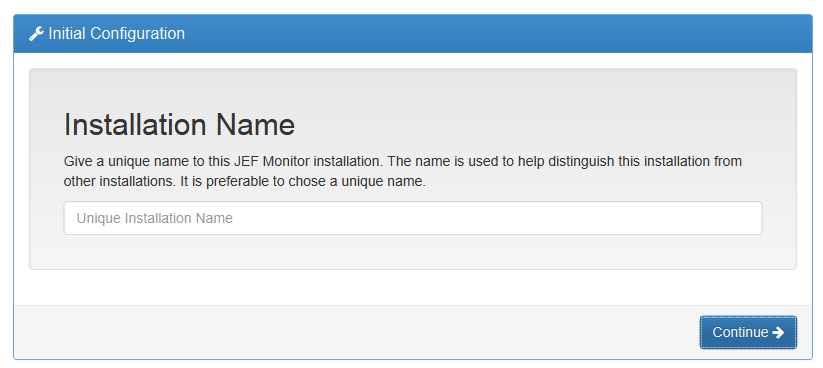
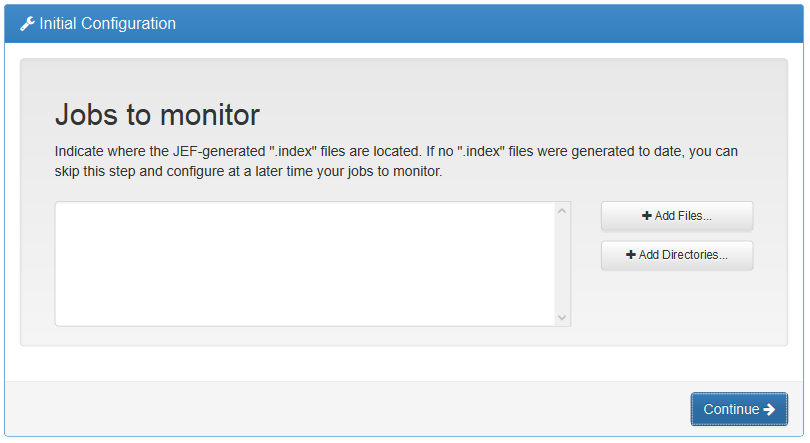
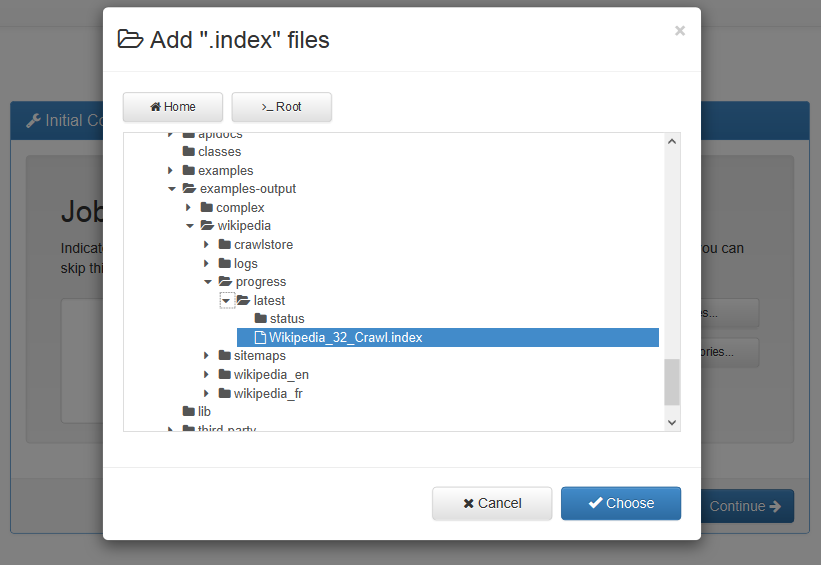
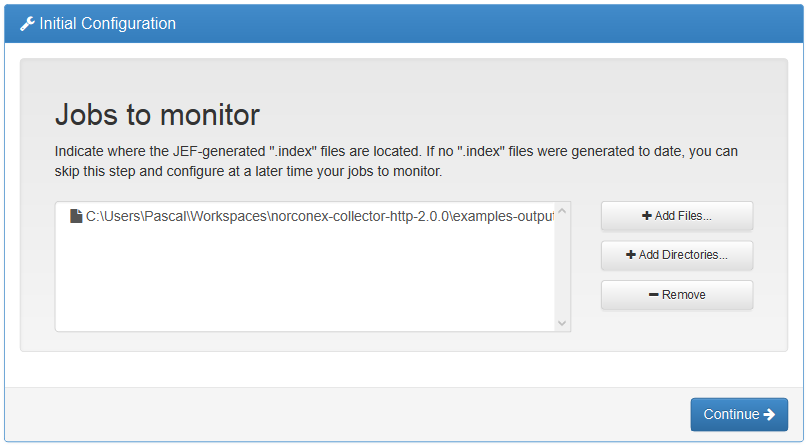
The status parameter returns a JSON formatted answer that looks like the following. It could be used by a tool like Nagios or JEF Monitor to do some remote monitoring.

Found 1 Solr nodes:
Solr process 6922 running on port 8983
{
"solr_home":"/Applications/solr-5.0.0/server/solr/",
"version":"5.0.0 1659987 - anshumgupta - 2015-02-15 12:26:10",
"startTime":"2015-02-27T17:19:22.455Z",
"uptime":"0 days, 0 hours, 2 minutes, 18 seconds",
"memory":"53.1 MB (%10.8) of 490.7 MB"}

 Solr Core demo

Since version 4.10, the /bin/solr start command has a parameter that lets you test Solr with few interesting examples: -e <example>.. To run Solr Core with sample data in 4.10, you would run the following command: ./bin/solr start -e default. That would give you an example of what could be done with a Solr search engine. In version 5.0, the default option has been replaced by the option ./bin/solr start -e techproducts. That new option illustrates many of the Solr Core capabilities.

Solr Cloud demo

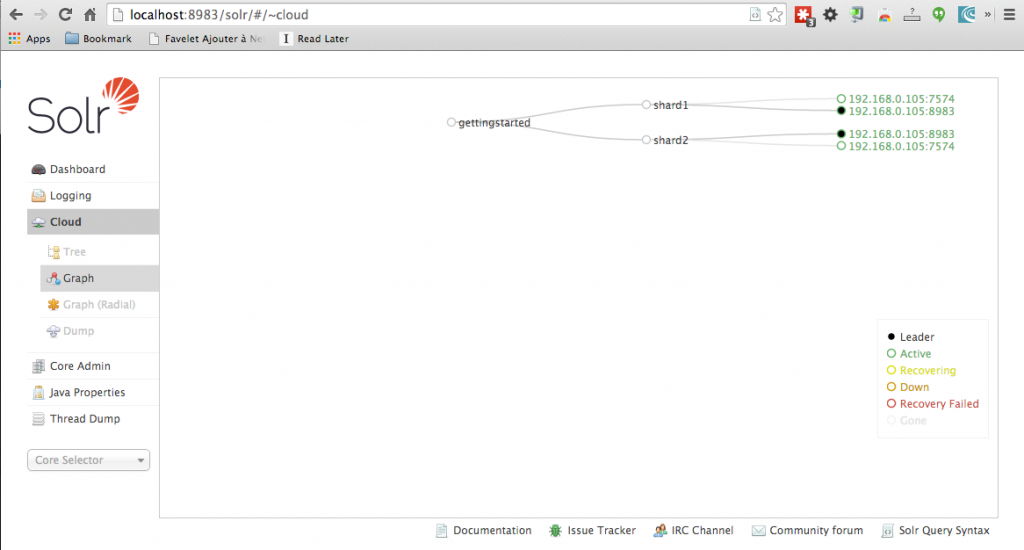
Configuring a Solr Cloud used to be a very complicated process. Several moving pieces needed to be put together perfectly to configure a working Solr Cloud server. Solr 5.0 still has the ./bin/solr start -e cloud present in 4.10. This option lets you create a Solr Cloud instance by answering a few questions driven by a wizard. You can see an example of the type of questions asked below.

Welcome to the SolrCloud example!
This interactive session will help you launch a SolrCloud cluster on your local workstation.
To begin, how many Solr nodes would you like to run in your local cluster? (specify 1-4 nodes) [2]
Ok, let's start up 2 Solr nodes using for your example SolrCloud cluster.
...
Now let's create a new collection for indexing documents in your 2-node cluster.
Please provide a name for your new collection: [gettingstarted]
gettingstarted
How many shards would you like to split gettingstarted into? [2]
2
How many replicas per shard would you like to create? [2]
2
...

SolrCloud example running, please visit http://localhost:8983/solr

solr-cloud

Finally, a script to install Solr as service

Solr now has a script named install_solr_service.sh that installs Solr as a service on Linux and Unix machines. When I tested Solr 5, I ran the code from a Mac os box, so the script did not work for me. I received an error message telling me my Linux distribution was not supported and I needed to setup Solr as a service manually using the documentation provided in the Solr Reference Guide. Even if the install script did not work for me on a Mac, this tool is a great addition for system administrators who like to configure their machines using automated tools like Puppets.

We use Tomcat at work, so where did my WAR go?

As of Solr 5.0, the only supported container is the Jetty one that ships by default with the download file. It is possible to repackage the exploded files into a war, but you will end up with an unsupported installation of Solr. I cannot recommend that route.

Adding document has never been easier

In Solr 5.0, adding documents has never been easier. We now have access to a new tool named ./bin/post. This tool can take almost any input document imaginable and post it to Solr. It has support for JSON, XML, CSV, and rich text documents like Microsoft Office documents. The post tool can also act as a crawler to extract information out of a website. During my test, I was not able to get the content off of a web page. The information extracted was meta-data like the title, authors, and keywords. Maybe there is a way to obtain this content, but I was not able to find a parameter or a config file that would let me do so. I think that the post utility is a very good tool to get started, but for my day to day work, I will stick with our good old open source crawler and Solr Commiter that we use here at Norconex.

Here is a quick list of the parameters one can use from the post command:

* JSON file: ./post -c wizbang events.json
* XML files: ./post -c records article*.xml
* CSV file: ./post -c signals LATEST-signals.csv
* Directory of files: ./post -c myfiles ~/Documents
* Web crawl: ./post -c gettingstarted http://lucidworks.com -recursive 1 -delay 1
* Standard input (stdin): echo ‘{commit: {}}’ | ./post -c my_collection -type application/json -out yes -d
* Data as string: ./post -c signals -type text/csv -out yes -d $’id,value\n1,0.47′

Solr 5.0 supports even more document types thanks to Tika 1.7

Solr 5 now comes with Tika 1.7. This means that Solr now has support for OCR via the Terrasact application. You will need to install Terrasact separately. With Tika 1.7, Solr also has better support for PST and matlab files. The date and spatial unit handling also have been improved in this new release.

More Exciting new features

Solr 5.0 now lets you slice and dice your data the way you want it. What this means is stats and facets are now working together. For example, you can automatically get the min, max, and average price for a book. You can find more about this new feature here.

The folks at Apache also improved the schema API to let us add fields programmatically. A core reload will be done automatically if you use the API. Check out the details on how to use that feature.

We can also manage the request handler via the API.

What are the main “gotchas” to look for when upgrading to Solr 5.0?

Solr 5 does not support reading Solr/Lucene 3.x and earlier indexes. You have to make sure that you run the tool Lucene IndexUpdate that is included with the Solr 4.10 release. Another way to go about it would be to fully optimise your index with a Solr 4.10 installation.

Solr 5 does not support the pre Solr 4.3 solr.xml format and move entirely to core discovery. If you need some more information about moving to the latest and greatest solr.xml file format, I suggest this article:  moving to the new solr.xml.

Solr 5 only supports creating and removing SolrCloud collections through the Collection API. You might still be able to manage the collection the former way, but there is no guarantee that it will work in future releases, and the documentation strongly advises against it.

Conclusion

It looks like most of the work done in this release was geared toward ease of use. The inclusion of tools to easily add data to the index with a very versatile script was encouraging. I also liked the idea of moving to a Jetty-only model and approaching Solr as a self-contained piece of software. One significant advantage of going this route is that it will make providing support easier for the Solr team, who will also be able to optimise the code for a specific container.

Broken linkThis tutorial will show you how to extend Norconex HTTP Collector using Java to create a link checker to ensure all URLs in your web pages are valid. The link checker will crawl your target site(s) and create a report file of bad URLs. It can be used with any existing HTTP Collector configuration (i.e., crawl a website to extract its content while simultaneously reporting on its broken links).  If you are not familiar with Norconex HTTP Collector already, you can refer to our Getting Started guide.

The link checker we will create will record:

  • URLs that were not found (404 HTTP status code)
  • URLs that generated other invalid HTTP status codes
  • URLs that generated an error from the HTTP Collector

The links will be stored in a tab-delimited-format, where the first row holds the column headers. The columns will be:

  • Referrer: the page containing the bad URL
  • Bad URL: the culprit
  • Cause: one of “Not Found,” “Bad Status,” or “Crawler Error”

One of the goals of this tutorial is to hopefully show you how easy it is to add your own code to the Norconex HTTP Collector. You can download the files used to create this tutorial at the bottom of this page. You can jump right there if you are already familiar with Norconex HTTP Collector. Otherwise, keep reading for more information.

Get your workspace setup

To perform this tutorial in your own environment, you have two main choices. If you are a seasoned Java developer and an Apache Maven enthusiast, you can create a new Maven project including Norconex HTTP Collector as a dependency. You can find the dependency information at the bottom of its download page.

If you want a simpler option, first download the latest version of Norconex HTTP Collector and unzip the file to a location of your choice. Then create a Java project in your favorite IDE.   At this point, you will need to add to your project classpath all Jar files found in the “lib” folder under your install location. To avoid copying compiled files manually every time you change them, you can change the compile output directory of your project to be the “classes” folder found under your install location. That way, the collector will automatically detect your compiled code when you start it.

You are now ready to code your link checker.

Listen to crawler events

There are several interfaces offered by the Norconex HTTP Collector that we could implement to achieve the functionality we seek. One of the easiest approaches in this case is probably to listen for crawler events. The collector provides an interface for this called ICrawlerEventListener. You can have any number of event listeners for your crawler, but we only need to create one. We can implement this interface with our link checking logic:

package com.norconex.blog.linkchecker;

public class LinkCheckerCrawlerEventListener 
        implements ICrawlerEventListener, IXMLConfigurable {

    private String outputFile;

    @Override
    public void crawlerEvent(ICrawler crawler, CrawlerEvent event) {
        String type = event.getEventType();
        
        // Create new file on crawler start
        if (CrawlerEvent.CRAWLER_STARTED.equals(type)) {
            writeLine("Referrer", "Bad URL", "Cause", false);
            return;
        }

        // Only keep if a bad URL
        String cause = null;
        if (CrawlerEvent.REJECTED_NOTFOUND.equals(type)) {
            cause = "Not found";
        } else if (CrawlerEvent.REJECTED_BAD_STATUS.equals(type)) {
            cause = "Bad status";
        } else if (CrawlerEvent.REJECTED_ERROR.equals(type)) {
            cause = "Crawler error";
        } else {
            return;
        }

        // Write bad URL to file
        HttpCrawlData httpData = (HttpCrawlData) event.getCrawlData();
        writeLine(httpData.getReferrerReference(), 
                httpData.getReference(), cause, true);
    }

    private void writeLine(
            String referrer, String badURL, String cause, boolean append) {
        try (FileWriter out = new FileWriter(outputFile, append)) {
            out.write(referrer);
            out.write('\t');
            out.write(badURL);
            out.write('\t');
            out.write(cause);
            out.write('\n');
        } catch (IOException e) {
            throw new CollectorException("Cannot write bad link to file.", e);
        }
    }

    // More code exists: download source files
}

As you can see, the previous code focuses only on the crawler events we are interested in and stores URL information associated with these events. We do not have to worry about other aspects of web crawling in that implementation. The above code is all the Java we need to write for our link checker.

Configure your crawler

If you have not seen a Norconex HTTP Collector configuration file before, you can find sample ones for download, along with all options available, on the product configuration page.

This is how we reference the link checker we created:

<crawlerListeners>
  <listener class="com.norconex.blog.linkchecker.LinkCheckerCrawlerEventListener">
    <outputFile>${workdir}/badlinks.tsv</outputFile>
  </listener>
</crawlerListeners>

By default, the Norconex HTTP Collector does not keep track of referring pages with every URL it extracts (to minimize information storage and increase performance). Because having a broken URL without knowing which page holds it is not very useful, we want to keep these referring pages. Luckily, this is just a flag to enable on an existing class:

<linkExtractors>
  <extractor class="com.norconex.collector.http.url.impl.HtmlLinkExtractor"
     keepReferrerData="true" />
</linkExtractors>

In addition to these configuration settings, you will want to apply more options, such as restricting your link checker scope to only your site or a specific sub-section or your site. Use the configuration file sample at the bottom of this page as your starting point and modify it according to your needs.

You are ready

Once you have your configuration file ready and the compiled Link Checker listener in place, you can give it a try (replace .bat with .sh on *nix platforms):

collector-http.bat -a start -c path/to/your/config.xml

The bad link report file will be written at the location you specified above.

Source files

Download Download the source files used to create this article


Despite all the “noise” on social media sites, we can’t deny how valuable information found on social media networks can be for some organizations. Somewhat less obvious is how to harvest that information for your own use. You can find many posts online asking about the best ways to crawl this or that social media service: Shall I write a custom web scraper? Should I purchase a product to do so?

This article will show you how to crawl Facebook posts (more…)

On large environments, it’s common to have many crawlers running at once, or at scheduled intervals, in order to keep your collected content up-to-date. For example, this is a typical requirement of search engines installations. They need their internal indices updated frequently in order to keep their search results relevant.

Keeping track of individual crawler execution can be challenging. How many are currently running? For how long? Any of them failed? Sure you can log in on the servers where these crawlers are running to get valuable insights. Your operating system can list running processes, and you can analyze each crawler logs. What if your supervisor or a non-technical person wants to know the current crawl status?   You can quickly become a bottleneck.

This approach is not ideal to say the least.

Luckily, Norconex Collectors were designed to take advantage of the Norconex JEF (Job Execution Framework) library.   As a result, all Norconex Collector crawlers you have defined are just waiting to be monitored by Norconex JEF Monitor, a web-based progress and status monitoring application. What’s best is you do not need to change anything in your crawler configurations to get this monitoring.

 JEF Monitor Main Screen

If you already have a JEF Monitor installation up and running, feel free to scroll down to skip the JEF Monitor installation.

Install JEF Monitor

Download the latest stable copy of JEF Monitor (4.0 as of this writing).   Decompress the obtained zip file in a directory of your choice, on the same server where one or more Norconex Collectors are installed.

This will create the following files and directory structure:

norconex-jef-monitor-4.0.0/
     apidocs/
     classes/
     config/
     lib/
     third-party/
     jef-monitor.bat
     jef-monitor.sh
     LICENSE.TXT
     NOTICE.TXT

 To start JEF Monitor, execute jef-monitor.bat or jef-monitor.sh whether you are on a Windows or *nix environment. Open your favorite browser, and access JEF Monitor using this URL:

               http://localhost:8080/

Replace localhost with the proper server name if your browser was not started from the same server where you installed JEF Monitor.

With version 4.0, the default port is 8080. To change that port or to have JEF Monitor accessible via https only, modify the config/setup.properties file accordingly before starting JEF Monitor.

First-time configuration

The first time JEF Monitor is accessed, you have to go through a few initial configuration screens:

JEF Monitor Introduction Screen

Hit “Let’s Go!”

JEF Monitor Installation Name

JEF Monitor Installation Name

You can have several JEF Monitor installations. Any installation can report on other installations to give you a unified view of all your jobs (in this case, crawler jobs).   For this reason, you need to give a unique name to this installation.   It can be anything you like.

This tutorial will pretend we are only monitoring crawlers found on a dedicated server. We’ll call this installation “Crawler Server”.

Noroconex Collector Jobs to Monitor

This is where we tell JEF Monitor where our crawlers are running. For JEF, a Norconex Collector and its configured crawlers are treated as “jobs.” When running, each Norconex Collector configured creates an .index file in a subdirectory of the collector progress directory called “latest”.   A collector progress directory can be configured using the <progressDir> configuration option.

We need to tell JEF Monitor about your Collector jobs. Click on Add Files…

In this tutorial, we’re pretending we have an HTTP Collector set up to crawl Wikipedia. We called it “Wikipedia Crawl” with two crawlers: “Wikipedia English” and “Wikipedia French” (to be shown in JEF Monitor later).

The index file can be found in this location:

[…]/wikipedia/progress/latest/Wikipedia_32_Crawl.index

Select your own index file, and click the “Choose” button.

You should see your selection in the list of jobs to monitor. If you have more than one Norconex Collector installation you want to monitor, repeat the exercise. Alternatively, if you have multiple progress files in a directory, have sub-directories, or have not yet executed your Norconex Collector installation, you can add a directory to be monitored.   Index files found under the selected directories will show up when they get created.

When you are done, click “Continue”.

With each JEF “job” being monitored, you can optionally perform “actions.”   With the default installation of JEF Monitor, two actions for viewing the logs in your browser are available and already configured.   Leave those there, and click “Continue”.

Happy Monitoring!

Launch your Norconex Collector as you normally do, and you should eventually see its progress automatically updated.

To monitor additional Norconex Collector installations, click on “Monitored Jobs” under the “Settings” menu. You will then be presented with the now familiar “Jobs to monitor” screen (similar to the one higher up).

More options are available in JEF Monitor, such as tracking remote JEF Monitor installation from this one.

Experiment and have fun.

During the development of our latest product, Norconex Content Analytics, we decided to add facets to the search interface. They allow for exploring the indexed content easily. Solr and Elasticsearch both have facet implementations that work on top of Lucene. But Lucene also offers simple facet implementations that can be picked out of the box. And because Norconex Content Analytics is based on Lucene, we decided to go with those implementations.

We’ll look at those facet implementations in this blog post, but before, let’s talk about a new feature of Lucene 4 that is used by all of them.

(more…)

Responsive Design
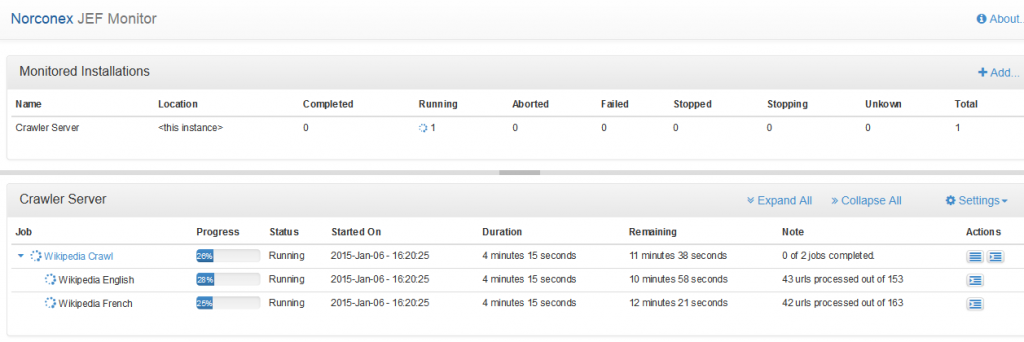
As a Search Expert at Norconex, I am often assigned the task of integrating web accessibility standards within a search user interface for our customers in the government sector; these customers look to web accessibility to improve the overall search experience of their current enterprise’s search offering. And, of course, we have noticed a growing trend in the desire for search user interfaces that can respond to various screen sizes on various devices.

This post will look at the strategies I have used to design a web accessible search user interface and present why it is equally important to tackle a responsive web design.  To illustrate an accessible response web design, I will demonstrate the Elections.ca website project that I have recently worked on with the Google Search Appliance (GSA). (more…)

HP Autonomy users, take control over your web crawling. Norconex recently released an HP Autonomy IDOL Committer module for its open-source web crawler, Norconex HTTP Collector. You can now enjoy the features of Norconex crawler and experience the freedom of open-source when crawling your sites for indexing into IDOL. (more…)

Apache Lucene Web Site

For a client last year, we had to upgrade some old Lucene code to Lucene 4. Lucene 4 was a rather large release and there are many aspects to be aware when upgrading non trivial code. Let’s take a look at some of them.

(more…)

David Gaulin, Pascal Essiembre, Sophie Carrier-LaforteNorconex is glad to help Sophie Carrier-Laforte, an outstanding amateur athlete who is targeting the biggest honors again this year, going further.  I have had the privilege to know Sophie for a long while now and I have seen her progression as an athlete. I must say that her hard work and her dedication to her sport is a true inspiration to me and the team here at Norconex.  It took her many years to get where she is now, in the top Canadian Junior, but her journey is just beginning. (more…)

AutocompleteAutocomplete (also known as live suggestions or search suggestions) is very popular with Search applications. It is generally used to return either query suggestion (à la Google Autocomplete) or to propose existing search results (à la Facebook).

Open source search platforms like Solr and Elasticsearch support this feature. (more…)