Introduction
When building a robust web crawling operation, regional access restrictions can pose serious challenges, especially if your infrastructure is centralized in a location like the United States, but the data you need resides behind geo-fenced websites in countries like Japan.
The Problem
Traditionally, the go-to workaround would be to deploy crawling nodes in each target region, such as setting up infrastructure in Asia Pacific (Tokyo) to reach Japanese-only content. While technically effective, this approach quickly becomes costly, operationally complex, and hard to scale.
What Are IPRoyal Proxies?
IPRoyal offers a wide range of proxy services designed to help users browse or crawl the web as if they were located in another country. Their residential proxies, in particular, are backed by real IP addresses from real devices, making them highly effective for:
- Bypassing geo-restrictions and IP-based content filters
- Avoiding CAPTCHAs and IP bans during large-scale crawling
- Accessing localized content without deploying regional infrastructure
Unlike datacenter proxies, residential proxies are more trusted by target websites, as they appear like legitimate traffic from real users. This makes IPRoyal an ideal choice for crawling region-sensitive websites, especially when paired with flexible tools like Norconex web-crawler.
A Smarter Alternative: Use Residential Proxies
Instead of managing infrastructure in multiple regions, you can route traffic through IPRoyal’s residential proxies to simulate access from anywhere in the world. This allows your existing US-based Norconex crawler to behave like it’s operating inside Japan; No physical relocation required.
Let’s walk through a real-world example.
Bypassing Region-Redirects
Many Japanese websites appear globally accessible at first glance. You might load jp.example.com just fine, but behind the scenes, the server may redirect you to a regional page like sample.co.jp, which then blocks all non-Japanese IPs.
So even though the crawler gets through the first request, it hits a geo-block on the redirect target and fails to capture the actual content, leaving gaps in your data collection.
With IPRoyal’s Japan proxy IPs, the crawler can seamlessly follow redirects and access the final, localized content as if it were based in Japan.
How to Configure Norconex to Use IPRoyal Proxies
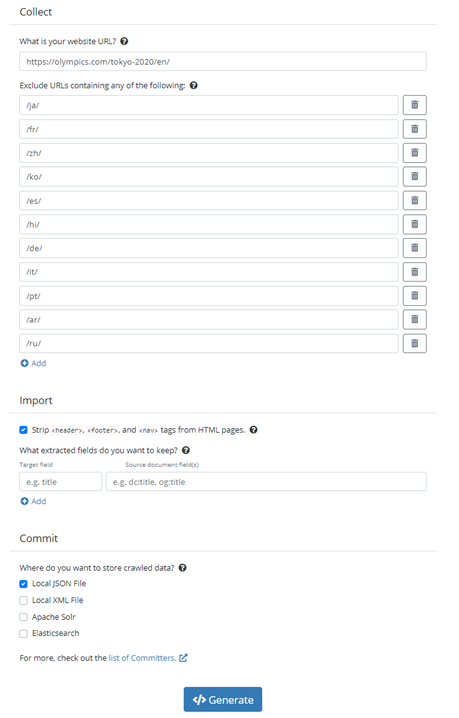
Below is a simple example of how to configure Norconex’s HTTP collector to use IPRoyal proxies only when accessing Japanese content:
<httpFetcherFactory class="GenericHttpFetcherFactory">
  <proxySettings>
    <host>proxy.iproyal.com</host>
    <port>12321</port> <!-- Replace with your assigned port -->
    <scheme>http</scheme> <!-- Or "https" if using TLS-enabled proxies -->
    <credentials>
      <username>your-username</username>
      <password>your-password</password>
    </credentials>
    <urlFilter>.*sample\.co\.jp.*</urlFilter> <!-- Apply proxy only to target domains -->
  </proxySettings>
</httpFetcherFactory>
Tip: With “urlFilter”, you can target specific domains for proxy usage, avoiding unnecessary proxy calls and optimizing speed and cost.
Final Thoughts
Pairing Norconex’s flexible crawling architecture with IPRoyal’s location-targeted proxies gives you the power to:
- Crawl localized content across the globe
- Bypass IP-based redirects and geo-blocks
- Avoid costly regional infrastructure
It’s a lightweight, scalable way to unlock data from restricted regions—without the overhead.
In an ideal world, you would leverage users to identify “good” and “bad” search results and then tweak your search engine. However, this strategy may not be possible in the world of enterprise search due to budget or resource constraints. This raises a question: how can relevancy changes be tracked automatically? This blog presents one of many possible ways to track relevancy changes in an enterprise search solution. After the initial setup, this solution can largely be automated.