This vulnerability impacts Log4J version 2.x, version 1.2 is not affected (source). Norconex HTTP Collector version 2.x use Log4J v1.2.17 and thus are not affected. Version 3 of the Collector uses Log4J v2.17.1, which Apache has patched.
Note: Unless you made it so on purpose, the HTTP Collector does not run as a service accessible from the internet.
Norconex is proud to announce the next major release of its popular open-source web crawler (also referred to as “Norconex HTTP Collector”). After a couple of years of development, you will find this new version was well worth the wait.
Not only does it introduce many new features, but it is also more flexible with even more documentation. Many of these improvements come from community feedback so long-term users deserve a pat on the back. This release is also yours.
If you are too eager to get started, you can download it now and follow its website documentation. Otherwise, keep reading for a glance at the new features.
What’s New?
Introduced features are too many to list here, but we’ll highlight some of the most significant.
Crawling of JavaScript-Driven Websites
Thanks to browser automation provided by Selenium WebDrivers, you can now use your favorite browser to crawl web pages relying on JavaScript to fully render. Generally speaking, if your browser can render content, the crawler can fetch it. It provides you with the ability to take screenshots of pages you crawl as well.
Multiple Committers
Committers are used to store crawled information into a target location, or repository of your choice. This version allows you to specify any number of committers to have your data sent to multiple targets at once (database, search engine, filesystem, etc.). It is also possible to perform simple routing as well.
Easier to deploy
Variables in configuration files can now be resolved against system properties and environment variables. Logging has been abstracted using SLF4J and now prints to STDOUT by default. These changes facilitate deployment in containerized environments (e.g., Docker).
Lots of Events
The event management has been redesigned and simplified. There are now more than 60 different event types being triggered for programmers to listen to and act upon. Ranging from new Committer and Importer events, as well as expected Web Crawler events.
XML Configuration improvements
Similar XML configuration options are now specified in a consistent way. In addition, it is now possible to provide partial class names (e.g., class=“ExtensionReferenceFilter“ instead of class=“com.norconex.collector.core.filter.impl.ExtensionReferenceFilter“). The Importer module also allows you to use XML “flow” to facilitate configuration logic. That is, you can now make use of special XML tags: <if>, <ifNot>, <condition>, <conditions>, <else>, and <then>.
Richer documentation
Documentation has been improved as well:
A new Online Manual is now available, giving great insight into installation and XML configuration.
Dynamic XML documentation combining options from all modules making up the web crawler into a single location.
The JavaDoc now has formatted XML documentation and XML usage, which is easy to copy and paste into your own configuration.
Config Starter
A very simple yet useful configuration generator is now available online. It will help you create your first configuration file. You provide your “start” URL, answer a few questions and your configuration file will be generated for you.
More?
Some additional features:
Can send deletion requests to Committers upon encountering specific events.
Can prevent duplicate documents to be sent to Committers during the same crawling sessions.
Can now extra links after document importing/parsing as well as from metadata.
The Crawler can be configured to stop itself after encountering specific events.
New command-line options for cleaning previous crawls (starting fresh) and to export/import the crawler internal data store.
Can now transform crawled images.
Additional content and metadata manipulation options.
Committers can now retry failing batches, reducing the batch size between each attempt.
New out-of-the-box CSV Committer.
We recommend you have a look at the release notes for more.
What next?
If you are coming from Norconex HTTP Collector version 2, we recommend you have a look at the version 3 migration notes.
As always, community support is still available on GitHub. While on GitHub, take a moment to “Star” the project.
Come back once in a while as we’ll publish more in-depth articles on specific features or use cases you did not even think was possible to address with our web crawler.
Finally, we always love to know who is using the Norconex Web Crawler. Let us know and you may get listed on our wall of fame.
Enjoy!
In my previous article, I talked about the new Config Starter and its features. This article serves as a follow-up. Now that you know how to generate a crawler configuration file, I will highlight the steps you can undertake to get you started on your own website crawling activities.
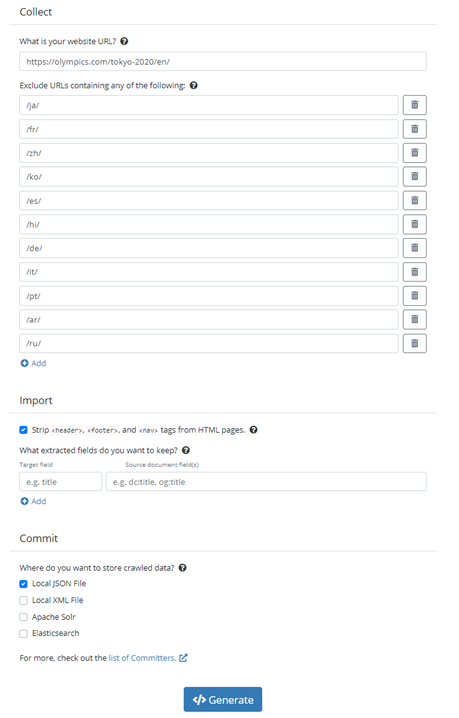
First, you will need to generate a basic configuration file targeting the Olympic website, using the Config Starter. In this example, I am targeting English content only, so I am excluding all URLs corresponding to the other languages on the website.
*Note that it is not mandatory to use the Config Starter to generate your configuration file as it only makes a basic configuration file. If you are looking for a more complete solution, you can make your own configuration file with the documentation here.
With your configuration file generated, the next step is to download the Norconex HTTP Collector on your computer from the Norconex Open-Source website and unzip it. If you are using the Config Starter, you will need to download version 3.x.
Once you have the HTTP Collector downloaded on your computer, open your command-line terminal in the location of the folder you just created with your download. To do this, simply use the following command with your file directory: cd C:\file\directory\of\the\collector
With your command-line terminal open, you must now enter the following line with the path to your configuration file:
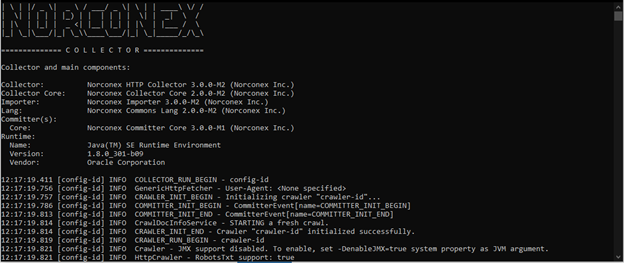
Congratulations! You are now running your crawler. If all went according to plan, you should see something similar to the next image and the data crawled should now be located in the created committer directory (if you are using the same committer as me, it should be in the “work” folder).
Now that you have crawled the Olympic site, go and collect your gold medal!
If you encounter any issues during the process, you can find resolutions on the HTTP Collector GitHub issues page.
[Try] out the new Norconex HTTP Collector Config Starter.
[Learn] more about the inner workings of the Norconex HTTP Collector.
When starting to play with the programming world, it doesn’t take long to notice the sheer amount of options. With so many options available, it’s easy to become overwhelmed by all the information. Sorting through it all is no easy task for the less tech-savvy among us. For that reason, Norconex has put a lot of effort into making its products more user-friendly. With the new Config Starter, everyone can now easily generate a basic configuration file for the Norconex HTTP Collector version 3.
The Norconex HTTP Collector Config Starter is a “wizard” that will generate the configuration file for you to run the Norconex HTTP Collector. Whether you don’t know anything about the world of programming or you just want to quickly set up your crawler, this Config Starter is made for you. In this article, we will go through each section of this wizard and show you how to start your crawler with it.
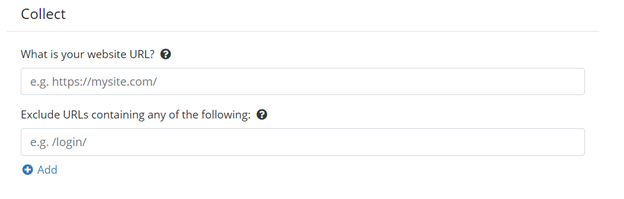
Collect section
Collect section of the Config Starter
First, we have the Collect section. This section is important because it will collect all the documents from the webpage of your website. Here, you will provide the URL where the crawler collects the data that you need. The collector will start by downloading that page and then following all the links from that webpage. In this section, you can also, if applicable, enter any sections of your site that you do not want to crawl.
Import section
Import section of the Config Starter
Next, we have the import section. This is where you will choose what to keep from the information collected by the Collector. The first option here lets you remove the data collected from your website’s header, footer and nav sections. Those sections are generally used to navigate through a website and rarely contain any relevant information to crawl.
The second option lets you choose the fields that you want to extract from the data collected. This is useful if your goal is to extract specific data from your website, which will be sent to the committer. If you want to keep all the data, just leave this section empty.
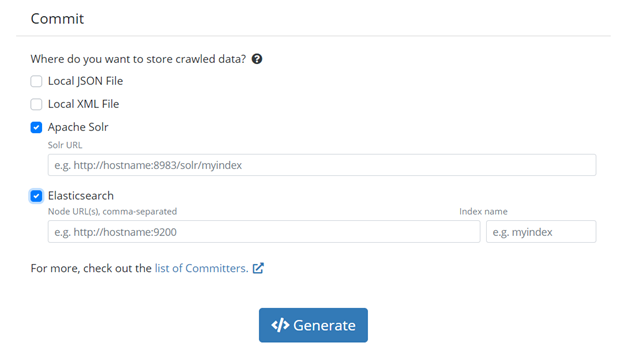
Commit section
Commit section of the Config Starter
Last, we have the Commit section. This section tells your crawler where to save the data you have collected. At the time of writing, we have four available committer options: Local JSON File, Local XML File, Apache Solr or Elasticsearch. If you select one of the last two, you will need to provide the localization of the committer.
If you want to manually configure any section of your configuration file, or use another committer, you can leave any section empty or easily edit it afterward.
When you are done, you can proceed to generate your configuration file; you should get something similar to the configuration below. This configuration comes with a detailed description for all the fields if you want to further customize your crawler later.
<?xml version="1.0" encoding="UTF-8"?>
<!--
_ _ ___ ____ ____ ___ _ _ _______ __
| \ | |/ _ \| _ \ / ___/ _ \| \ | | ____\ \/ /
| \| | | | | |_) | | | | | | \| | _| \ /
| |\ | |_| | _ <| |__| |_| | |\ | |___ / \
|_| \_|\___/|_| \_\\____\___/|_| \_|_____/_/\_\
===============================================
HTTP Collector Configuration File.
Generated by: https://opensource.norconex.com/collectors/http/v3/config/starter
Website: https://opensource.norconex.com/collectors/http/
Manual: https://opensource.norconex.com/docs/collectors/http/
-->
<httpcollector id="config-id">
<!--
Crawler "work" directory. This is where files downloaded or created as
part of crawling activities get stored.
It should be unique to each crawlers.
-->
<workDir>./work</workDir>
<crawlers>
<crawler id="crawler-id">
<!--
Mandatory starting URL(s) where crawling begins. If you put more
than one URL, they will be processed together. You can also
point to one or more URLs files (i.e., seed lists), or
point to a sitemap.xml.
-->
<startURLs stayOnDomain="true" stayOnPort="true" stayOnProtocol="true">
<url>https://mywebsite.com</url>
</startURLs>
<!-- Normalizes incoming URLs. -->
<urlNormalizer class="GenericURLNormalizer">
<normalizations>
removeFragment, lowerCaseSchemeHost, upperCaseEscapeSequence,
decodeUnreservedCharacters, removeDefaultPort,
encodeNonURICharacters
</normalizations>
</urlNormalizer>
<!--Handles interval between each page download-->
<delay default="3000" />
<!--
How many threads you want a crawler to use. Regardless of how many
thread you have running, the frequency of each URL being invoked
will remain dictated by the <delay/> option above. Using more
than one thread is a good idea to ensure the delay is respected
in case you run into single downloads taking more time than the
delay specified. Default is 2 threads.
-->
<numThreads>2</numThreads>
<!--
How many level deep can the crawler go. I.e, within how many clicks
away from the main page (start URL) each page can be to be considered.
Beyond the depth specified, pages are rejected.
The starting URLs all have a zero-depth. Default is -1 (unlimited)
-->
<maxDepth>10</maxDepth>
<!--
Crawler "work" directory. This is where files downloaded or created as
part of crawling activities (besides logs and progress) get stored.
It should be unique to each crawlers.
-->
<maxDocuments>-1</maxDocuments>
<!--
What to do with orphan documents. Orphans are valid
documents, which on subsequent crawls can no longer be reached when
running the crawler (e.g. there are no links pointing to that page
anymore). Available options are:
IGNORE, DELETE, and PROCESS (default).
-->
<orphansStrategy>PROCESS</orphansStrategy>
<!-- Handle robots.txt files. -->
<robotsTxt ignore="false" />
<!-- Detects and processes sitemap files. -->
<sitemapResolver ignore="false" />
<!--
Detects pages with a canonical link and rejects them in favor of
the canonical one.
-->
<canonicalLinkDetector ignore="false" />
<!--
Filter out matching URLs before they are downloaded. If you
want links extracted before a page gets rejected, it needs to be
rejected after it was downloaded. You can use <documentFilters>
instead to achieve this.
-->
<referenceFilters>
<filter class="RegexReferenceFilter" onMatch="exclude">.*/login/.*</filter>
</referenceFilters>
<!--
Import a document using Norconex Importer module. Here is your chance
to manipulate a document content and its metadata fields using
import handlers before it is sent to your target repository.
-->
<importer>
<!--
Pre-parse handlers take place BEFORE a document is converted to
plain-text. If you need to deal with the original document format
(HTML, XML, binary, etc.), define your import handlers here.
-->
<preParseHandlers>
<!-- Remove navigation elements from HTML pages. -->
<handler class="DOMDeleteTransformer">
<dom selector="header" />
<dom selector="footer" />
<dom selector="nav" />
<dom selector="noindex" />
</handler>
</preParseHandlers>
<!--
Post-parse handlers take place AFTER a document is converted to
plain-text. At this stage, content should be stripped of formatting
(e.g., HTML tags) and you should no longer encounter binary content.
-->
<postParseHandlers>
<!-- Rename extracted fields to what you want. -->
<handler class="RenameTagger">
<rename toField="title" onSet="replace">
<fieldMatcher method="csv">dc:title, og:title</fieldMatcher>
</rename>
</handler>
<!-- Make sure we are sending only one value per field. -->
<handler class="ForceSingleValueTagger" action="keepFirst">
<fieldMatcher method="csv">title</fieldMatcher>
</handler>
<!-- Keep only those fields and discard the rest. -->
<handler class="KeepOnlyTagger">
<fieldMatcher method="csv">title</fieldMatcher>
</handler>
</postParseHandlers>
</importer>
<!--
Commits a document to a data source of your choice.
This step calls the Committer module. The
committer is a different module with its own set of XML configuration
options. Please refer to committer for complete documentation.
Below is an example using the FileSystemCommitter.
-->
<committers>
<!--
JSON File Committer.
Store crawled documents to the local file system, in JSON Format.
Web site:
https://opensource.norconex.com/committers/core/
Configuration options and output format:
https://opensource.norconex.com/committers/core/v3/apidocs/com/norconex/committer/core3/fs/impl/JSONFileCommitter.html
-->
<committer class="JSONFileCommitter"/>
</committers>
</crawler>
</crawlers>
</httpcollector>
To start running your crawler, just refer to the location of the configuration file in the start command in the command-line console.
[Try] out the new Norconex HTTP Collector Config Starter.
[Learn] more about the inner workings of the Norconex HTTP Collector.
Covid-19 has affected almost every country around the globe and has left everyone looking for the latest information. Below are just some of those who are searching for data:
Government agencies trying to manage information for the public
Healthcare organizations trying to keep abreast of the latest research
Businesses looking for the latest updates on government subsidies and how to properly plan and prepare to reopen
Parents following information on school closures and how to keep their families safe
Individuals staying home and trying to navigate through the constant updates and search for products that have become harder to source during the outbreak
For these scenarios and so many more, all of those searching need to be able to access the most current and relevant information.
Norconex has assisted with a couple of projects related to the coronavirus outbreak, so we wanted to share the details for one of those projects.
Covid-19 Content Monitor
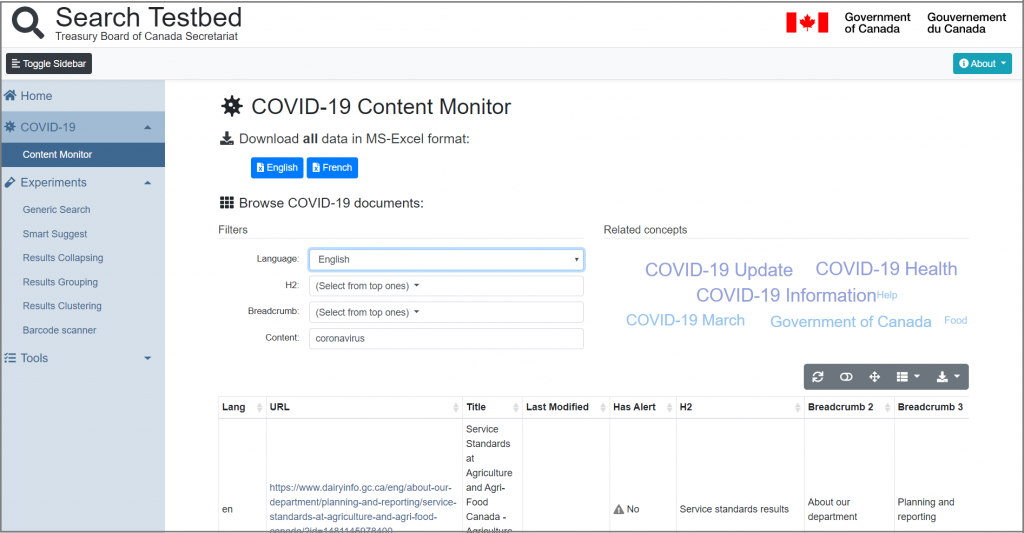
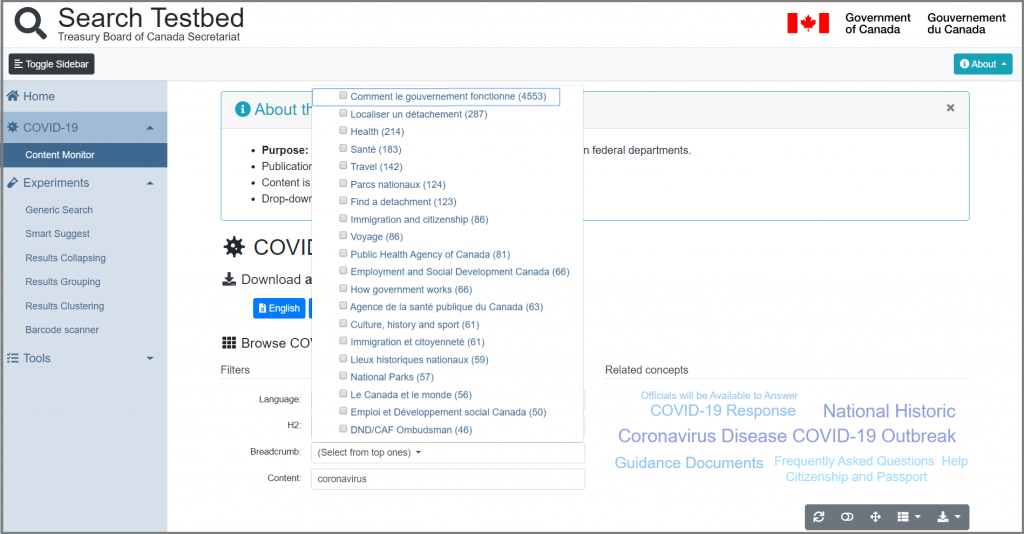
Right before Covid-19 emerged, Norconex had built a search testbed for the Canadian federal government departments. The testbed application was used to demonstrate the many features of a modern search engine and how they can be applied to search initiatives across the Government of Canada. As part of this initiative, for Health Canada we had implemented the search using data related to health and safety recalls.
When Covid-19 hit, it became more important than ever for Health Canada to ensure that the government disseminates accurate and up-to-date information to the Canadian population. Each department has the ongoing responsibility to properly inform its audience, efficiently share new directives and detail how the virus impacts department services. This raised some questions. How do you validate the quality of information shared with the public across various departments? How do you ensure a consistent message?
Norconex was happy to answer when asked for a quick solution to facilitate a remedy for these issues.
By building upon the pre-existing testbed, Norconex developed a search solution that crawls the relevant data from specific data sources. Health Canada employees can search through all data using various faceting options to help find the desired data. The data is then provided back in a fast, simple-to-use interface. The solution monitors content in both of Canada’s official languages across all departments. Among its time-saving features, the search tool offers the following:
Automated classification of content
Continuous detection of new and updated content
Easy filtering of content
Detection of “alerts” found in pages so alerts can be verified more frequently to ensure continued relevance
This search and monitoring tool is currently being hosted for free on the Norconex cloud and being accessed by the team at Health Canada daily, saving precious time as they gather the information needed to help keep Canadians safe.
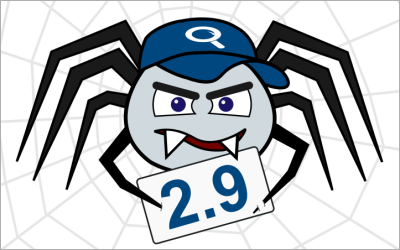
Norconex is proud to announce the 2.9.0 release of its HTTP and Filesystem crawlers. Keep reading for a few release highlights.
CMIS support
Norconex Filesystem Collector now supports Content Management Interoperability Services (CMIS). CMIS is an open standard for accessing content management systems (CMS) content. Extra information can be extracted, such as document ACL (Access Control List) for document-level security. It is now easier than ever to crawl your favorite CMS. CMIS is supported by Alfresco, Interwoven, Magnolia, SharePoint server, OpenCMS, OpenText Documentum, and more.
ACL from your CMS is not the only new type of ACL you can extract. This new Norconex Filesystem Collector release introduces support for obtaining local filesystem ACL. These new ACL types are in addition to the already existing support for CIFS/SMB ACL extraction (since 2.7.0).
Field discovery
You can’t always tell upfront what metadata your crawler will find. One way to discover your fields is to send them all to your Committer. This approach is not always possible nor desirable. You can now store to a local file all fields found by the crawler. Each field will be saved once, with sample values to give you a better idea of their nature.
The HTTP Collector adds a few new rules GenericURLNormalizer. Those are:
removeQueryString
lowerCase
lowerCasePath
lowerCaseQuery
lowerCaseQueryParameterNames
lowerCaseQueryParameterValues
Subdomains being part of a domain
When you configure your HTTP crawler to stay on the current site (stayOnDomain="true"), you can now tell it to consider sub-domains as being the same site (includeSubdomains="true").
Other changes
For a complete list of all additions and changes, refer to the following release notes:
The Norconex Collectors community keeps growing. We are thrilled to see the number of integrations grow with it as well. If you know of any Norconex Committer implementation out there, let us know and we’ll add them to the list!
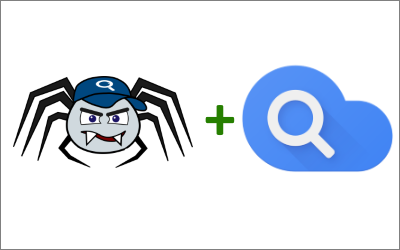
This addition to Norconex Collector family should delight Google Cloud Search fans. They too can now enjoy the full-featured crawling capabilities offered by Norconex Open-Source crawlers.
Since this Committer is developed and maintained by Google, you will find installation and configuration documentation on the Google Developers website.
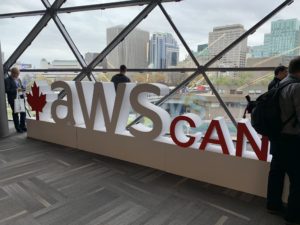
Amazon Web Services (AWS) and the Canadian Public Sector organized another excellent Public Sector Summit on May 15, 2019. AWS hosted the first such summit in Ottawa last year, but this year’s event attracted a much larger crowd. Thousands of attendees filled Shaw Centre’s entire third floor.
In the keynote sessions, it was great to hear Alex Benay (deputy minister at the Treasury Board of Canada) talk about the government’s modern digital initiative. He discussed the approach, successes, and challenges of the government’s Cloud migration journey. Another excellent speaker was Mohamed Frendi (director of IT, innovation, science, and economic development for the government of Canada). He covered Canada’s API Store and how it uses the Cloud to make government data more accessible.
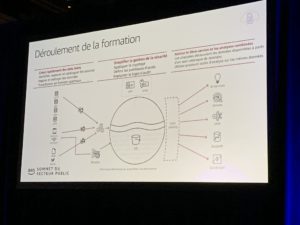
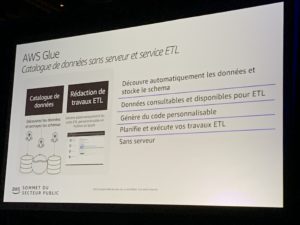
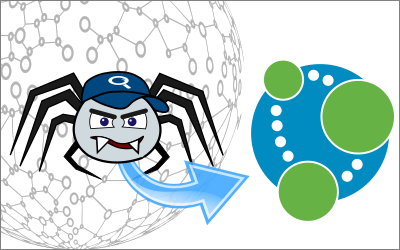
The afternoon session was led by Darin Briskman, an AWS developer evangelist. He talked about Amazon’s self-service analytics tool, called AWS Lake Formation, which combines data from multiple sources to resolve data-driven challenges in a timely manner. Machine learning and AI help in making informed decisions and solving problems. This service is a great fit for Norconex’s open-source crawler products HTTP Collector and Filesystem Collector, which fetch data from unstructured data sources to make it easy to consume. Collected content and metadata are natively stored in various existing repositories (or formats), including AWS-specific ones like Amazon Elasticsearch Service, Amazon Open Distro Elasticsearch, and Amazon CloudSearch, as well as many others, such as relational databases, Apache Solr, Google Cloud Search, Neo4J, Microsoft Azure Search, Lucidworks, IDOL, and more.
The diagrams below provide further explanation. The one showing the crawling spider is particularly exciting, because Norconex crawlers have much potential to help in this area. See available Norconex Committers.
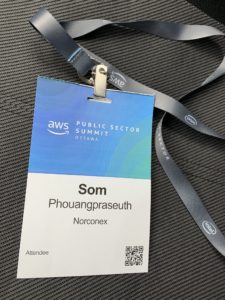
AWS Public Sector Summit Event Pass
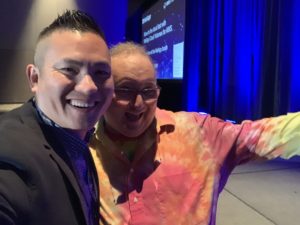
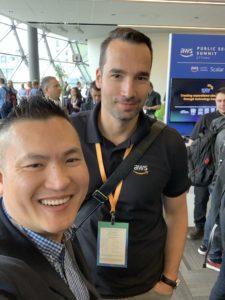
Selfies with Darin Briskman, Developer Evangelist, AWS and Stevan Beara, Solutions Architect Manager, AWS.
Norconex crawlers and Neo4j graph database are now a love match! Neo4j is arguably the most popular graph database out there. Use Norconex crawlers to harvest relationships from websites and filesystems and feed them to your favorite graph engine.
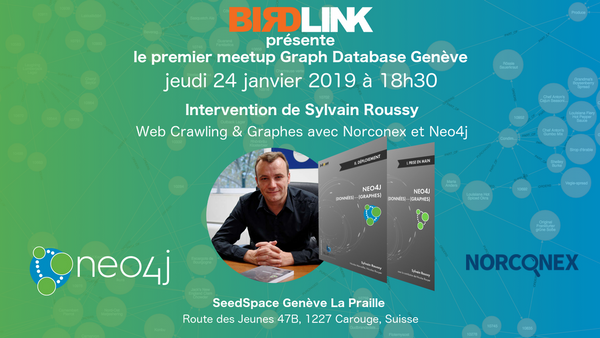
This was made possible thanks to no other than France contributor Sylvain Roussy, a Neo4j reference, and author of 2 Neo4j books. Norconex is proud to have been able to partner with Sylvain to develop a Neo4j Committer for use with its Norconex HTTP and Filesystem Collectors.
To our French-speaking European friends, Sylvain will host a series of Neo4j Meetups at different locations. He will explain how Norconex crawlers can be used to gather graph data from the web to use in Neo4j. The first of the series is taking place on January 24th, in Genève:
This website uses cookies to improve your experience while you navigate through the website. Out of these, the cookies that are categorized as necessary are stored on your browser as they are essential for the working of basic functionalities of the website. We also use third-party cookies that help us analyze and understand how you use this website. These cookies will be stored in your browser only with your consent. You also have the option to opt-out of these cookies. But opting out of some of these cookies may affect your browsing experience.
Necessary cookies are absolutely essential for the website to function properly. This category only includes cookies that ensures basic functionalities and security features of the website. These cookies do not store any personal information.
Any cookies that may not be particularly necessary for the website to function and is used specifically to collect user personal data via analytics, ads, other embedded contents are termed as non-necessary cookies. It is mandatory to procure user consent prior to running these cookies on your website.

 Norconex is proud to announce the 2.9.0 release of its
 In the keynote sessions, it was great to hear Alex Benay (deputy minister at the Treasury Board of Canada) talk about the government’s modern digital initiative. He discussed the approach, successes, and challenges of the government’s Cloud migration journey. Another excellent speaker was Mohamed Frendi (director of IT, innovation, science, and economic development for the government of Canada). He covered Canada’s API Store and how it uses the Cloud to make government data more accessible.