On large environments, it’s common to have many crawlers running at once, or at scheduled intervals, in order to keep your collected content up-to-date. For example, this is a typical requirement of search engines installations. They need their internal indices updated frequently in order to keep their search results relevant.
Keeping track of individual crawler execution can be challenging. How many are currently running? For how long? Any of them failed? Sure you can log in on the servers where these crawlers are running to get valuable insights. Your operating system can list running processes, and you can analyze each crawler logs. What if your supervisor or a non-technical person wants to know the current crawl status? You can quickly become a bottleneck.
This approach is not ideal to say the least.
Luckily, Norconex Collectors were designed to take advantage of the Norconex JEF (Job Execution Framework) library. As a result, all Norconex Collector crawlers you have defined are just waiting to be monitored by Norconex JEF Monitor, a web-based progress and status monitoring application. What’s best is you do not need to change anything in your crawler configurations to get this monitoring.
If you already have a JEF Monitor installation up and running, feel free to scroll down to skip the JEF Monitor installation.
Install JEF Monitor
Download the latest stable copy of JEF Monitor (4.0 as of this writing). Decompress the obtained zip file in a directory of your choice, on the same server where one or more Norconex Collectors are installed.
This will create the following files and directory structure:
norconex-jef-monitor-4.0.0/
     apidocs/
     classes/
     config/
     lib/
     third-party/
     jef-monitor.bat
     jef-monitor.sh
     LICENSE.TXT
     NOTICE.TXT
To start JEF Monitor, execute jef-monitor.bat or jef-monitor.sh whether you are on a Windows or *nix environment. Open your favorite browser, and access JEF Monitor using this URL:
http://localhost:8080/
Replace localhost with the proper server name if your browser was not started from the same server where you installed JEF Monitor.
With version 4.0, the default port is 8080. To change that port or to have JEF Monitor accessible via https only, modify the config/setup.properties file accordingly before starting JEF Monitor.
First-time configuration
The first time JEF Monitor is accessed, you have to go through a few initial configuration screens:
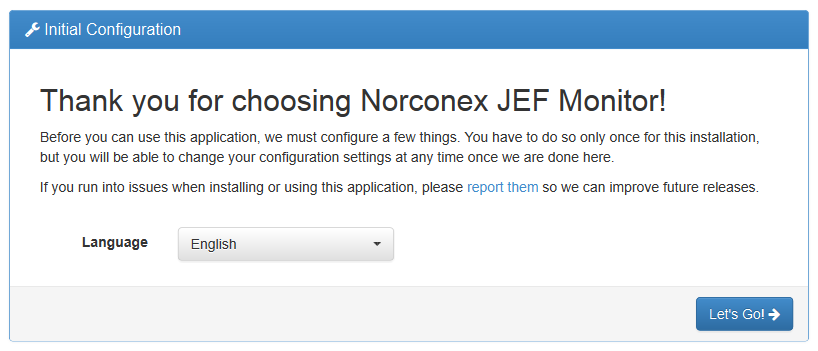
Hit “Let’s Go!”
JEF Monitor Installation Name
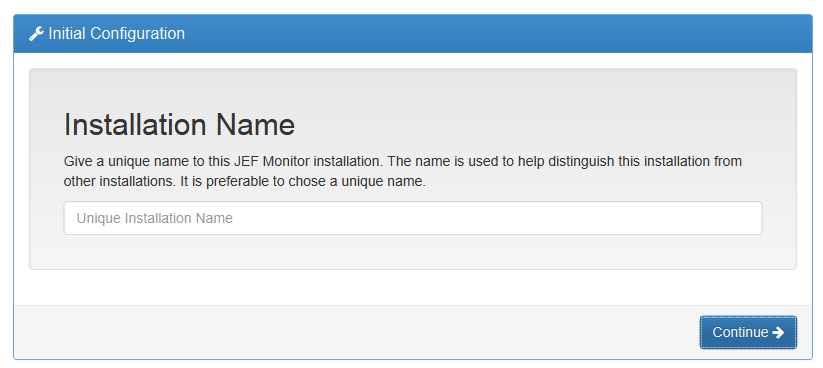
You can have several JEF Monitor installations. Any installation can report on other installations to give you a unified view of all your jobs (in this case, crawler jobs). For this reason, you need to give a unique name to this installation. It can be anything you like.
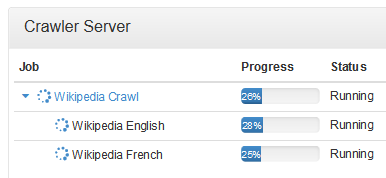
This tutorial will pretend we are only monitoring crawlers found on a dedicated server. We’ll call this installation “Crawler Server”.
Noroconex Collector Jobs to Monitor
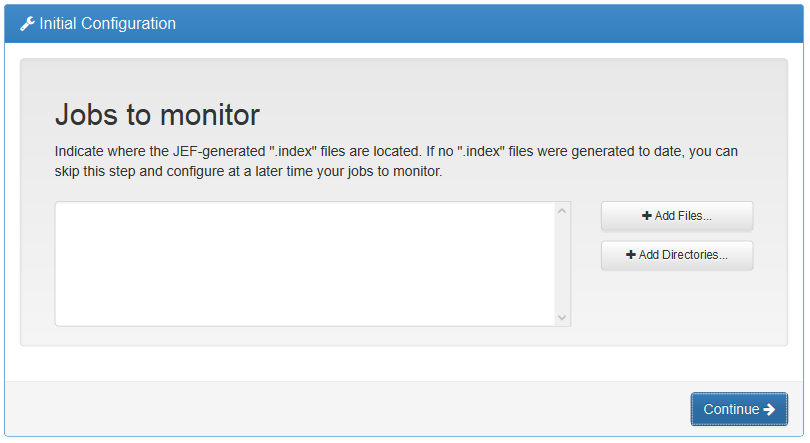
This is where we tell JEF Monitor where our crawlers are running. For JEF, a Norconex Collector and its configured crawlers are treated as “jobs.” When running, each Norconex Collector configured creates an .index file in a subdirectory of the collector progress directory called “latest”. A collector progress directory can be configured using the <progressDir> configuration option.
We need to tell JEF Monitor about your Collector jobs. Click on “Add Files…”
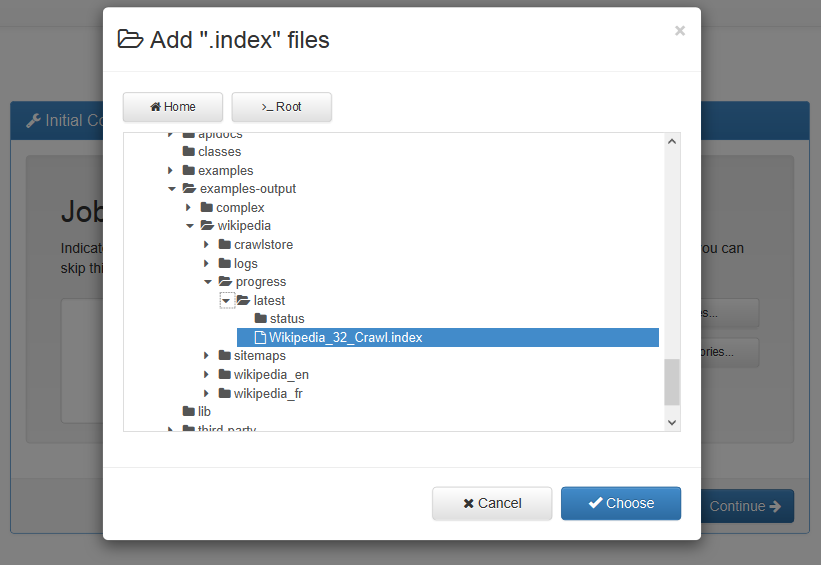
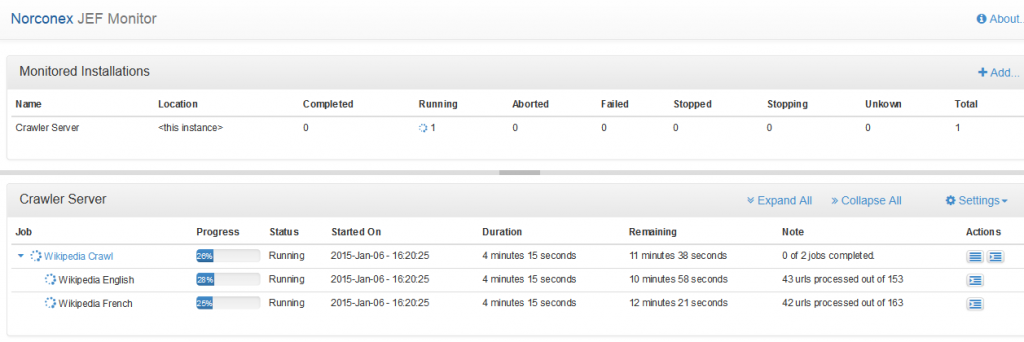
In this tutorial, we’re pretending we have an HTTP Collector set up to crawl Wikipedia. We called it “Wikipedia Crawl” with two crawlers: “Wikipedia English” and “Wikipedia French” (to be shown in JEF Monitor later).
The index file can be found in this location:
[…]/wikipedia/progress/latest/Wikipedia_32_Crawl.index
Select your own index file, and click the “Choose” button.
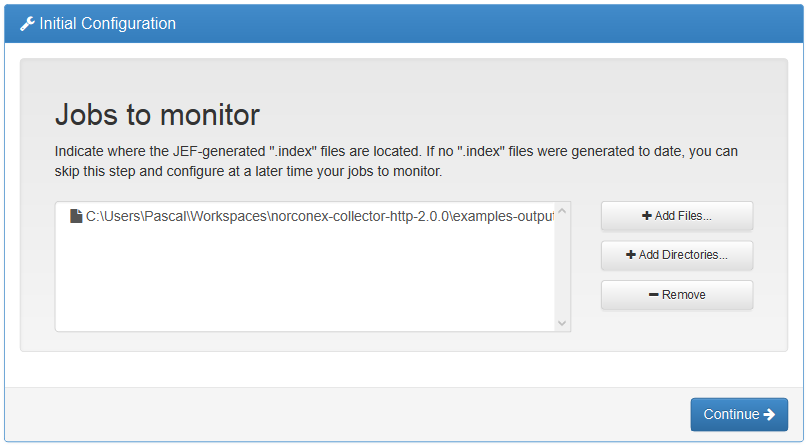
You should see your selection in the list of jobs to monitor. If you have more than one Norconex Collector installation you want to monitor, repeat the exercise. Alternatively, if you have multiple progress files in a directory, have sub-directories, or have not yet executed your Norconex Collector installation, you can add a directory to be monitored. Index files found under the selected directories will show up when they get created.
When you are done, click “Continue”.
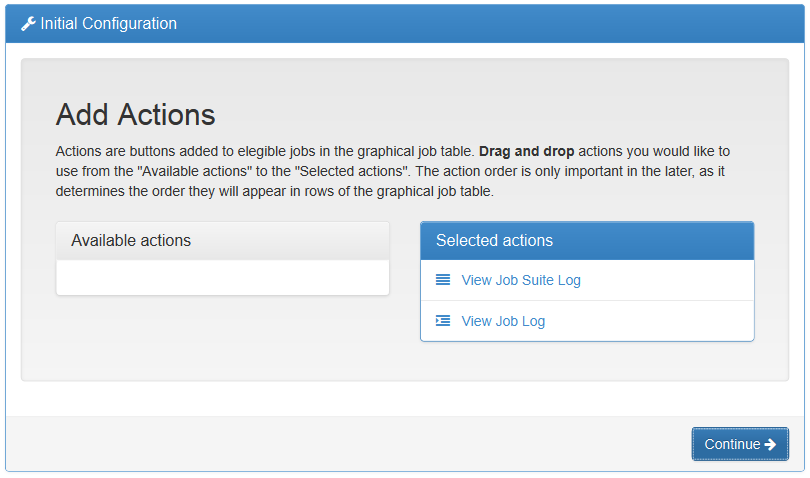
With each JEF “job” being monitored, you can optionally perform “actions.” With the default installation of JEF Monitor, two actions for viewing the logs in your browser are available and already configured. Leave those there, and click “Continue”.
Happy Monitoring!
Launch your Norconex Collector as you normally do, and you should eventually see its progress automatically updated.
To monitor additional Norconex Collector installations, click on “Monitored Jobs” under the “Settings” menu. You will then be presented with the now familiar “Jobs to monitor” screen (similar to the one higher up).
More options are available in JEF Monitor, such as tracking remote JEF Monitor installation from this one.
Experiment and have fun.
Pascal Essiembre
Pascal Essiembre has been a successful Enterprise Application Developer for several years before founding Norconex in 2007 and remaining its president to this day. Pascal has been responsible for several successful Norconex enterprise search projects across North America. Pascal is also heading the Product Division of Norconex and leading Norconex Open-Source initiatives.