tag page

Introduction

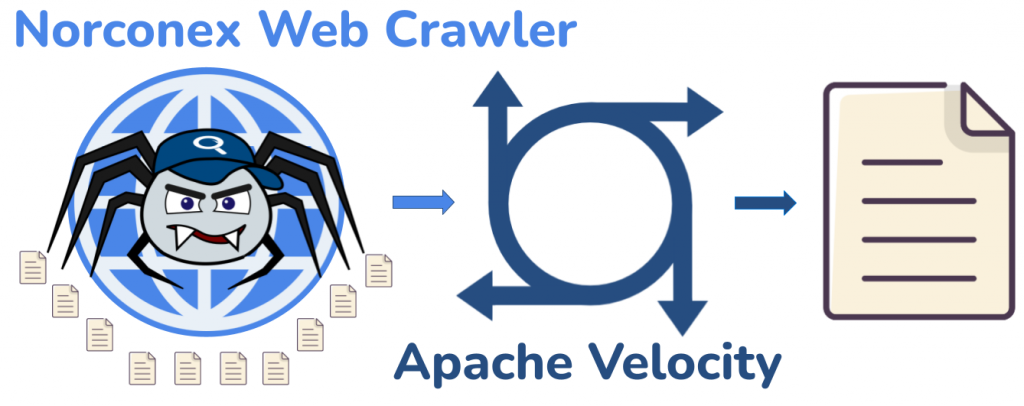
Norconex Web Crawler is a full-featured, open-source web crawling solution meticulously crafted to parse, extract, and index web content. The Crawler is flexible, adaptable and user-friendly, making it a top-notch selection for extracting data from the web.

As the volume and complexity of web crawling tasks increase, organizations face challenges in efficiently scaling the Crawler to meet organizational needs. Scaling effectively involves addressing issues related to configuration management, resource allocation, and the handling of large data sets to enable seamless scalability while maintaining data quality and integrity.

In this blog post you will learn how to handle configuration management for medium to large Crawler installations.

The Problem

Norconex Web Crawler only needs to be installed once, no matter how many sites you’re crawling. If you need to crawl different websites requiring different configuration options, you will likely need multiple configuration files. And as Crawling needs further grow, yet more configuration files will be needed. Some parts of these configuration files will inevitably have common elements as well. How can you minimize the duplication between configs?

The Solution: Apache Velocity Templates

Norconex Web Crawler configuration is not a plain XML file, but rather, a Apache Velocity template. Broadly speaking, the configuration file is interpreted by the Velocity Engine before being applied to the Crawler.
You can leverage the Velocity Engine to dynamically provide the appropriate values. The following sections walk you through exactly how to do so.

Variables

To keep things simple, consider a crawling solution that contains just 2 configuration files; one for siteA and one for siteB.

Note: This scenario is for demonstration purposes only. If you only have 2 sites to crawl, the following approach is not recommended.

Default configurations

The configurations for the 2 sites may look as follows.

siteA configuration

<?xml version="1.0" encoding="UTF-8"?>
<!DOCTYPE xml>
<httpcollector id="collector-siteA">
  <workDir>./workDir</workDir>
  <crawlers>
    <crawler id="crawler-siteA">
      <startURLs stayOnDomain="true">
   	  <url>www.siteA.com</url>
      </startURLs>
      <maxDepth>-1</maxDepth>
      <!-- redacted for brevity -->     
    </crawler>
  </crawlers>
</httpcollector>

siteB configuration

<?xml version="1.0" encoding="UTF-8"?>
<!DOCTYPE xml>
<httpcollector id="collector-siteB">
  <workDir>./workDir</workDir>
  <crawlers>
    <crawler id="crawler-siteB">
      <startURLs stayOnDomain="true">
        <url>www.siteB.com</url>
      </startURLs>
      <maxDepth>0</maxDepth>
      <!-- redacted for brevity -->
    </crawler>
  </crawlers>
</httpcollector>

As you can probably see, just 4 differences exist between the two configurations:

  • httpcollector id
  • crawler id
  • StartURLs
  • maxDepth

The common elements in both configurations should be shared. Below, you’ll learn how to share them with Velocity variables.

Optimized configuration

The following steps will optimize the configuration by extracting dynamic data to dedicated files thereby removing duplication.

First, extract unique items into their respective properties file

siteA.properties

domain=www.siteA.com
maxDepth=-1

siteB.properties

domain=www.cmp-cpm.forces.gc.ca
maxDepth=0

Then, add variables to the Crawler configuration and save it as my-config.xml at the root of your Crawler installation. The syntax to add a variable is ${variableName}.

<?xml version="1.0" encoding="UTF-8"?>
<!DOCTYPE xml>
<httpcollector id="collector-${domain}"> <!-- variable added here -->
  <workDir>./workDir</workDir>
  <crawlers>
    <crawler id="crawler-${domain}"> <!-- variable added here -->
      <startURLs stayOnDomain="true">
        <url>${domain}</url> <!-- variable added here -->
      </startURLs>   		 
      <maxDepth>${maxDepth}</maxDepth> <!-- variable added here -->
      <!-- redacted for brevity -->
    </crawler>
  </crawlers>
</httpcollector>

With the variables in place in the Crawler config, the variables file simply needs to be specified to the Crawler start script. This is accomplished with the -variables flag, as follows.

siteA

>collector-http.bat start -clean -config=my-config.xml -variables=siteA.properties

siteB

>collector-http.bat start -clean -config=my-config.xml -variables=siteB.properties

The Crawler will replace the variables in the config XML with what it finds in the .properties file.

The example above is for a Windows machine. If you are on Linux, use the collector-http.sh script instead.

Tip: If you’re interested in seeing what the config will look like after variables are replaced, use the configrender option.

>collector-http.bat configrender -c=my-config.xml -variables=siteA.properties -o=full_config.xml

So far, we have only seen the basics of storing data in variables. But what if siteA and siteB needed to commit documents to separate repositories? Below you’ll see how to leverage the power of Apache Velocity Engine to accomplish just that.

Importing Files

Using variables goes a long way toward organizing multiple configuration files. You can also dynamically include chunks of configuration by utilizing Velocity’s #parse() script element.

To demonstrate, consider that siteA is required to commit documents to Azure Cognitive Search and siteB to Elasticsearch. The steps below will walk you through how to accomplish just that.

First, you need 2 committer XML files.

committer-azure.xml

<committer class="AzureSearchCommitter">
  <endpoint>https://....search.windows.net</endpoint>   			 
  <apiKey>...</apiKey>
  <indexName>my_index</indexName>
</committer>

committer-es.xml

<committer class="ElasticsearchCommitter">
  <nodes>https://localhost:9200</nodes>
  <indexName>my_index</indexName>
</committer>

Then, augment the Crawler config (my-config.xml), and add the <committers> section

<?xml version="1.0" encoding="UTF-8"?>
<!DOCTYPE xml>
<httpcollector id="collector-${domain}">
  <workDir>./workDir</workDir>
    <crawlers>
      <crawler id="crawler-${domain}">
        <startURLs stayOnDomain="true">
          <url>${domain}</url>
        </startURLs>
  		 
  	<maxDepth>${maxDepth}</maxDepth>
  	
  	<!-- add this section -->
	<committers>
	  #parse("${committer}")
        </committers>
    </crawler>
  </crawlers>
</httpcollector>

Finally, the .properties files must be updated to specify the committer file we required for each.

siteA.properties

domain=www.siteA.com
maxDepth=-1
committer=committer-azure.xml

siteB.properties

domain=www.siteB.com
maxDepth=0
committer=committer-es.xml

Now you can use the configrender option to see the final configuration for each site.

siteA

>collector-http.bat configrender -c=my-config.xml -variables=siteA.properties -o=full_config.xml

Relevant snippet from full_config.xml.

<committers>
  <committer class="com.norconex.committer.azuresearch.AzureSearchCommitter">
    <endpoint>https://....search.windows.net</endpoint>
    <apiKey>...</apiKey>
    <indexName>my_index</indexName>
    <!-- redacted for brevity -->
  </committer>
</committers>

siteB

>collector-http.bat configrender -c=my-config.xml -variables=siteB.properties -o=full_config.xml

Relevant snippet from full_config.xml.

<committers>
  <committer class="com.norconex.committer.elasticsearch.ElasticsearchCommitter">
    <nodes>https://localhost:9200</nodes>
    <indexName>my_index</indexName>
    <!-- redacted for brevity -->
  </committer>
</committers>

And there you have it! With those simple steps, you can add the correct <committer> to the final configuration for each site.

Conclusion

As the scale and complexity of your projects grow, so does the challenge of managing multiple configuration files. Herein lies the beauty of harnessing the Apache Velocity Template Engine. By leveraging its power, you can streamline and organize your configurations to minimize redundancy and maximize efficiency. Say goodbye to duplicated efforts, and welcome a more streamlined, manageable, and scalable approach to web crawling. Happy indexing!

Introduction

Amazon CloudSearch, a powerful and scalable search and analytics service, has revolutionized how businesses handle data search and analysis. This blog post will walk you through how to set up and leverage Norconex Web Crawler to seamlessly index data to your Amazon CloudSearch domain.

Understanding Norconex Web Crawler

Norconex Web Crawler is an open-source web crawler designed to extract, parse, and index content from the web. For extracting data from the web, Crawler’s flexibility and ease of use make it an excellent choice. Norconex offers a range of committers that index data to various repositories. See https://opensource.norconex.com/committers/ for a complete list of supported target repositories. If the provided committers do not meet your requirements, extend the Committer Core and then create a custom committer to fit your needs.

This blog post will focus on indexing data to Amazon CloudSearch.

Prerequisites

Amazon CloudSearch

Follow the steps below to create a new Amazon CloudSearch Domain.

  • Enter a Search Domain Name. Next, select search.small and 1 for Desired Instance Type and Desired Replication Count, respectively.
  • Select Manual configuration from the list of options.
  • Add 3 fields – title, description, and content, of type text.
  • Authorize your IP address to send data to this CloudSearch instance. Click on Allow access to all services from specific IP(s). Then enter your public IP address.
  • That’s it! You have now created your own Amazon CloudSearch domain. AWS will take a few minutes to complete the setup procedure.

Important: You will need the accessKey and secretKey for your AWS account. Not sure where to get these values? Contact your AWS administrator.

After a few minutes, go to your CloudSearch Dashboard and make a note of the Document Endpoint.

Norconex Web Crawler

Download the latest version of Crawler from Norconex’s website. At the time of this writing, version 3.0.2 is the most recent.

Download the latest version of Amazon CloudSearch Committer. At the time of this writing, version 2.0.0 is the most recent.

Follow the Automated Install instructions to install Amazon CloudSearch Committer libraries in the Crawler.

Crawler Configuration

The following Crawler configuration will be used for this test. First, place the configuration in the root folder of your Crawler installation. Then, name it my-config.xml.

Ensure that you supply appropriate values for serviceEndpoint, accessKey, and secretKey. On your CloudSearch Dashboard, serviceEndpoint is the Document Endpoint.

<?xml version="1.0" encoding="UTF-8"?>
<!DOCTYPE xml>
<httpcollector id="Norconex HTTP Crawler">
  <!-- Decide where to store generated files. -->
  <workDir>./output</workDir>
  <crawlers>
    <crawler id="Norconex Amazon CloudSearch Committer Demo">

      <startURLs
   	 stayOnDomain="true"
   	 stayOnPort="true"
   	 stayOnProtocol="true">
   	 <url>https://github.com/</url>
      </startURLs>

      <!-- only crawl 1 page -->     
      <maxDepth>0</maxDepth>

      <!-- We know we don't want to crawl the entire site, so ignore sitemap. -->
      <sitemapResolver ignore="true" />

      <!-- Be as nice as you can to sites you crawl. -->
      <delay default="5 seconds" />

      <importer>
 	  <postParseHandlers>
   		 <!-- only keep `description` and `title` fields -->
  		 <handler class="KeepOnlyTagger">
  		   <fieldMatcher method="csv">
   			description,title
   		   </fieldMatcher>
  		</handler>
         </postParseHandlers>
  	 </importer>

      <committers>
	  <!-- send documents to Amazon CloudSearch -->
        <committer class="CloudSearchCommitter">   	
          <serviceEndpoint>...</serviceEndpoint>
          <accessKey>...</accessKey>
          <secretKey>...</secretKey>
  	  </committer>
      </committers>
	 
    </crawler>
  </crawlers>
</httpcollector>

Note that this configuration is the minimal required. To suit your needs, you can set many other parameters. Norconex’s documentation does an excellent job of detailing all the available parameters.

Important: For the purposes of this blog, AWS credentials are specified directly in the Crawler configuration as plain text. This practice is not recommended due to the obvious security issues doing so creates. Accordingly, please consult AWS documentation to learn about securely storing your AWS credentials.

Start the Crawler

Norconex Web Crawler comes packaged with shell scripts to start the application. To start the Crawler, run the following command in the console. The example below is for a Windows machine. If you are on Linux, use the collector-http.sh script instead.

C:\Norconex\norconex-collector-http-3.0.2>collector-http.bat start -clean -config=.\my-config.xml

Recall that you saved the configuration at the root of your Crawler installation.

The crawl job will take only a few seconds since only a single page is being indexed. Once the job completes, browse to your CloudSearch Dashboard. Then run a Test Search with the word github to see that the page was indeed indexed!

Conclusion

Indexing data to Amazon CloudSearch using Norconex Web Crawler opens a world of possibilities for data management and search functionality. Following the steps outlined in this guide, you can seamlessly integrate your data to Amazon CloudSearch, empowering your business with faster, more efficient search capabilities. Happy indexing!

Introduction

In the era of data-driven decision-making, efficient data indexing is pivotal in empowering businesses to extract valuable insights from vast amounts of information. Elasticsearch, a powerful and scalable search and analytics service, has become popular for organizations seeking to implement robust search functionality. Norconex Web Crawler offers a seamless and effective solution for indexing web data to Elasticsearch.

In this blog post, you will learn how to utilize Norconex Web Crawler to index data to Elasticsearch and enhance your organization’s search capabilities.

Understanding Norconex Web Crawler

Norconex Web Crawler is an open-source web crawler designed to extract, parse, and index content from the web. The crawler’s flexibility and ease of use make it an excellent choice for extracting data from the web. Plus, Norconex offers a range of committers that index data to various repositories. See https://opensource.norconex.com/committers/ for a complete list of supported target repositories. If the provided committers do not meet your organizational requirements, you can extend the Committer Core and create a custom committer.

This blog post will focus on indexing data to Elasticsearch.

Prerequisites

Elasticsearch

To keep things simple, we will rely on Docker to stand up an Elasticsearch container locally. If you don’t have Docker installed, follow the installation instructions on their website. Once Docker is installed, open a command prompt and run the following command.

docker run -d -p 9200:9200 -p 9600:9600 -e "discovery.type=single-node" -e "xpack.security.enabled=false" elasticsearch:7.17.10

This command does the following

  • requests version 7.17.10 of Elasticsearch
  • maps ports 9200 and 9600
  • sets the discovery type to “single-node”
  • disables the security plugin
  • Starts the Elasticsearch container

Once the container is up, browse to http://localhost:9200 in your favourite browser. You will get a response that looks like this:

{
  "name" : "c6ce36ceee17",
  "cluster_name" : "docker-cluster",
  "cluster_uuid" : "gGbNNtDHTKCSJnYaycuWzQ",
  "version" : {
  "number" : "7.17.10",
  "build_flavor" : "default",
  "build_type" : "docker",
  "build_hash" : "fecd68e3150eda0c307ab9a9d7557f5d5fd71349",
  "build_date" : "2023-04-23T05:33:18.138275597Z",
  "build_snapshot" : false,
  "lucene_version" : "8.11.1",
  "minimum_wire_compatibility_version" : "6.8.0",
  "minimum_index_compatibility_version" : "6.0.0-beta1"
  },
  "tagline" : "You Know, for Search"
}

Elasticsearch container is now up and running!

Norconex Web Crawler

Download the latest version of the Web Crawler from Norconex’s website. At the time of this writing, version 3.0.2 is the most recent version.

Download the latest version of Elasticsearch Committer. At the time of this writing, version 5.0.0 is the most recent version.

Follow the automated installation instructions to install the Elasticsearch Committer libraries into the Crawler.

Crawler Configuration

We will use the following Crawler configuration for this test. Place this configuration in the root folder of your Crawler installation, with the filename my-config.xml.

<?xml version="1.0" encoding="UTF-8"?>
<!DOCTYPE xml>
<httpcollector id="Norconex HTTP Collector">
    <!-- Decide where to store generated files. -->
  <workDir>./output</workDir>
  <crawlers>
	<crawler id="Norconex Elasticsearch Committer Demo">
  	<startURLs 
		stayOnDomain="true" 
		stayOnPort="true" 
		stayOnProtocol="true">
		<url>https://github.com/</url>
  	</startURLs>
  	<!-- only crawl 1 page --> 	 
  	<maxDepth>0</maxDepth>
  	<!-- We know we don't want to crawl the entire site, so ignore sitemap. -->
  	<sitemapResolver ignore="true" />
  	<!-- Be as nice as you can to sites you crawl. -->
  	<delay default="5 seconds" />
  	<importer>
  	  	<postParseHandlers>
  	  	  	<!-- only keep `description` and `title` fields -->
  	  	  	<handler class="KeepOnlyTagger">
  	  	  	  	<fieldMatcher method="csv">
  	  	  	  	  	description,title
  	  	  	  	</fieldMatcher>
  	  	  	</handler>
  	  	</postParseHandlers>
   	</importer>
  	<committers>
 		 <!-- send documents to Elasticsearch -->
   		<committer class="ElasticsearchCommitter">
			<nodes>http://localhost:9200</nodes>
			<indexName>my-index</indexName>
   		</committer>
  	</committers>
 	 
    </crawler>
  </crawlers>
</httpcollector>

Note that this is the minimal configuration required. There are many more parameters you can set to suit your needs. Norconex’s documentation does an excellent job of detailing all the parameters.

Start the Crawler

Norconex Web Crawler comes packaged with shell scripts to start the application. To start the crawler, run the following command in a shell terminal. The example below is for a Windows machine. If you are on Linux, use the collector-http.sh script instead.

C:\Norconex\norconex-collector-http-3.0.2>collector-http.bat start -clean -config=.\my-config.xml

Recall that you saved the Crawler configuration at the root of your Crawler installation.

Since only a single page is being indexed, the crawl job will take only a few seconds. Once the job completes, query the Elasticsearch container by browsing to http://localhost:9200/my-index/_search in your browser. You will see something like this:

{
  "took": 12,
  "timed_out": false,
  "_shards": {
	"total": 1,
	"successful": 1,
	"skipped": 0,
	"failed": 0
  },
  "hits": {
	"total": {
  	"value": 1,
  	"relation": "eq"
	},
	"max_score": 1,
	"hits": [
  	{
    	"_index": "my-index",
    	"_id": "https://github.com/",
    	"_score": 1,
    	"_source": {
      	"title": "GitHub: Let's build from here · GitHub",
      	"description": "GitHub is where over 100 million developers shape the future of software, together. Contribute to the open source community, manage your Git repositories, review code like a pro, track bugs and features, power your CI/CD and DevOps workflows, and secure code before you commit it.",
      	"content": "<redacted for brevity>"
    	}
  	}
	]
  }
}

You can see that the document was indeed indexed!

Conclusion

Norconex Web Crawler streamlines the process of indexing web data into Elasticsearch, making valuable information readily available for search and analytics.
This guide provides step-by-step instructions for integrating your data with Elasticsearch, unleashing potent search capabilities for your organization’s applications. Embrace the powerful synergy of Norconex Web Crawler and Elasticsearch to revolutionize your data indexing journey, empowering your business with real-time insights and effortless data discovery. Happy indexing!

Introduction

Azure Cognitive Search is a robust cloud-based service that enables organizations to build sophisticated search experiences. In this blog post, you will learn how to utilize Norconex Web Crawler to index data into Azure Cognitive Search and enhance your organization’s search capabilities.

Understanding Norconex Web Crawler

Norconex Web Crawler is an open-source web crawler designed to extract, parse, and index content from the web. The crawler’s flexibility and ease of use make it an excellent choice for extracting data from the web. Plus, Norconex offers a range of committers that index data to various repositories. See https://opensource.norconex.com/committers/ for a complete list of supported target repositories. If the provided committers do not meet your organizational requirements, you can extend the Committer Core and create a custom committer.

This blog post will focus on indexing data to Microsoft Azure Cognitive Search.

Prerequisites

Azure Cognitive Search

Before getting started, make sure you’ve already set up an Azure Cognitive Search service instance through your Azure portal. Consult the official Microsoft documentation for guidance on setting up this service.
After completing the setup, create an Index where you will index/commit your data. Then configure the index with the following fields:

Note: For this exercise, the English – Lucene analyzer will be used for the title, description, and content fields.

Note that the following 3 items are required to configure the Norconex Azure Cognitive Search Committer:

  • URL (listed on the Overview page of your Azure Cognitive Search portal)
  • Admin API key (listed under Settings -> Keys)
  • Index name

Norconex Web Crawler

Download the latest version of the Web Crawler from Norconex’s website. At the time of this writing, version 3.0.2 is the most recent version.

Download the latest version of Azure Search Committer. At the time of this writing, version 2.0.0 is the most recent version.

Follow the Automated Install instructions to install the Azure Search Committer libraries into the Crawler.

Crawler Configuration

We will use the following Crawler configuration for this test. Place this configuration in the root folder of your Crawler installation, with the filename my-config.xml.

<?xml version="1.0" encoding="UTF-8"?>
<!DOCTYPE xml>
<httpcollector id="Norconex HTTP Collector">
  
  <!-- Decide where to store generated files. -->
  <workDir>./output</workDir>
  <crawlers>
    <crawler id="Norconex Azure Committer Demo">
      <startURLs 
        stayOnDomain="true" 
	stayOnPort="true" 
	stayOnProtocol="true">
	<url>https://github.com/</url>
      </startURLs>
      <!-- only crawl 1 page --> 	 
      <maxDepth>0</maxDepth>
      <!-- We know we don't want to crawl the entire site, so ignore sitemap. -->
      <sitemapResolver ignore="true" />
      <!-- Be as nice as you can to sites you crawl. -->
      <delay default="5 seconds" />
      <importer>
        <postParseHandlers>
          <!-- only keep `description` and `title` fields -->
          <handler class="KeepOnlyTagger">
            <fieldMatcher method="csv">
              description,title
            </fieldMatcher>
          </handler>
        </postParseHandlers>
      </importer>
      <committers>
        <!-- send documents to Azure Cognitive Search -->
   	<committer class="AzureSearchCommitter">
          <endpoint>https://....search.windows.net</endpoint>			    
            <apiKey>...</apiKey>
            <indexName>...</indexName>
        </committer>
      </committers> 
    </crawler>
  </crawlers>
</httpcollector>

Be sure to appropriately set the endpoint, apiKey, and indexName under the section. Recall that you noted this information while satisfying the Azure Search Prerequisites.


Start the Crawler

Norconex Web Crawler comes packaged with shell scripts to start the application. To start the crawler, run the following command in a shell terminal. The example below is for a Windows machine. If you are using Linux, use the collector-http.sh script instead.

C:\Norconex\norconex-collector-http-3.0.2>collector-http.bat start -clean -config=.\my-config.xml

Recall that you saved the Crawler configuration at the root of your Crawler installation.

Since only a single page is being indexed, the crawl job will only take a few seconds. Once the job completes, you can query the Azure Cognitive Search portal and see the document was indexed!

Common pitfalls

Invalid API key

If the API key is invalid, the Crawler will throw a “Forbidden” error.

Invalid HTTP response: "Forbidden". Azure Response:

Ensure that you use the Admin API key

Invalid index name

If the indexName provided in the Crawler config does not match what is in your Azure Search, you will see this error.

CommitterException: Invalid HTTP response: "Not Found". Azure Response: {"error":{"code":"","message":"The index 'test2' for service 'norconexdemo' was not found."}}

Misconfigured fields in the Azure Search index

If you did not add title, description and content fields to your index, the Crawler will throw an exception referencing the missing field.

CommitterException: Invalid HTTP response: "Bad Request". Azure Response: {"error":{"code":"","message":"The request is invalid. Details: parameters : The property 'content' does not exist on type 'search.documentFields'. Make sure to only use property names that are defined by the type."}}

Conclusion

Azure Cognitive Search, combined with the powerful data ingestion capabilities of Norconex Web Crawler, offers a potent solution for indexing and searching data from various sources. Following the steps outlined in this blog post, you can seamlessly integrate and update your organization’s Azure search index with fresh, relevant data. Leveraging the flexibility and scalability of Azure Cognitive Search will allow you to deliver exceptional search experiences to your users and gain valuable insights from your data. Happy indexing!