tag page

This year I was given the privilege to attend my first KubeCon + CloudNativeCon North America 2020 virtually. This event spans four days consisting of virtual activities such as visiting vendor booths, learning about Cloud Native projects, and exploring the advancement of cloud native computing.

The keynote started off by paying respects to the passing of the legendary Dan Kohn. Kohn’s influence has changed how we do online shopping to research on the internet and made ways for the new evolutions of The Linux Foundation and Cloud Native Computing Foundation for an exciting future for many generations to come, while supporting the creation of sustainable open source ecosystems.

There were glitches while live streaming from the virtual conference platform, which was to be expected due to the real-time heavy load test that is not desirable in any production environments. Fortunately, on-demand recordings of the presentations are now available.

Slack channels can be joined from cloud-native.slack.com to communicate with others from channels like #kubecon-mixandmingle and other KubeCon-related topics. This feature provides a great way to connect with the KubeCon audience virtually even after the event is over.

KubeCon provides many 101 learning and tutorial events about the service CNCF projects offer and how it can help with the 3 main pillars that I am involved with daily: automation, dev-ops, and observability.  Each of the pillar implementations are usually done in parallel, for instance, continuous development and continuous deployment required automation in building the pipeline, involves creating codes and having knowledge in operations architecture planning.  Once deployed, the observability of the services running would be required to monitor for smooth services deliver to users.  Many of the projects from the CNCF provide the services front to help create the development flow from committing code that gets deployed into the cloud services and providing monitoring capabilities to the secured mesh services.

At Norconex, our upcoming Norconex Collector version 3.0.0 could be used with the combination of Containerd, Helm, and Kubernetes and with automating the build and deployment via Jenkins. One way to get started is to figure out how to package the Norconex Collector and Norconex Committer into a container-runnable image with container tools such as Docker to run builds for development and testing. After discerning how to build the container image, I have to decide where to deploy and store the container image registry so that the Kubernetes cluster can pull the image from this registry and run the container image with Kubernetes Cronjob based on a schedule when the job should run.  The Kubernetes Job would create Pod to run crawl using the Norconex Collector and commit indexed data. Finally, I would choose Jenkins as the build tool for this experiment to help to automate updates and deployments. 

Below are steps that provide an overview for my quick demo experiment setup:

  1. Demo use of the default Norconex Collector:
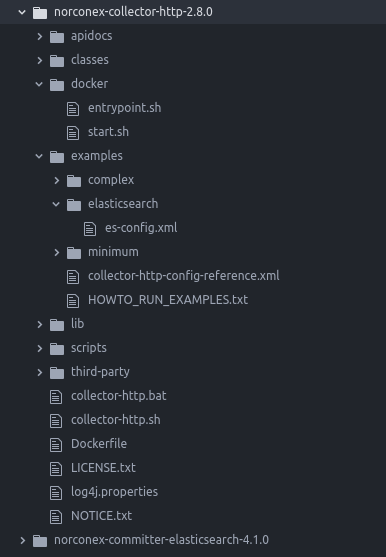
    • Download | Norconex HTTP Collector with Filesystem Committer. The other choices of Committers can be found at Norconex Committers
    • Build container image using Dockerfile
    • Setup a Git repository file structure for container image build
    • Guide to build and test-run using the created Dockerfile
      • Demo set up locally using Docker Desktop to run Kubernetes
        • Tutorials for setting up local Kubernetes
  2. Determine where to push the container image; can be public or private image registry such as Docker Hub
  3. Create a Helm Chart template using the Helm Chart v3
    • Demo will start with default template creation of Helm Chart
    • Demo to use the Kubernetes Node filesystem for persistent storage
      • Other storage options can be used, for instance, in AWS use EBS volume or EFS
    • Helm template and yaml configuration
      • cronjob.yaml to deploy Kubernetes Cronjob that would create new Kubernetes job to run on schedule
      • pvc.yaml to create Kubernetes persistent volume and persistent volume claim that the Norconex Collector crawl job will use on the next recrawl job run
  4. Simple build using Jenkins
    • Overview of Jenkins build job pipeline script

I hope you enjoyed this recap of Kubecon!


More details of the codes and tutorials can be found here:

https://github.com/somphouang/norconex-devops-demo


Introduction

Docker is popular because it makes it easy to package and deliver programs. This article will show you how to run the Java-based, open-source crawler, Norconex HTTP Collector and Elasticsearch Committer in Docker to crawl a website and index its content into Elasticsearch. At the end of this article, you can find links to download the complete, fully functional files.

Overview

Here is the whole structure, which contains a “Dockerfile” to make a Docker image, “entrypoint.sh” and “start.sh” in “bin/” directory to configure and execute the Docker container, and “es-config.xml” in “examples/elasticsearch” as Norconex-Collector’s configuration file to crawl a website and index contents into Elasticsearch.

Installation

We are using Docker Community Edition in this tutorial. See Install Docker for more information.

Download the latest Norconex Collector and extract the downloaded .zip file. See Getting Started for more details.

Download the latest Norconex Elasticsearch Committer and install it. See Installation for more details.

Collector Configuration

Create “es-config.xml” in the “examples/elasticsearch” directory. In this tutorial, we will crawl /product/collector-http-test/complex1.php and /product/collector-http-test/complex2.php  and index them to Elasticsearch, which is running on 127.0.0.1:9200, with an index named “norconex.” See Norconex Collector Configuration as a reference.

<?xml version="1.0" encoding="UTF-8"?>
<!--
   Copyright 2010-2017 Norconex Inc.

   Licensed under the Apache License, Version 2.0 (the "License");
   you may not use this file except in compliance with the License.
   You may obtain a copy of the License at

       http://www.apache.org/licenses/LICENSE-2.0

   Unless required by applicable law or agreed to in writing, software
   distributed under the License is distributed on an "AS IS" BASIS,
   WITHOUT WARRANTIES OR CONDITIONS OF ANY KIND, either express or implied.
   See the License for the specific language governing permissions and
   limitations under the License.
-->
<httpcollector id="Norconex Complex Collector">

  #set($http = "com.norconex.collector.http")
  #set($core = "com.norconex.collector.core")
  #set($urlNormalizer   = "${http}.url.impl.GenericURLNormalizer")
  #set($filterExtension = "${core}.filter.impl.ExtensionReferenceFilter")
  #set($filterRegexRef  = "${core}.filter.impl.RegexReferenceFilter")
  #set($committerClass = "com.norconex.committer.elasticsearch.ElasticsearchCommitter")
  #set($searchUrl = "http://127.0.0.1:9200")

  <progressDir>../crawlers/norconex/progress</progressDir>
  <logsDir>../crawlers/norconex/logs</logsDir>

  <crawlerDefaults>
    <referenceFilters>
      <filter class="$filterExtension" onMatch="exclude">jpg,gif,png,ico,css,js</filter>
    </referenceFilters>
    <urlNormalizer class="$urlNormalizer">
      <normalizations>
        removeFragment, lowerCaseSchemeHost, upperCaseEscapeSequence,
        decodeUnreservedCharacters, removeDefaultPort, encodeNonURICharacters,
        removeDotSegments
      </normalizations>
    </urlNormalizer>
    <maxDepth>0</maxDepth>
    <workDir>../crawlers/norconex/workDir</workDir>
    <!-- We know we don't want to crawl the entire site, so ignore sitemap. -->
    <sitemapResolverFactory ignore="true" />
  </crawlerDefaults>
  <crawlers>
    <crawler id="Norconex Complex Test Page 1">
      <startURLs>
        <url>/product/collector-http-test/complex1.php</url>
      </startURLs>
      <committer class="$committerClass">
    	  		<nodes>$searchUrl</nodes>
    	  		<indexName>norconex</indexName>
            <typeName>web</typeName>
    	  		<queueDir>../crawlers/norconex/committer-queue</queueDir>
    	  		<targetContentField>body</targetContentField>
    	  		<queueSize>100</queueSize>
  			<commitBatchSize>500</commitBatchSize>
   		</committer>
    </crawler>
    <crawler id="Norconex Complex Test Page 2">
      <startURLs>
        <url>/product/collector-http-test/complex2.php</url>
      </startURLs>
      <committer class="$committerClass">
    	  		<nodes>$searchUrl</nodes>
    	  		<indexName>norconex</indexName>
            <typeName>web</typeName>
    	  		<queueDir>../crawlers/norconex/committer-queue</queueDir>
    	  		<targetContentField>body</targetContentField>
    	  		<queueSize>100</queueSize>
  			<commitBatchSize>500</commitBatchSize>
   		</committer>
    </crawler>
  </crawlers>
</httpcollector>

Entrypoint and Start Scripts

Create a directory, “docker”, to store the configuration and execute scripts.

Entrypoint.sh:

#!/bin/sh
set -x
set -e

set -- /docker/crawler/docker/start.sh "$@"

exec "$@"

start.sh:

#!/bin/sh
set -x
set -e
${CRAWLER_HOME}/collector-http.sh -a start -c examples/elasticsearch/es-config.xml

Dockerfile

A Dockerfile is a simple text -file that contains a list of commands that the Docker client calls on while creating an image. Create a new file, “Dockerfile”, in the “norconex-collector-http-2.8.0” directory.
Let’s start with the base image “java:8-jdk” using FROM keyword.

FROM java:8-jdk

Set environment variables and create a user and group in the image. We’ll set DOCKER_HOME and CRAWLER_HOME environment variables and create the user and group, “crawler”.

ENV DOCKER_HOME /docker
ENV CRAWLER_HOME /docker/crawler
RUN groupadd crawler && useradd -g crawler crawler

The following commands will create DOCKER_HOME and CRAWLER_HOME directories in the container and copy the content from the “norconex-collector-http-2.8.0” directory into CRAWLER_HOME.

RUN mkdir -p ${DOCKER_HOME}
RUN mkdir -p ${CRAWLER_HOME}
COPY ./ ${CRAWLER_HOME}

The following commands change ownership and permissions for DOCKER_HOME, set entrypoint, and execute the crawler.

RUN chown -R crawler:crawler ${DOCKER_HOME} && chmod -R 755 ${DOCKER_HOME}
ENTRYPOINT [ "/docker/crawler/docker/entrypoint.sh" ]
CMD [ "/docker/crawler/docker/start.sh" ]

Almost There

Build a Docker image of Norconex Collector with the following command:

$ docker build -t norconex-collector:2.8.0 .

You will see this success message:

Successfully built 43298c7de13f
Successfully tagged norconex-collector:2.8.0

Start Elasticsearch for development with the following command (see Install Elasticsearch with Docker for more details):

$ docker run -p 9200:9200 -p 9300:9300 -e "discovery.type=single-node" docker.elastic.co/elasticsearch/elasticsearch:6.1.2

Start Norconex Collector.

$ docker run --net=host norconex-collector:2.8.0

Let’s verify the crawling result. Visit http://127.0.0.1:9200/norconex/_search?pretty=true&q=* and you will see two indexed documents.

Conclusion

This tutorial is for development or testing use. If you would like to use it in a production environment, then we recommend that you consider the data persistence of Elasticsearch Docker container, security, and so forth, based on your particular case.

Useful Links

Download Norconex Collector
Download Norconex Elasticsearch Committer

DockerDocker is all the rage at the moment! It was recently selected as Gartner Cool Vendor in DevOps. As you may already know, Docker is a platform to build and deploy applications as self-contained units. Those units, called containers, can be executed consistently on a developer laptop or production server. Since containers include all their dependencies, they are truly portable. And, compared to normal virtual machine images, Docker containers are much more lightweight because they don’t need as much infrastructure as a normal VM. Docker containers are built from an image, a simple text file describing the steps needed to assemble and execute the container. But the goal of this blog post is not to be a Docker tutorial. If you need it, there are plenty of good resources to get you started, like the Docker User Guide, this series of video tutorials recently published on their blog or the nice 10-minute tutorial where you can try Docker online. In this post, we will be using Docker 1.6.

We recently encountered a situation where we needed to use Solr 5 on a server already installed with Java 6. But Solr 5 requires at least Java 7. And, for different reasons, upgrading to Java 7 on this server was not an option. The solution? Run Solr 5 in a Docker container using the appropriate Java version! Containers are completely isolated, so this has no impact on the other applications running on the server.

It’s easy to build a Docker image for Solr 5. But, it’s even easier to use an already-existing image! Unfortunately, Docker does not offer an official Solr image (like it does for Elasticsearch). But the community has built multiple good-quality Solr images. We decided to use makuk66/docker-solr, which is actively maintained and has the options we needed. For example, this image has options to use SolrCloud. For this post, we will limit ourselves to using Solr cores.

First, you need to pull the image:

$ docker pull makuk66/docker-solr

Then, you can simply start a container with:

$ docker run -d -p 8983:8983 --name solr5 makuk66/docker-solr

You should be able to connect to Solr on port 8983.

But, as it is, you can’t add a core to this Solr installation. Solr requires the core files (solrconfig.xml, schema.xml, etc.) to be already on the server (in this case the container), which the makuk66/docker-solr does not provide. So we have to provide the core configuration files to the Docker container. The easy way to do so is to use Docker volumes, which link a directory on the host server to a directory of the Docker container. For example, let’s assume we create the necessary configuration files for the Solr core at ~/solr5/myindex on our server. This directory should contain a sub-directory conf with all the usual files, like solrconfig.xml and schema.xml. The myindex directory should also have a core.properties file with the content name=myindex.

$ cd ~/solr5/myindex
$ tree .
.
├── conf
│   ├── admin-extra.html
│   ├── admin-extra.menu-bottom.html
│   ├── admin-extra.menu-top.html
│   ├── _rest_managed.json
│   ├── schema.xml
│   └── solrconfig.xml
└── core.properties

1 directory, 7 files

Docker will need write access to the myindex directory (to create the data directory containing the Lucene index, for example). There are multiple ways to accomplish this, but here we simply change the group owner of the myindex directory to be docker and allow group members write access to the folder:

$ chgrp docker ~/solr5/myindex
$ chmod g+w ~/solr5/myindex

Now that the myindex directory is ready, we will need to link it so that it is available under the solr.home directory of the Docker container. What is the solr.home directory of the container? It’s easy to get this from Solr. When connecting to the Solr instance on port 8983, you should be redirected to the Solr dashboard. On this page, you should see the list of JVM parameters, and one of them is -Dsolr.solr.home

Docker Solr5 Dashboard

We can now remove the previous container:

$ docker rm -f solr5

and start a new one with a volume:

$ docker run -d -p 8983:8983 -v ~/solr5/myindex:/opt/solr/server/solr/myindex --name solr5 makuk66/docker-solr

Notice the -v parameter. It links the ~/solr5/myindex directory of the server to the /opt/solr/server/solr/myindex of the container. Every time Solr reads or writes data to the /opt/solr/server/solr/myindex directory, it will actually be accessing our ~/solr5/myindex directory. This is where Solr will create the data directory. Great, because Docker recommends that all files created by the container be held outside of the container. If you access the Solr instance on port 8983, you should now have the myindex core available.

The Docker container was started with basic JVM settings. What if we need to allocate more memory to Solr or other options? Docker allows us to override the default startup command defined in the image. For example, here is how we could start the container with more memory (don’t forget to remove the previous container):

$ docker run -d -p 8983:8983 -v ~/solr5/myindex:/opt/solr/server/solr/myindex --name solr5 makuk66/docker-solr "/bin/bash" "-c" "/opt/solr/bin/solr -m 1g -f"

To confirm that everything is fine with our Solr container, you can consult the logs generated by Solr with:

$ docker logs solr5

Conclusion

There is a lot more to be said about Docker and Solr 5, like how to use a specific Solr version or how to use SolrCloud. Hopefully this blog post was enough to get you started!