Introduction
Azure Cognitive Search is a robust cloud-based service that enables organizations to build sophisticated search experiences. In this blog post, you will learn how to utilize Norconex Web Crawler to index data into Azure Cognitive Search and enhance your organization’s search capabilities.
Understanding Norconex Web Crawler
Norconex Web Crawler is an open-source web crawler designed to extract, parse, and index content from the web. The crawler’s flexibility and ease of use make it an excellent choice for extracting data from the web. Plus, Norconex offers a range of committers that index data to various repositories. See https://opensource.norconex.com/committers/ for a complete list of supported target repositories. If the provided committers do not meet your organizational requirements, you can extend the Committer Core and create a custom committer.
This blog post will focus on indexing data to Microsoft Azure Cognitive Search.
Prerequisites
Azure Cognitive Search
Before getting started, make sure you’ve already set up an Azure Cognitive Search service instance through your Azure portal. Consult the official Microsoft documentation for guidance on setting up this service.
After completing the setup, create an Index where you will index/commit your data. Then configure the index with the following fields:

Note: For this exercise, the English – Lucene analyzer will be used for the title, description, and content fields.
Note that the following 3 items are required to configure the Norconex Azure Cognitive Search Committer:
- URL (listed on the Overview page of your Azure Cognitive Search portal)
- Admin API key (listed under Settings -> Keys)
- Index name
Norconex Web Crawler
Download the latest version of the Web Crawler from Norconex’s website. At the time of this writing, version 3.0.2 is the most recent version.
Download the latest version of Azure Search Committer. At the time of this writing, version 2.0.0 is the most recent version.
Follow the Automated Install instructions to install the Azure Search Committer libraries into the Crawler.
Crawler Configuration
We will use the following Crawler configuration for this test. Place this configuration in the root folder of your Crawler installation, with the filename my-config.xml.
<?xml version="1.0" encoding="UTF-8"?>
<!DOCTYPE xml>
<httpcollector id="Norconex HTTP Collector">

  <!-- Decide where to store generated files. -->
  <workDir>./output</workDir>
  <crawlers>
    <crawler id="Norconex Azure Committer Demo">
      <startURLs
        stayOnDomain="true"
	stayOnPort="true"
	stayOnProtocol="true">
	<url>https://github.com/</url>
      </startURLs>
      <!-- only crawl 1 page -->
      <maxDepth>0</maxDepth>
      <!-- We know we don't want to crawl the entire site, so ignore sitemap. -->
      <sitemapResolver ignore="true" />
      <!-- Be as nice as you can to sites you crawl. -->
      <delay default="5 seconds" />
      <importer>
        <postParseHandlers>
          <!-- only keep `description` and `title` fields -->
          <handler class="KeepOnlyTagger">
            <fieldMatcher method="csv">
              description,title
            </fieldMatcher>
          </handler>
        </postParseHandlers>
      </importer>
      <committers>
        <!-- send documents to Azure Cognitive Search -->
   	<committer class="AzureSearchCommitter">
          <endpoint>https://....search.windows.net</endpoint>
            <apiKey>...</apiKey>
            <indexName>...</indexName>
        </committer>
      </committers>
    </crawler>
  </crawlers>
</httpcollector>
Be sure to appropriately set the endpoint, apiKey, and indexName under the section. Recall that you noted this information while satisfying the Azure Search Prerequisites.
Start the Crawler
Norconex Web Crawler comes packaged with shell scripts to start the application. To start the crawler, run the following command in a shell terminal. The example below is for a Windows machine. If you are using Linux, use the collector-http.sh script instead.
C:\Norconex\norconex-collector-http-3.0.2>collector-http.bat start -clean -config=.\my-config.xmlRecall that you saved the Crawler configuration at the root of your Crawler installation.
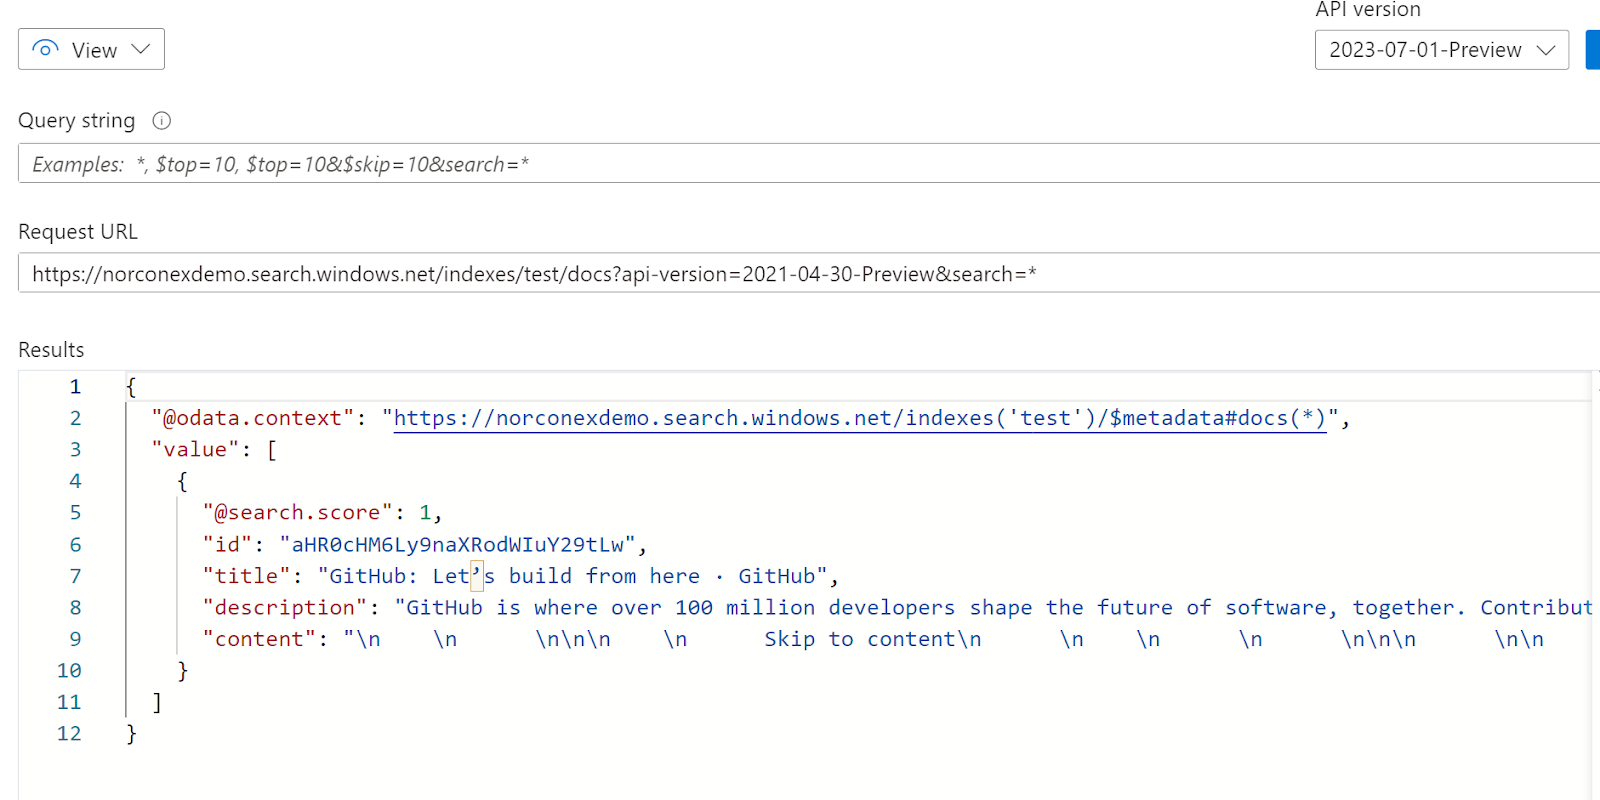
Since only a single page is being indexed, the crawl job will only take a few seconds. Once the job completes, you can query the Azure Cognitive Search portal and see the document was indexed!
Common pitfalls
Invalid API key
If the API key is invalid, the Crawler will throw a “Forbidden” error.
Invalid HTTP response: "Forbidden". Azure Response:Ensure that you use the Admin API key
Invalid index name
If the indexName provided in the Crawler config does not match what is in your Azure Search, you will see this error.
CommitterException: Invalid HTTP response: "Not Found". Azure Response: {"error":{"code":"","message":"The index 'test2' for service 'norconexdemo' was not found."}}Misconfigured fields in the Azure Search index
If you did not add title, description and content fields to your index, the Crawler will throw an exception referencing the missing field.
CommitterException: Invalid HTTP response: "Bad Request". Azure Response: {"error":{"code":"","message":"The request is invalid. Details: parameters : The property 'content' does not exist on type 'search.documentFields'. Make sure to only use property names that are defined by the type."}}Conclusion
Azure Cognitive Search, combined with the powerful data ingestion capabilities of Norconex Web Crawler, offers a potent solution for indexing and searching data from various sources. Following the steps outlined in this blog post, you can seamlessly integrate and update your organization’s Azure search index with fresh, relevant data. Leveraging the flexibility and scalability of Azure Cognitive Search will allow you to deliver exceptional search experiences to your users and gain valuable insights from your data. Happy indexing!