Amazon Web Services (AWS) have been all the rage lately, used by many organizations, companies and even individuals. This rise in popularity can be attributed to the sheer number of services provided by AWS, such as Elastic Compute (EC2), Elastic Beanstalk, Amazon S3, DynamoDB and so on. One particular service that has been getting more exposure very recently is the Amazon CloudSearch service. It is a platform that is built on top of the Apache Solr search engine and enables the indexing and searching of documents with a multitude of features.
The main focus of this blog post is crawling and indexing sites. Before delving into that, however, I will briefly go over the steps to configure a simple AWS CloudSearch domain. If you’re already familiar with creating a domain, you may skip to the next section of the post.
Starting a Domain
A CloudSearch domain is the search instance where all your documents will be indexed and stored. The level of usage of these domains is what dictates the pricing. Visit this link for more details.
Luckily, the web interface is visually appealing, intuitive and user friendly. First of all, you need an AWS account. If you don’t have one already, you can create one now by visiting the Amazon website. Once you have an account, simply follow these steps:
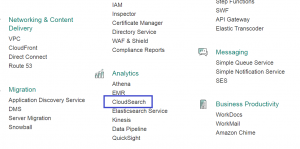
1) Click the CloudSearch icon (under the Analytics section) in the AWS console.
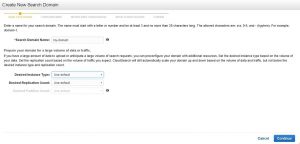
2) Click the “Create new search domain” button. Give the domain a name that conforms to the rules given in the first line of the popup menu, and select the instance type and replication factor you want. I’ll go for the default options to keep it simple.
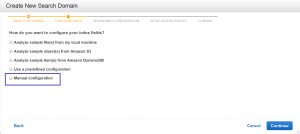
3) Choose how you want your index fields to be added. I recommend starting off with the manual configuration option because it gives you the choice of adding the index fields at any time. You can find the description of each index field type here:

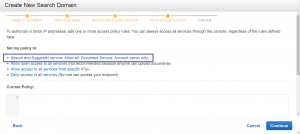
4) Set the access policies of your domain. You can start with the first option because it is the most straightforward and sensible way to start.
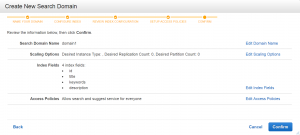
5) Review your selected options and edit what needs to be edited. Once you’re satisfied with the configurations, click “Confirm” to finalize the process.
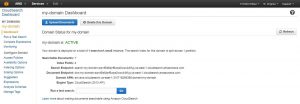
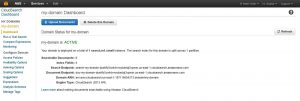
It’ll take a few minutes for the domain to be ready for use, as indicated by the yellow “LOADING” label that shows up next to the domain name. A green “ACTIVE” label shows up once the loading is done.
Now that the domain is fully loaded and ready to be used, you can choose to upload documents to it, add index fields, add suggesters, add analysis schemes and so on. Note, however, that the domain will need to be re-indexed for every change that you apply. This can be done by clicking the “Run indexing” button that pops up with every change. The time it takes for the re-indexing to finish depends on the number of documents contained in the domain.
As mentioned previously, the main focus of this post is crawling sites and indexing the data to a CloudSearch domain. At the time of this writing, there are very few crawlers that are able to commit to a CloudSearch domain, and the ones that do are unintuitive and needlessly complicated. The Norconex HTTP Collector is the only crawler that has CloudSearch support that is very intuitive and straightforward. The remainder of this blog post aims to guide you through the steps necessary to set up a crawler and index the data to a CloudSearch domain in as simple and informative steps as possible.

Setting up the Norconex HTTP Collector
The Norconex HTTP Collector will be installed and configured in a Linux environment using Unix syntax. You can still, however, install on Windows, and the instructions are just as simple.
Unzip the downloaded file and navigate to the extracted folder. If needed, make sure to set the directory as readable and writable using the chmod command. Once that’s done, follow these steps:
1) Create a directory and name it testCrawl. In the folder myCrawler, create a file config.xml and populate it with the minimal configuration file, which you can find in the examples/minimum directory.
2) Give the crawler a name in the <httpcollector id="..."> I’ll name my crawler TestCrawl.
3) Set progress and log directories in their respective tags:
<progressDir>./testCrawl/progressdir</progressDir>
<logsDir>./testCrawl/logsDir</logsDir>
4) Within <crawlerDefaults>, set the work directory where the files will be stored during the crawling process:
<workDir>./testCrawl/workDir</workDir>
5) Type the site you want crawled in the [tag name] tag:
<url>http://beta2.norconex.com/</url>
Another method is to create a file with a list of URLs you want crawled, and point to the file:
<urlsFile>./urls/urlFile</urlsFile>
6) If needed, set a limit on how deep (from the start URL) the crawler can go and a limit on the number of documents to process:
<maxDepth>2</maxDepth>
<maxDocuments>10</maxDocuments>
7) If needed, you can set the crawler to ignore documents with specific file extensions. This is done by using the ExtensionReferenceFilter class as follows:
<referenceFilters>
  	<filter
     	class="com.norconex.collector.core.filter.impl.ExtensionReferenceFilter"
            onMatch="exclude" caseSensitive="false">
         	png,gif,jpg,jpeg,js,css
  	</filter>
</referenceFilters>
8) You will most likely want to use an importer to parse the crawled data before it’s sent to your CloudSearch domain. The Norconex importer is a very intuitive and easy-to-use tool with a plethora of different configuration options, offering a multitude of pre- and post-parse taggers, transforms, filters and splitters, all of which can be found here. As a starting point, you may want to use the KeepOnlyTagger as a post-parse handler, where you get to decide on what metadata fields to keep:
<importer>
      <postParseHandlers>
         <tagger class="com.norconex.importer.handler.tagger.impl.KeepOnlyTagger">
            <fields>title,description</fields>
         </tagger>
       </postParseHandlers>
</importer>
Be sure that your CloudSearch domain has been configured to support the metadata fields described above. Also, make sure to have a ‘content’ field in your CloudSearch domain as the committer assumes that there’s one.
The config.xml file should look something like this:
<?xml version="1.0" encoding="UTF-8"?>
<!--
   Copyright 2010-2015 Norconex Inc.

   Licensed under the Apache License, Version 2.0 (the "License");
   you may not use this file except in compliance with the License.
   You may obtain a copy of the License at

       http://www.apache.org/licenses/LICENSE-2.0

   Unless required by applicable law or agreed to in writing, software
   distributed under the License is distributed on an "AS IS" BASIS,
   WITHOUT WARRANTIES OR CONDITIONS OF ANY KIND, either express or implied.
   See the License for the specific language governing permissions and
   limitations under the License.
-->
<!-- This configuration shows the minimum required and basic recommendations
     to run a crawler.
     -->
<httpcollector id="TestCrawl">

  <!-- Decide where to store generated files. -->
  <progressDir>../myCrawler/testCrawl/progress</progressDir>
  <logsDir>../myCrawler/testCrawl/logs</logsDir>

  <crawlers>
    <crawler id="CloudSearch">

      <!-- Requires at least one start URL (or urlsFile).
           Optionally limit crawling to same protocol/domain/port as
           start URLs. -->
      <startURLs stayOnDomain="true" stayOnPort="true" stayOnProtocol="true">
        <url>http://beta2.norconex.com/</url>
      </startURLs>

      <!-- === Recommendations: ============================================ -->

      <!-- Specify a crawler default directory where to generate files. -->
      <workDir>../myCrawler/testCrawl</workDir>

      <!-- Put a maximum depth to avoid infinite crawling (e.g. calendars). -->
      <maxDepth>2</maxDepth>
      <maxDocuments>10</maxDocuments>

      <!-- We know we don't want to crawl the entire site, so ignore sitemap. -->
      <!-- Before 2.3.0: -->
      <sitemap ignore="true" />
      <!-- Since 2.3.0: -->
      <sitemapResolverFactory ignore="true" />

      <!-- Be as nice as you can to sites you crawl. -->
      <delay default="5000" />


      <referenceFilters>
      	<filter class="$filterExtension"
			onMatch="exclude"
			caseSensitive="false" >
			png,gif,jpg,jpeg,js,css
		</filter>
      </referenceFilters>


      <!-- Document importing -->

      <importer>
        <postParseHandlers>
          <tagger class="com.norconex.importer.handler.tagger.impl.KeepOnlyTagger">
            <fields>title,description/fields>
          </tagger>
        </postParseHandlers>
      </importer>

 	</crawler>
  </crawlers>
</httpcollector>
The Norconex CloudSearch Committer
The Norconex http collector is compatible with several committers such as Solr, Lucidworks, Elasticsearch, etc. Visit this website to find out what other committers are available. The latest addition to this set of committers is the AWS CloudSearch committer. This is an especially useful committer since the very few publicly available CloudSearch committers are needlessly complicated and unintuitive. Luckily for you, Norconex solves this issue by offering a very simple and straightforward CloudSearch committer. All you have to do is:
1) Download the JAR file from here, and move it to the lib folder of the http collector folder.
2) Add the following towards the end of the <craweler></crawler> block (right after the specifying the importer) in your config.xml file:
<committer class="com.norconex.committer.cloudsearch.CloudSearchCommitter">
    <documentEndpoint></documentEndpoint>
    <accessKey></accessKey>
    <secretAccessKey></secretAccessKey>
</committer>
You can obtain the URL for your document endpoint from your CloudSearch domain’s main page. As for the AWS credentials, specifying them in the config file could result in an error due to a bug in the committer. Therefore, we strongly recommend that you DO NOT include the <accessKey> and <secretAccessKey> variables. Instead, we recommend that you set two environment variables, AWS_ACCESS_KEY and AWS_SECRET_ACCESS_KEY with their respective values. To obtain and use these values, refer to the AWS documentation.
Run the Crawler!
All that is left to do is to run the http collector using the Linux shell script (from the main collector directory):
./collector-http.sh -a start -c ./myCrawler/config.xml
Give the crawler some time to crawl the specified URLs, until it reaches the <maxDepth> or <maxDocuments> constraints, or if it finds no more URLs to crawl. Once the crawling is complete, the successfully processed documents will be committed to the domain specified in the <documentEndpoint> option.
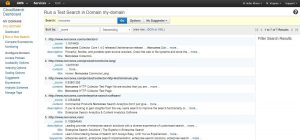
To confirm that the documents have indeed been uploaded, you can go to the domain’s main page and see how many documents are stored and run a test search.
