Introduction

In the ever-evolving landscape of enterprise search, maintaining optimal relevance in search results is a perpetual challenge. In fact, the delicate balance of relevance often teeters on the edge of uncertainty as organizations regularly update their data. An intricate web of parameters, filters, and algorithms dictates what users see in their search results, and those dynamics demand a strategic approach. The goal of that approach is to ensure updates do not inadvertently disrupt the delicate equilibrium of relevance. Accordingly, ensuring any changes made to alter search relevancy are moving the needle in the right direction is imperative.
Search relevance is a measure of how effectively a search system aligns with the user’s intentions and expectations. As the enterprise Search space has evolved, locating the correct documents has become easier, but arranging them in a meaningful sequence remains a formidable challenge.

The Problem

Many factors influence relevancy in an enterprise search solution. As data is added/removed or organizational search strategy changes, how can relevancy be measured to ensure it stays, well, relevant?

A Solution

In an ideal world, you would leverage users to identify “good” and “bad” search results and then tweak your search engine. However, this strategy may not be possible in the world of enterprise search due to budget or resource constraints. This raises a question: how can relevancy changes be tracked automatically? This blog presents one of many possible ways to track relevancy changes in an enterprise search solution. After the initial setup, this solution can largely be automated.
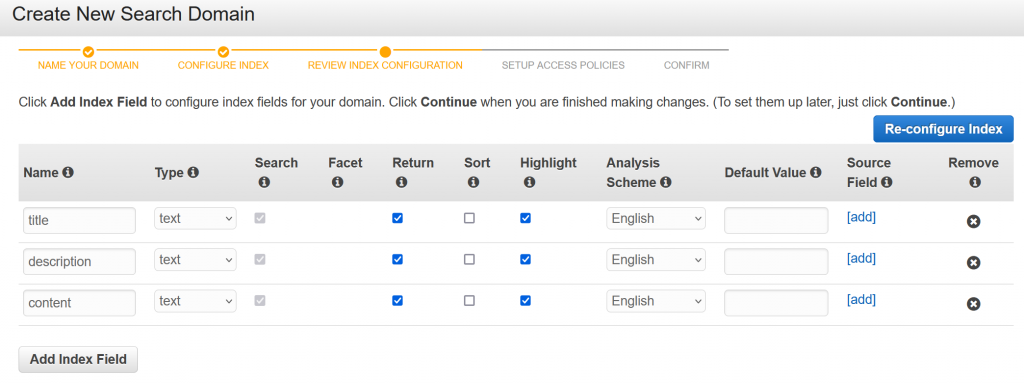
Step 1

Pick the top 100 (or 1,000 or more!) of the most popular terms of your search application. Ideally, these terms should be extracted from an analytics system already in place in the organization, such as Google Analytics.

Step 2

For each term in the list, figure out what a “good” set of results looks like. This task can be daunting, but it doesn’t need to be. As a starting point, take the current result set from your system for each term. Then, over time, this result set can be updated a few terms at a time. This list is your “ideal” result set — given a search term, this result set tells you information about which documents should be included and in what order.

The list can be stored in a database or simply as a CSV. Here is an example of what a CSV might look like for a system where the top 5 results matter.

homer simpsonid-123id-423id-391id-508id-185
another thing user searches forid-008id-872id-876id-281id-119

For the search term homer simpson, results must be in the following order: id-123, id-423, id-391, id-508, id-185.

Your organizational needs will ultimately determine which information is important. For example, if search strategy dictates that there is some flexibility with the order of search results, then the positions can be stored in the CSV. Here’s what that might look like.

homer simpsonid-1231-2id-3912-4id-1852-5
another thing user searches forid-0081-1id-8762-3id-1193-5

For the term homer simpson, document with ID id-123 must either be the first or second result.

As noted previously, this list will never be complete. It will evolve alongside organizational needs. With time, terms will added/removed and results for existing term(s) will be adjusted.

Step 3

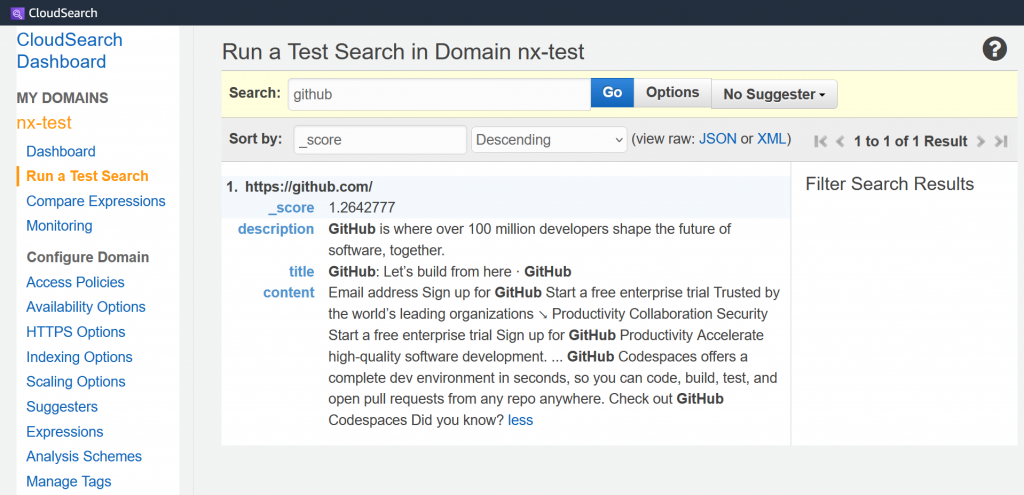
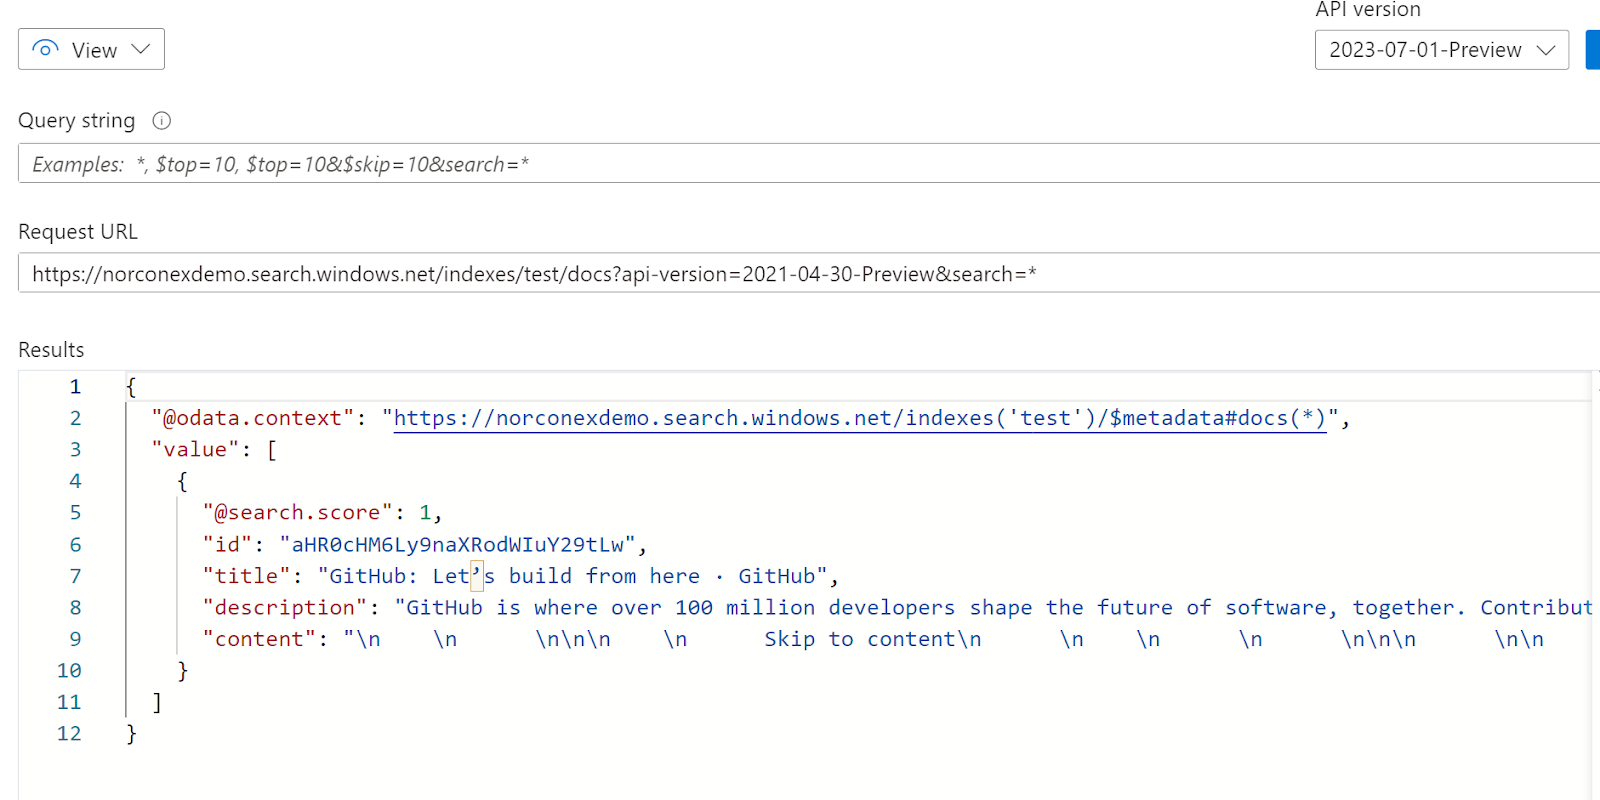
Build a tool in the language of your choice to compare the “ideal” list with the actual results from your search system. 

This tool will need to do the following:

  1. Read the existing “ideal” list created in Step 2 above
  2. Query the search engine to record actual results from each term from the list
  3. Compare the actual vs ideal for each term
  4. Save the results in the target repo of your choice, which not only simplifies the evaluation process but also helps identify trends over time

For simplicity, having a formula for the comparison is beneficial. The end goal is to have a number that shows you whether a search term’s relevancy improved or worsened. In a solution with a flexible order of results, here’s what that formula might look like:

For each search result within a search term,

  • if it is within the “ideal” range, give it a score of 0
  • if it is higher or lower than it should be, find the difference in position

Add scores for each result. The closer this number is to 0, the closer the results are to the “ideal” result.

The tool is now built. Next, let’s look at how to use it.

Put It All Together

Every time the tool is run, you get a snapshot of how well the system is performing in terms of relevancy. Organizational goals, however, will ultimately dictate how often the tool is run. Perhaps more importantly, the tool enables you to test impacts to relevancy when making changes!

Let’s look at a factitious example.

Organizational search strategy now dictates that fieldA is the most important field in the data corpus. Accordingly, a boost rule is to be added that increases the weight of fieldA. Thanks to the tool, you can now understand how such a change will impact search relevancy.

  1. Run the tool to get current relevancy in the system
  2. Add the boost rule to the search application
  3. Run the tool again
  4. Compare results from Step 1 and 3

There you have it! With that practical solution, you can track relevancy changes in an enterprise search application.

Conclusion

The need for a strategic approach to track and adapt to changes is evident in the dynamic realm of enterprise search, where relevance is a perpetual challenge. But it doesn’t have to be one; the presented solution allows for adaptability to organizational changes, accommodating shifts in user expectations and content updates. While the initial setup may require thoughtful consideration of what constitutes an “ideal” result set, the subsequent automation of the process ensures ongoing relevancy assessment without overwhelming resource demands.

As organizations evolve, so too can their approach to tracking and adapting search relevancy. That evolution will help ensure a seamless alignment with user intentions and expectations in an ever-changing landscape.

Introduction

Managing vast amounts of data stored across various file systems can be a daunting task. But it doesn’t have to be! Norconex File System Crawler comes to the rescue, offering a robust solution for efficiently extracting, organizing, and indexing your files.

But did you know you can extend its capabilities without writing a single line of code? In this blog post, you’ll learn how to connect an external application to the Crawler and unleash its full potential.

The Use Case

Both Norconex File System Crawler and Norconex Web Crawler utilize Norconex Importer to extract data from documents. Right out of the box, the Importer supports various file formats, as documented here. But you may encounter a scenario where the Importer cannot parse a document. 

One such example is a RAR5 document. At the time of this writing, the latest version of File System Crawler is 2.9.1. Extracting a RAR5 file with this version throws the following exception.

com.norconex.importer.parser.DocumentParserException: org.apache.tika.exception.TikaException: Unexpected RuntimeException from org.apache.tika.parser.pkg.RarParser@35f95a13
...
Caused by: org.apache.tika.exception.TikaException: Unexpected RuntimeException from org.apache.tika.parser.pkg.RarParser@35f95a13
...
Caused by: java.lang.NullPointerException: mainheader is null
...

As you can see, Apache Tika’s RarParser class cannot extract the document. You’ll see how to work around this issue below.

Note: This blog post will focus on a no-code solution. However, if you can code, writing your own custom parser is highly recommended. Look at the Extend the File System Crawler section of the documentation on accomplishing just that.

ExternalTransformer to the Resuce

Many applications support the extraction of RAR files. One such application is 7zip. If you need to, go ahead and install 7zip on your machine now. You’ll need the application moving forward.

Overview

You will run 2 crawlers separately. The first crawls everything normally while ignoring RAR files. It will use the ExternalTransformer to extract the RAR file contents to folder X and do no further processing of the file. The second will crawl the extracted files in folder X.

Configs

Config for the first crawler is as follows, with helpful comment explanations of various options.

<?xml version="1.0" encoding="UTF-8"?>
<fscollector id="fs-collector-main">

#set($workdir = .\workdir-main)
#set($startDir = .\input)
#set($extractedDir = .\extracted)
#set($tagger = "com.norconex.importer.handler.tagger.impl")
#set($filter = "com.norconex.importer.handler.filter.impl")
#set($transformer = "com.norconex.importer.handler.transformer.impl")

  <logsDir>${workdir}/logs</logsDir>
  <progressDir>${workdir}/progress</progressDir>

  <crawlers>
	<crawler id="fs-crawler-main">
  	<workDir>${workdir}</workDir>
  	<startPaths>
    	<path>${startDir}</path>
  	</startPaths>
 	 
  	<importer>
    	<!-- do the following before attempting to parse a file -->
    	<preParseHandlers>
      	<transformer class="${transformer}.ExternalTransformer">
        	<!-- apply this transfomer to .rar files only -->
        	<restrictTo field="document.reference">.*\.rar$</restrictTo>
        	<!--
          	calls on 7zip to uncompress the file and place the contents in `extracted` dir
        	-->
        	<command>'C:\Program Files\7-Zip\7z.exe' e ${INPUT} -o${extractedDir} -y</command>
        	<metadata>
          	<pattern toField="extracted_paths" valueGroup="1">
            	^Path = (.*)$
          	</pattern>
        	</metadata>
        	<tempDir>${workdir}/temp</tempDir>
      	</transformer>

      	<!-- stop further processing of .rar files -->
      	<filter class="${filter}.RegexReferenceFilter" onMatch="exclude">
        	<regex>.*\.rar$</regex>
      	</filter>
   	 
    	</preParseHandlers>
  	</importer>
 	 
  	<!--
    	commit extracted files to the local FileSystem
    	You can substitute this with any of the available committers
  	-->
  	<committer class="com.norconex.committer.core.impl.FileSystemCommitter">
    	<directory>${workdir}/crawledFiles</directory>
  	</committer>
	</crawler>
    
  </crawlers>

</fscollector>

This crawler will parse all files normally, except RAR files. When encountering a RAR file, the Crawler will call upon 7zip to extract RAR files and place the extracted files under an extracted folder. No further processing will be done on these RAR files.

The second crawler is configured to simply extract files within the extracted folder. Here is the configuration:

<?xml version="1.0" encoding="UTF-8"?>
<fscollector id="fs-71-collector-extracted">

#set($workdir = .\workdir-extracted)
#set($startDir = .\extracted)

  <logsDir>${workdir}/logs</logsDir>
  <progressDir>${workdir}/progress</progressDir>

  <crawlers>

	<crawler id="fs-crawler-extracted">
  	<startPaths>
    	<path>${startDir}</path>
  	</startPaths>

  	<!--
    	commit extracted files to the local FileSystem
    	You can substitute this with any of the available committers
  	-->
  	<committer class="com.norconex.committer.core.impl.FileSystemCommitter">
    	<directory>${workdir}/crawledFiles</directory>
  	</committer>
	</crawler>
    
  </crawlers>

</fscollector>

There you have it! You just extended the capabilities of the File System Crawler without writing a single line of code – a testament to the incredible flexibility offered by the Crawler.

Conclusion

Norconex File System Crawler is undeniably a remarkable tool for web crawling and data extraction. Even more impressive is the ease with which you can extend the Crawler’s capabilities, all without the need for coding expertise. Whether you’re a seasoned professional or just getting started, let the Norconex File System Crawler – free from the complexities of coding – become your trusted companion in unleashing the full potential of your data management endeavours. Happy indexing!

Introduction

Norconex Web Crawler is a full-featured, open-source web crawling solution meticulously crafted to parse, extract, and index web content. The Crawler is flexible, adaptable and user-friendly, making it a top-notch selection for extracting data from the web.

As the volume and complexity of web crawling tasks increase, organizations face challenges in efficiently scaling the Crawler to meet organizational needs. Scaling effectively involves addressing issues related to configuration management, resource allocation, and the handling of large data sets to enable seamless scalability while maintaining data quality and integrity.

In this blog post you will learn how to handle configuration management for medium to large Crawler installations.

The Problem

Norconex Web Crawler only needs to be installed once, no matter how many sites you’re crawling. If you need to crawl different websites requiring different configuration options, you will likely need multiple configuration files. And as Crawling needs further grow, yet more configuration files will be needed. Some parts of these configuration files will inevitably have common elements as well. How can you minimize the duplication between configs?

The Solution: Apache Velocity Templates

Norconex Web Crawler configuration is not a plain XML file, but rather, a Apache Velocity template. Broadly speaking, the configuration file is interpreted by the Velocity Engine before being applied to the Crawler.
You can leverage the Velocity Engine to dynamically provide the appropriate values. The following sections walk you through exactly how to do so.

Variables

To keep things simple, consider a crawling solution that contains just 2 configuration files; one for siteA and one for siteB.

Note: This scenario is for demonstration purposes only. If you only have 2 sites to crawl, the following approach is not recommended.

Default configurations

The configurations for the 2 sites may look as follows.

siteA configuration

<?xml version="1.0" encoding="UTF-8"?>
<!DOCTYPE xml>
<httpcollector id="collector-siteA">
  <workDir>./workDir</workDir>
  <crawlers>
    <crawler id="crawler-siteA">
      <startURLs stayOnDomain="true">
   	  <url>www.siteA.com</url>
      </startURLs>
      <maxDepth>-1</maxDepth>
      <!-- redacted for brevity -->     
    </crawler>
  </crawlers>
</httpcollector>

siteB configuration

<?xml version="1.0" encoding="UTF-8"?>
<!DOCTYPE xml>
<httpcollector id="collector-siteB">
  <workDir>./workDir</workDir>
  <crawlers>
    <crawler id="crawler-siteB">
      <startURLs stayOnDomain="true">
        <url>www.siteB.com</url>
      </startURLs>
      <maxDepth>0</maxDepth>
      <!-- redacted for brevity -->
    </crawler>
  </crawlers>
</httpcollector>

As you can probably see, just 4 differences exist between the two configurations:

  • httpcollector id
  • crawler id
  • StartURLs
  • maxDepth

The common elements in both configurations should be shared. Below, you’ll learn how to share them with Velocity variables.

Optimized configuration

The following steps will optimize the configuration by extracting dynamic data to dedicated files thereby removing duplication.

First, extract unique items into their respective properties file

siteA.properties

domain=www.siteA.com
maxDepth=-1

siteB.properties

domain=www.cmp-cpm.forces.gc.ca
maxDepth=0

Then, add variables to the Crawler configuration and save it as my-config.xml at the root of your Crawler installation. The syntax to add a variable is ${variableName}.

<?xml version="1.0" encoding="UTF-8"?>
<!DOCTYPE xml>
<httpcollector id="collector-${domain}"> <!-- variable added here -->
  <workDir>./workDir</workDir>
  <crawlers>
    <crawler id="crawler-${domain}"> <!-- variable added here -->
      <startURLs stayOnDomain="true">
        <url>${domain}</url> <!-- variable added here -->
      </startURLs>   		 
      <maxDepth>${maxDepth}</maxDepth> <!-- variable added here -->
      <!-- redacted for brevity -->
    </crawler>
  </crawlers>
</httpcollector>

With the variables in place in the Crawler config, the variables file simply needs to be specified to the Crawler start script. This is accomplished with the -variables flag, as follows.

siteA

>collector-http.bat start -clean -config=my-config.xml -variables=siteA.properties

siteB

>collector-http.bat start -clean -config=my-config.xml -variables=siteB.properties

The Crawler will replace the variables in the config XML with what it finds in the .properties file.

The example above is for a Windows machine. If you are on Linux, use the collector-http.sh script instead.

Tip: If you’re interested in seeing what the config will look like after variables are replaced, use the configrender option.

>collector-http.bat configrender -c=my-config.xml -variables=siteA.properties -o=full_config.xml

So far, we have only seen the basics of storing data in variables. But what if siteA and siteB needed to commit documents to separate repositories? Below you’ll see how to leverage the power of Apache Velocity Engine to accomplish just that.

Importing Files

Using variables goes a long way toward organizing multiple configuration files. You can also dynamically include chunks of configuration by utilizing Velocity’s #parse() script element.

To demonstrate, consider that siteA is required to commit documents to Azure Cognitive Search and siteB to Elasticsearch. The steps below will walk you through how to accomplish just that.

First, you need 2 committer XML files.

committer-azure.xml

<committer class="AzureSearchCommitter">
  <endpoint>https://....search.windows.net</endpoint>   			 
  <apiKey>...</apiKey>
  <indexName>my_index</indexName>
</committer>

committer-es.xml

<committer class="ElasticsearchCommitter">
  <nodes>https://localhost:9200</nodes>
  <indexName>my_index</indexName>
</committer>

Then, augment the Crawler config (my-config.xml), and add the <committers> section

<?xml version="1.0" encoding="UTF-8"?>
<!DOCTYPE xml>
<httpcollector id="collector-${domain}">
  <workDir>./workDir</workDir>
    <crawlers>
      <crawler id="crawler-${domain}">
        <startURLs stayOnDomain="true">
          <url>${domain}</url>
        </startURLs>
  		 
  	<maxDepth>${maxDepth}</maxDepth>
  	
  	<!-- add this section -->
	<committers>
	  #parse("${committer}")
        </committers>
    </crawler>
  </crawlers>
</httpcollector>

Finally, the .properties files must be updated to specify the committer file we required for each.

siteA.properties

domain=www.siteA.com
maxDepth=-1
committer=committer-azure.xml

siteB.properties

domain=www.siteB.com
maxDepth=0
committer=committer-es.xml

Now you can use the configrender option to see the final configuration for each site.

siteA

>collector-http.bat configrender -c=my-config.xml -variables=siteA.properties -o=full_config.xml

Relevant snippet from full_config.xml.

<committers>
  <committer class="com.norconex.committer.azuresearch.AzureSearchCommitter">
    <endpoint>https://....search.windows.net</endpoint>
    <apiKey>...</apiKey>
    <indexName>my_index</indexName>
    <!-- redacted for brevity -->
  </committer>
</committers>

siteB

>collector-http.bat configrender -c=my-config.xml -variables=siteB.properties -o=full_config.xml

Relevant snippet from full_config.xml.

<committers>
  <committer class="com.norconex.committer.elasticsearch.ElasticsearchCommitter">
    <nodes>https://localhost:9200</nodes>
    <indexName>my_index</indexName>
    <!-- redacted for brevity -->
  </committer>
</committers>

And there you have it! With those simple steps, you can add the correct <committer> to the final configuration for each site.

Conclusion

As the scale and complexity of your projects grow, so does the challenge of managing multiple configuration files. Herein lies the beauty of harnessing the Apache Velocity Template Engine. By leveraging its power, you can streamline and organize your configurations to minimize redundancy and maximize efficiency. Say goodbye to duplicated efforts, and welcome a more streamlined, manageable, and scalable approach to web crawling. Happy indexing!

Introduction

Amazon CloudSearch, a powerful and scalable search and analytics service, has revolutionized how businesses handle data search and analysis. This blog post will walk you through how to set up and leverage Norconex Web Crawler to seamlessly index data to your Amazon CloudSearch domain.

Understanding Norconex Web Crawler

Norconex Web Crawler is an open-source web crawler designed to extract, parse, and index content from the web. For extracting data from the web, Crawler’s flexibility and ease of use make it an excellent choice. Norconex offers a range of committers that index data to various repositories. See https://opensource.norconex.com/committers/ for a complete list of supported target repositories. If the provided committers do not meet your requirements, extend the Committer Core and then create a custom committer to fit your needs.

This blog post will focus on indexing data to Amazon CloudSearch.

Prerequisites

Amazon CloudSearch

Follow the steps below to create a new Amazon CloudSearch Domain.

  • Enter a Search Domain Name. Next, select search.small and 1 for Desired Instance Type and Desired Replication Count, respectively.
  • Select Manual configuration from the list of options.
  • Add 3 fields – title, description, and content, of type text.
  • Authorize your IP address to send data to this CloudSearch instance. Click on Allow access to all services from specific IP(s). Then enter your public IP address.
  • That’s it! You have now created your own Amazon CloudSearch domain. AWS will take a few minutes to complete the setup procedure.

Important: You will need the accessKey and secretKey for your AWS account. Not sure where to get these values? Contact your AWS administrator.

After a few minutes, go to your CloudSearch Dashboard and make a note of the Document Endpoint.

Norconex Web Crawler

Download the latest version of Crawler from Norconex’s website. At the time of this writing, version 3.0.2 is the most recent.

Download the latest version of Amazon CloudSearch Committer. At the time of this writing, version 2.0.0 is the most recent.

Follow the Automated Install instructions to install Amazon CloudSearch Committer libraries in the Crawler.

Crawler Configuration

The following Crawler configuration will be used for this test. First, place the configuration in the root folder of your Crawler installation. Then, name it my-config.xml.

Ensure that you supply appropriate values for serviceEndpoint, accessKey, and secretKey. On your CloudSearch Dashboard, serviceEndpoint is the Document Endpoint.

<?xml version="1.0" encoding="UTF-8"?>
<!DOCTYPE xml>
<httpcollector id="Norconex HTTP Crawler">
  <!-- Decide where to store generated files. -->
  <workDir>./output</workDir>
  <crawlers>
    <crawler id="Norconex Amazon CloudSearch Committer Demo">

      <startURLs
   	 stayOnDomain="true"
   	 stayOnPort="true"
   	 stayOnProtocol="true">
   	 <url>https://github.com/</url>
      </startURLs>

      <!-- only crawl 1 page -->     
      <maxDepth>0</maxDepth>

      <!-- We know we don't want to crawl the entire site, so ignore sitemap. -->
      <sitemapResolver ignore="true" />

      <!-- Be as nice as you can to sites you crawl. -->
      <delay default="5 seconds" />

      <importer>
 	  <postParseHandlers>
   		 <!-- only keep `description` and `title` fields -->
  		 <handler class="KeepOnlyTagger">
  		   <fieldMatcher method="csv">
   			description,title
   		   </fieldMatcher>
  		</handler>
         </postParseHandlers>
  	 </importer>

      <committers>
	  <!-- send documents to Amazon CloudSearch -->
        <committer class="CloudSearchCommitter">   	
          <serviceEndpoint>...</serviceEndpoint>
          <accessKey>...</accessKey>
          <secretKey>...</secretKey>
  	  </committer>
      </committers>
	 
    </crawler>
  </crawlers>
</httpcollector>

Note that this configuration is the minimal required. To suit your needs, you can set many other parameters. Norconex’s documentation does an excellent job of detailing all the available parameters.

Important: For the purposes of this blog, AWS credentials are specified directly in the Crawler configuration as plain text. This practice is not recommended due to the obvious security issues doing so creates. Accordingly, please consult AWS documentation to learn about securely storing your AWS credentials.

Start the Crawler

Norconex Web Crawler comes packaged with shell scripts to start the application. To start the Crawler, run the following command in the console. The example below is for a Windows machine. If you are on Linux, use the collector-http.sh script instead.

C:\Norconex\norconex-collector-http-3.0.2>collector-http.bat start -clean -config=.\my-config.xml

Recall that you saved the configuration at the root of your Crawler installation.

The crawl job will take only a few seconds since only a single page is being indexed. Once the job completes, browse to your CloudSearch Dashboard. Then run a Test Search with the word github to see that the page was indeed indexed!

Conclusion

Indexing data to Amazon CloudSearch using Norconex Web Crawler opens a world of possibilities for data management and search functionality. Following the steps outlined in this guide, you can seamlessly integrate your data to Amazon CloudSearch, empowering your business with faster, more efficient search capabilities. Happy indexing!

Introduction

In the era of data-driven decision-making, efficient data indexing is pivotal in empowering businesses to extract valuable insights from vast amounts of information. Elasticsearch, a powerful and scalable search and analytics service, has become popular for organizations seeking to implement robust search functionality. Norconex Web Crawler offers a seamless and effective solution for indexing web data to Elasticsearch.

In this blog post, you will learn how to utilize Norconex Web Crawler to index data to Elasticsearch and enhance your organization’s search capabilities.

Understanding Norconex Web Crawler

Norconex Web Crawler is an open-source web crawler designed to extract, parse, and index content from the web. The crawler’s flexibility and ease of use make it an excellent choice for extracting data from the web. Plus, Norconex offers a range of committers that index data to various repositories. See https://opensource.norconex.com/committers/ for a complete list of supported target repositories. If the provided committers do not meet your organizational requirements, you can extend the Committer Core and create a custom committer.

This blog post will focus on indexing data to Elasticsearch.

Prerequisites

Elasticsearch

To keep things simple, we will rely on Docker to stand up an Elasticsearch container locally. If you don’t have Docker installed, follow the installation instructions on their website. Once Docker is installed, open a command prompt and run the following command.

docker run -d -p 9200:9200 -p 9600:9600 -e "discovery.type=single-node" -e "xpack.security.enabled=false" elasticsearch:7.17.10

This command does the following

  • requests version 7.17.10 of Elasticsearch
  • maps ports 9200 and 9600
  • sets the discovery type to “single-node”
  • disables the security plugin
  • Starts the Elasticsearch container

Once the container is up, browse to http://localhost:9200 in your favourite browser. You will get a response that looks like this:

{
  "name" : "c6ce36ceee17",
  "cluster_name" : "docker-cluster",
  "cluster_uuid" : "gGbNNtDHTKCSJnYaycuWzQ",
  "version" : {
  "number" : "7.17.10",
  "build_flavor" : "default",
  "build_type" : "docker",
  "build_hash" : "fecd68e3150eda0c307ab9a9d7557f5d5fd71349",
  "build_date" : "2023-04-23T05:33:18.138275597Z",
  "build_snapshot" : false,
  "lucene_version" : "8.11.1",
  "minimum_wire_compatibility_version" : "6.8.0",
  "minimum_index_compatibility_version" : "6.0.0-beta1"
  },
  "tagline" : "You Know, for Search"
}

Elasticsearch container is now up and running!

Norconex Web Crawler

Download the latest version of the Web Crawler from Norconex’s website. At the time of this writing, version 3.0.2 is the most recent version.

Download the latest version of Elasticsearch Committer. At the time of this writing, version 5.0.0 is the most recent version.

Follow the automated installation instructions to install the Elasticsearch Committer libraries into the Crawler.

Crawler Configuration

We will use the following Crawler configuration for this test. Place this configuration in the root folder of your Crawler installation, with the filename my-config.xml.

<?xml version="1.0" encoding="UTF-8"?>
<!DOCTYPE xml>
<httpcollector id="Norconex HTTP Collector">
    <!-- Decide where to store generated files. -->
  <workDir>./output</workDir>
  <crawlers>
	<crawler id="Norconex Elasticsearch Committer Demo">
  	<startURLs 
		stayOnDomain="true" 
		stayOnPort="true" 
		stayOnProtocol="true">
		<url>https://github.com/</url>
  	</startURLs>
  	<!-- only crawl 1 page --> 	 
  	<maxDepth>0</maxDepth>
  	<!-- We know we don't want to crawl the entire site, so ignore sitemap. -->
  	<sitemapResolver ignore="true" />
  	<!-- Be as nice as you can to sites you crawl. -->
  	<delay default="5 seconds" />
  	<importer>
  	  	<postParseHandlers>
  	  	  	<!-- only keep `description` and `title` fields -->
  	  	  	<handler class="KeepOnlyTagger">
  	  	  	  	<fieldMatcher method="csv">
  	  	  	  	  	description,title
  	  	  	  	</fieldMatcher>
  	  	  	</handler>
  	  	</postParseHandlers>
   	</importer>
  	<committers>
 		 <!-- send documents to Elasticsearch -->
   		<committer class="ElasticsearchCommitter">
			<nodes>http://localhost:9200</nodes>
			<indexName>my-index</indexName>
   		</committer>
  	</committers>
 	 
    </crawler>
  </crawlers>
</httpcollector>

Note that this is the minimal configuration required. There are many more parameters you can set to suit your needs. Norconex’s documentation does an excellent job of detailing all the parameters.

Start the Crawler

Norconex Web Crawler comes packaged with shell scripts to start the application. To start the crawler, run the following command in a shell terminal. The example below is for a Windows machine. If you are on Linux, use the collector-http.sh script instead.

C:\Norconex\norconex-collector-http-3.0.2>collector-http.bat start -clean -config=.\my-config.xml

Recall that you saved the Crawler configuration at the root of your Crawler installation.

Since only a single page is being indexed, the crawl job will take only a few seconds. Once the job completes, query the Elasticsearch container by browsing to http://localhost:9200/my-index/_search in your browser. You will see something like this:

{
  "took": 12,
  "timed_out": false,
  "_shards": {
	"total": 1,
	"successful": 1,
	"skipped": 0,
	"failed": 0
  },
  "hits": {
	"total": {
  	"value": 1,
  	"relation": "eq"
	},
	"max_score": 1,
	"hits": [
  	{
    	"_index": "my-index",
    	"_id": "https://github.com/",
    	"_score": 1,
    	"_source": {
      	"title": "GitHub: Let's build from here · GitHub",
      	"description": "GitHub is where over 100 million developers shape the future of software, together. Contribute to the open source community, manage your Git repositories, review code like a pro, track bugs and features, power your CI/CD and DevOps workflows, and secure code before you commit it.",
      	"content": "<redacted for brevity>"
    	}
  	}
	]
  }
}

You can see that the document was indeed indexed!

Conclusion

Norconex Web Crawler streamlines the process of indexing web data into Elasticsearch, making valuable information readily available for search and analytics.
This guide provides step-by-step instructions for integrating your data with Elasticsearch, unleashing potent search capabilities for your organization’s applications. Embrace the powerful synergy of Norconex Web Crawler and Elasticsearch to revolutionize your data indexing journey, empowering your business with real-time insights and effortless data discovery. Happy indexing!

Introduction

Azure Cognitive Search is a robust cloud-based service that enables organizations to build sophisticated search experiences. In this blog post, you will learn how to utilize Norconex Web Crawler to index data into Azure Cognitive Search and enhance your organization’s search capabilities.

Understanding Norconex Web Crawler

Norconex Web Crawler is an open-source web crawler designed to extract, parse, and index content from the web. The crawler’s flexibility and ease of use make it an excellent choice for extracting data from the web. Plus, Norconex offers a range of committers that index data to various repositories. See https://opensource.norconex.com/committers/ for a complete list of supported target repositories. If the provided committers do not meet your organizational requirements, you can extend the Committer Core and create a custom committer.

This blog post will focus on indexing data to Microsoft Azure Cognitive Search.

Prerequisites

Azure Cognitive Search

Before getting started, make sure you’ve already set up an Azure Cognitive Search service instance through your Azure portal. Consult the official Microsoft documentation for guidance on setting up this service.
After completing the setup, create an Index where you will index/commit your data. Then configure the index with the following fields:

Note: For this exercise, the English – Lucene analyzer will be used for the title, description, and content fields.

Note that the following 3 items are required to configure the Norconex Azure Cognitive Search Committer:

  • URL (listed on the Overview page of your Azure Cognitive Search portal)
  • Admin API key (listed under Settings -> Keys)
  • Index name

Norconex Web Crawler

Download the latest version of the Web Crawler from Norconex’s website. At the time of this writing, version 3.0.2 is the most recent version.

Download the latest version of Azure Search Committer. At the time of this writing, version 2.0.0 is the most recent version.

Follow the Automated Install instructions to install the Azure Search Committer libraries into the Crawler.

Crawler Configuration

We will use the following Crawler configuration for this test. Place this configuration in the root folder of your Crawler installation, with the filename my-config.xml.

<?xml version="1.0" encoding="UTF-8"?>
<!DOCTYPE xml>
<httpcollector id="Norconex HTTP Collector">
  
  <!-- Decide where to store generated files. -->
  <workDir>./output</workDir>
  <crawlers>
    <crawler id="Norconex Azure Committer Demo">
      <startURLs 
        stayOnDomain="true" 
	stayOnPort="true" 
	stayOnProtocol="true">
	<url>https://github.com/</url>
      </startURLs>
      <!-- only crawl 1 page --> 	 
      <maxDepth>0</maxDepth>
      <!-- We know we don't want to crawl the entire site, so ignore sitemap. -->
      <sitemapResolver ignore="true" />
      <!-- Be as nice as you can to sites you crawl. -->
      <delay default="5 seconds" />
      <importer>
        <postParseHandlers>
          <!-- only keep `description` and `title` fields -->
          <handler class="KeepOnlyTagger">
            <fieldMatcher method="csv">
              description,title
            </fieldMatcher>
          </handler>
        </postParseHandlers>
      </importer>
      <committers>
        <!-- send documents to Azure Cognitive Search -->
   	<committer class="AzureSearchCommitter">
          <endpoint>https://....search.windows.net</endpoint>			    
            <apiKey>...</apiKey>
            <indexName>...</indexName>
        </committer>
      </committers> 
    </crawler>
  </crawlers>
</httpcollector>

Be sure to appropriately set the endpoint, apiKey, and indexName under the section. Recall that you noted this information while satisfying the Azure Search Prerequisites.


Start the Crawler

Norconex Web Crawler comes packaged with shell scripts to start the application. To start the crawler, run the following command in a shell terminal. The example below is for a Windows machine. If you are using Linux, use the collector-http.sh script instead.

C:\Norconex\norconex-collector-http-3.0.2>collector-http.bat start -clean -config=.\my-config.xml

Recall that you saved the Crawler configuration at the root of your Crawler installation.

Since only a single page is being indexed, the crawl job will only take a few seconds. Once the job completes, you can query the Azure Cognitive Search portal and see the document was indexed!

Common pitfalls

Invalid API key

If the API key is invalid, the Crawler will throw a “Forbidden” error.

Invalid HTTP response: "Forbidden". Azure Response:

Ensure that you use the Admin API key

Invalid index name

If the indexName provided in the Crawler config does not match what is in your Azure Search, you will see this error.

CommitterException: Invalid HTTP response: "Not Found". Azure Response: {"error":{"code":"","message":"The index 'test2' for service 'norconexdemo' was not found."}}

Misconfigured fields in the Azure Search index

If you did not add title, description and content fields to your index, the Crawler will throw an exception referencing the missing field.

CommitterException: Invalid HTTP response: "Bad Request". Azure Response: {"error":{"code":"","message":"The request is invalid. Details: parameters : The property 'content' does not exist on type 'search.documentFields'. Make sure to only use property names that are defined by the type."}}

Conclusion

Azure Cognitive Search, combined with the powerful data ingestion capabilities of Norconex Web Crawler, offers a potent solution for indexing and searching data from various sources. Following the steps outlined in this blog post, you can seamlessly integrate and update your organization’s Azure search index with fresh, relevant data. Leveraging the flexibility and scalability of Azure Cognitive Search will allow you to deliver exceptional search experiences to your users and gain valuable insights from your data. Happy indexing!

This vulnerability impacts Log4J version 2.x, version 1.2 is not affected (source).  Norconex HTTP Collector version 2.x use Log4J v1.2.17 and thus are not affected. Version 3 of the Collector uses Log4J v2.17.1, which Apache has patched.

Note: Unless you made it so on purpose, the HTTP Collector does not run as a service accessible from the internet.